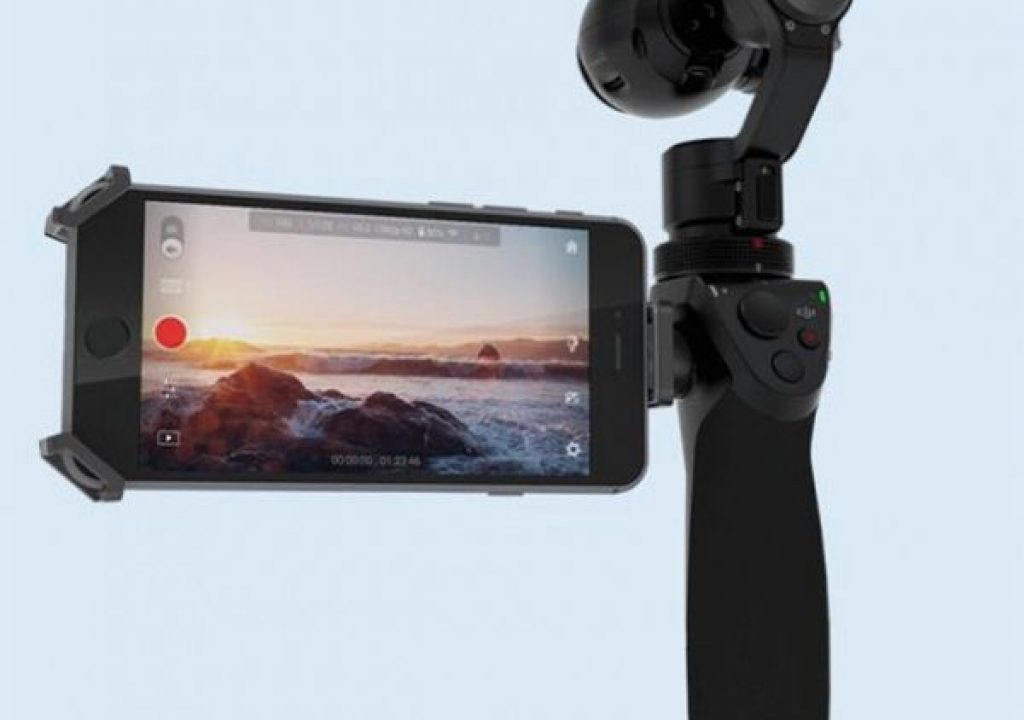
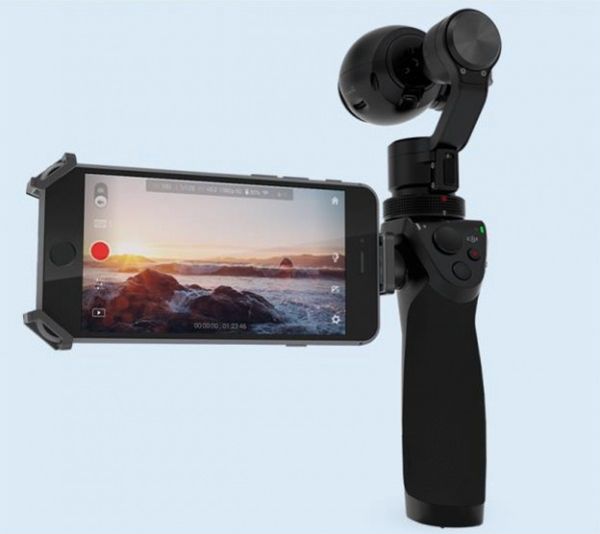
Based off the professional 4K camera that DJI developed for their Inspire 1 quadcopter, the new OSMO handheld stabilizer camera is a perfect companion for the aerial photos and videos you’re taking from the sky. Or, you may just have a need for a solid and easy to pack gimbaled 4K production camera that isn’t just a GoPro on a stick – nor a hefty MoVi with a big DSLR attached to drag around. And for less than $700 complete, the OSMO might just fill that need and small enough to toss in your gear bag.
Based off the professional 4K camera that DJI developed for their Inspire 1 quadcopter that I reviewed earlier this year, the new OSMO handheld stabilizer camera is a perfect companion for the aerial photos and videos you’re taking from the sky. Or, you may just have a need for a solid and easy to pack gimbaled 4K production camera that isn’t just a GoPro on a stick – nor a hefty MoVi with a big DSLR attached to drag around. And for about $650. complete, the OSMO might just fill that need and small enough to toss in your gear bag.
The folks at Multicopter Warehouse sent me one of the first production units in to the US to test and review, so I’ll share some of my examples and impressions of it.
DJI OSMO Handheld Gimbal and Camera
I’ve tested several different gimbaled handheld stabilizers over the past couple of years – some for smartphone and some for GoPros, and all have done a lot of similar things: they stabilize the camera so you can move freely and get smoother video from a handheld position. Most have worked fairly well, so I’m familiar with them and how they should work. The DJI OSMO is different in many ways, however – primarily in that you control the camera operations from your smartphone device which doubles as your wireless viewfinder screen.
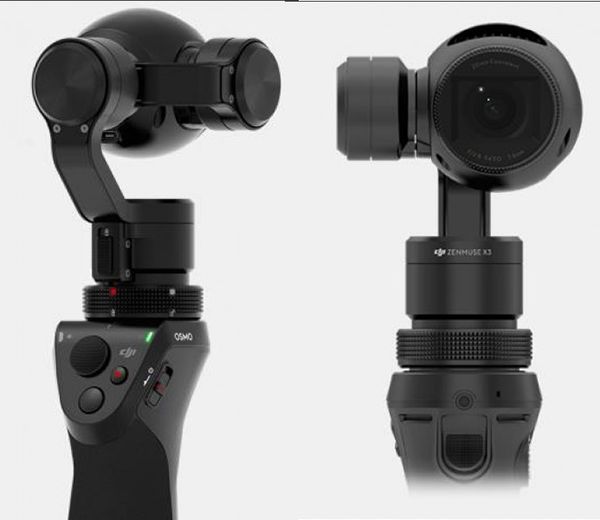 The OSMO was originally based on the camera & gimbal design on the DJI Inspire 1 quadcopter’s X3 camera and an early prototype was teased around at NAB this year – a handle that held the X3 in an upright position instead of it’s usual underslung orientation.
While many UAV photographers and videographers have been waiting for the OSMO to arrive (most impatiently on the social media boards), many were disappointed that the only configuration you can currently get the handle was to buy the complete unit with the OSMO camera included. After doing my initial tests when I first got it, I discovered that the Inspire 1 X3 camera does not exactly work well with the handle and the software does not connect your smartphone to it correctly either. I’ll cover more of than in another follow-up comparison article that shows side-by-side shots from both cameras.
But that’s really okay by me, as the OSMO camera is specifically designed to work with this handle configuration in either an upright or underslung position – or pretty much any position in-between! Plus DJI has stated that the camera’s lens is set focused for closer range so objects closer around you will be in sharper focus.
The gimbal on the OSMO also locks in all three axis, so it’s not flopping around in the case or if you lay it down on a table when not in use.
The OSMO fits neatly inside it’s custom storage case (included) when fully collapsed. And while the case is kind of cute and looks like a little violin case (or a handgun case, perhaps) there’s no additional room for the battery charger, extra battery or even filters inside the case so you’ll need to toss those all in your gear bag. Plus being an asymmetrical shape, it doesn’t pack very easily.

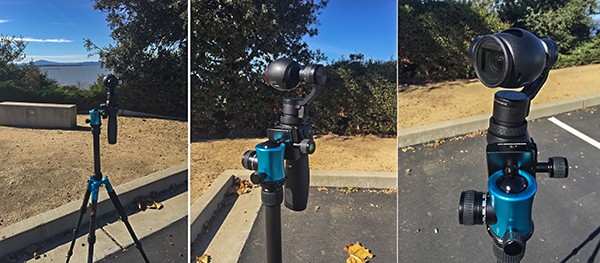
The feel and design of the OSMO is really quite nice. It has a professional feel and heft to it without feeling too heavy, not cheap like a toy. The smartphone bracket is pure genius in design and fabrication alone, and really holds phones up to the iPhone 6s Plus and has soft rubber padding to secure your phone without scratching the case. The phone holder rotates in position so whatever angle you’re holding OSMO, you can see your viewfinder screen and camera menu/controls. It also detaches with a 1/4-20 mount that you can then use other mounts and accessories like an extension arm, telescoping pole, bike mount or suction cup vehicle mount (accessories available soon). I attached the OSMO to a tripod and it worked great. More on that later…
OSMO Camera Features
The camera settings and viewfinder are all presented on the smartphone screen and connected through WiFi, so there’s no cables, unlike other camera based DJI products like the Phantom 3 Professional and Inspire 1, where the tablet or smartphone are connected directly to the radio controller via cable. I first thought it was strange to not have a cable connection of some kind as it’s a bit cumbersome to have to reconnect the WiFi every time you turn the OSMO off and on again and you’re in range of a known WiFi hotspot with your smartphone.
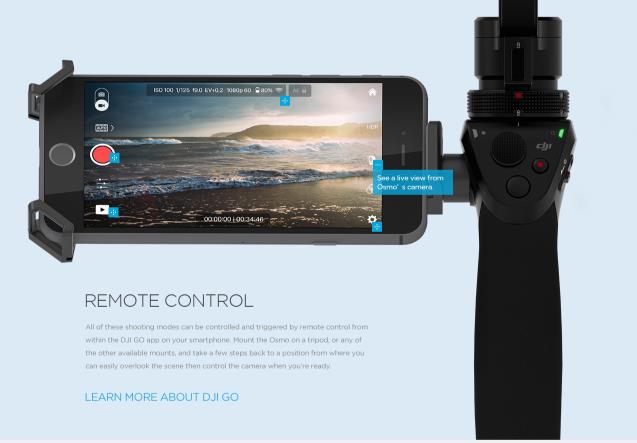
The smartphone app is the same used by the latest DJI quadcopters, called DJI GO and will automatically recognize the OSMO once you’re connected by WiFi and will display the camera’s viewfinder image as soon as it’s selected from the menu.
All of your separate menu settings are clearly marked and those already familiar with DJI’s app will quickly recognize most of them. You have separate controls for photos and video, plus a full range of exposure controls and white balance settings. There’s also advanced settings for gimbal controls and other features.
The fan-cooled gimbal-camera is utilizes a Sony 1/2.3-inch 12-megapixel sensor that can record videos of up to 4K resolution — 4,096 x 2,160 at 24fps or 3,840 x 2,160 at 30fps/24fps, to be exact — with a maximum video bitrate of 60 Mbps. If you want a smoother video, you can go up to 60fps at either 1080p or 720p, or even do slow motion with 120fps at 1080p. It features a 20mm f/2.8 lens with a 94-degree FOV. You can shoot 12MP still images as well in both JPG + RAW (DNG) that can be edited in Adobe Lightroom and Photoshop (ACR). There’s also an automated 360º pano mode, which I’ll share more about later.
The microSD card slot is on the side of the camera pod on the gimbal and comes with an included Lexar 16GB UHS Speed Class 3 card.
There is a built in condenser mic but it’s practically useless at the moment, but word is there may be some firmware updates to resolve some issues in the future, but we’ll get into more about that later in this review.
The handle controls allow you to reposition or lock the gimbal’s yaw motion with a finger trigger and a pan/tilt thumbstick. You can also start/stop recording video and take single frame images with two other thumb controls. This frees up your other hand to change settings on your smartphone screen, operate other gear or just hang on tight while you’re getting a ride down the road grabbing awesome action shots!
There are three different yaw control modes with the trigger switch on the front of the OSMO handle: Single click + hold, and it locks the gimbal in the direction the camera is currently facing, no matter how you twist or reposition the handle. A double-click will re-center the camera out ahead of you. And a triple-click will swing the camera gimbal around into selfie mode for bloggers and the man on the street reporting.
But unlike all other handheld gimbal stabilizers I’ve used, you can actually “touch” the camera head! In fact, you can manually grab the camera and move it with your hand to a position you want and it will just stay there. A simple double-click with the trigger switch and it snaps right back to the center neutral position.
Specs from DJI’s Website:
| Handle |
Dimensions2.4 x 1.9 x 6.4 inches
(61.8 x 48.2 x 161.5 mm) Weight (Including Battery)201 g
|
|---|---|
| Gimbal |
ModelZENMUSE X3
Weight221 g
Output Power (With Camera)Static: 9 W; Dynamic: 11 W
Angular Vibration Range±0.03°
MountDetachable
Controllable RangeTilt: – 35° to +135°
Pan: ±320° Roll: ±30° Mechanical RangeTilt: – 90° to +150°
Pan: ±330° Roll: – 50° to +90° Max Controllable SpeedPitch: 120°/s
|
| Camera |
ModelX3/FC350H
SensorSony Exmor R CMOS; 1/2.3”
Effective pixels: 12.40M (Total pixels: 12.76M) Lens94° FOV 20mm
(35mm format equivalent) f/2.8 ISO Range100-3200 (video);100-1600 (photo)
Electronic Shutter Speed8s - 1/8000s
(up to 30s when camera is on M mode) Max. Image Size4000 x 3000 pixels
Still Photography ModesSingle Shot
Photo Burst Mode: 3/5/7 shots Auto Exposure Bracketing (AEB): 3/5 bracketed frames @ 0.7EV bias Interval Timelapse Auto Panorama Selfie Panorama Video ResolutionUHD: 4K (4096 x 2160) 24/25p
UHD 4K (3840 x 2160) 24/25/30p 2.7K (2704 x 1520) 24/25/30p FHD: 1920 x 1080 24/25/30/48/50/60/120p HD: 1280 x 720 24/25/30/48/50/60p Video Recording ModesAuto; Slow Motion
Max. Video Bitrate60 Mbps
Supported File FormatsFAT32(≤32 GB);exFAT (>32 GB)
Photo FormatsJPEG, DNG
Video FormatsMP4/MOV (MPEG-4 AVC/H.264)
Supported SD CardsMicro SD; Max. Capacity: 64 GB;
Class 10 or UHS-1 Operating Temperature32° to 104° F (0° to 40° C)
Audio OutputTwo channel, 48 KHz; AAC
|
| Wi-Fi Video Link |
Operating Frequency2.412-2.462 GHz; 5.180-5.805 GHz
Max. Transmission Distance82 feet (25 m)
Transmitter Power (EIRP)2.4 G: 8 dBm; 5 G: 12 dBm
|
| Intelligent Battery |
ModelHB01-522365
TypeLiPo
Capacity980 mAh
Energy10.8 Wh
Voltage11.1V
Charging Temperature59° to 104° F (15° to 40° C)
Operating Temperature14° to 122° F (-10° to 50° C)
|
| Battery Charger |
ModelSOY015A-1260120
Input100-240 V, 50/60 Hz
Output12.6 V, 1.2 A
|
| Compatible Device |
Microphones (Confirmed)Sennheiser MKE400
Sony ECM DS70P Rode Videomic Pro Mymyk Smartmyk DED DV-889 |
Testing the OSMO right out of the box:
Since this is a “first look” overview of the OSMO, I won’t get into a lot of deep testing quite yet (I’ve only had it a couple days so far) so here are some general tests I did right out of the box and setting it up for first use. Note that all of my examples shared here are in default settings and full auto mode.
You can touch anywhere on the smartphone screen to set the exposure spot meter until you get the balance you prefer. The OSMO has a surprisingly wide dynamic range for such a small sensor camera. By default there are Zebras for exposure but I haven’t yet dug into the menus settings to see if their values can be changed or not.
You can also tap/hold on the screen to slide your finger to smoothly reposition the gimbal head in any direction – pan/tilt. This is really useful when you have the OSMO mounted on a tripod or a rigid mount or car. Since the smartphone is connected by WiFi, you can easily control it without being attached to the handle – as long as you are in WiFi signal range.
Here’s a videoI compiled with some basic test scenarios over a couple days. You can see that the 3 axis are covered pretty well, but the yaw can be a bit jerky at times with the stock settings. I’ll be testing some advanced gimbal controls to see if that can be tuned out. Other than that I’m pretty pleased with the stabilization it gives for a 3-axis gimbal. If it also had one more axis like a Steadicam gives (up/down) then the walking motion would be almost entirely eliminated.
Video examples are in full 4K so be sure to click-through to YouTube and view in 4K HD. Note that all the clips are straight from the OSMO camera with no post-processing or color grading of any kind:
Still image quality and clarity
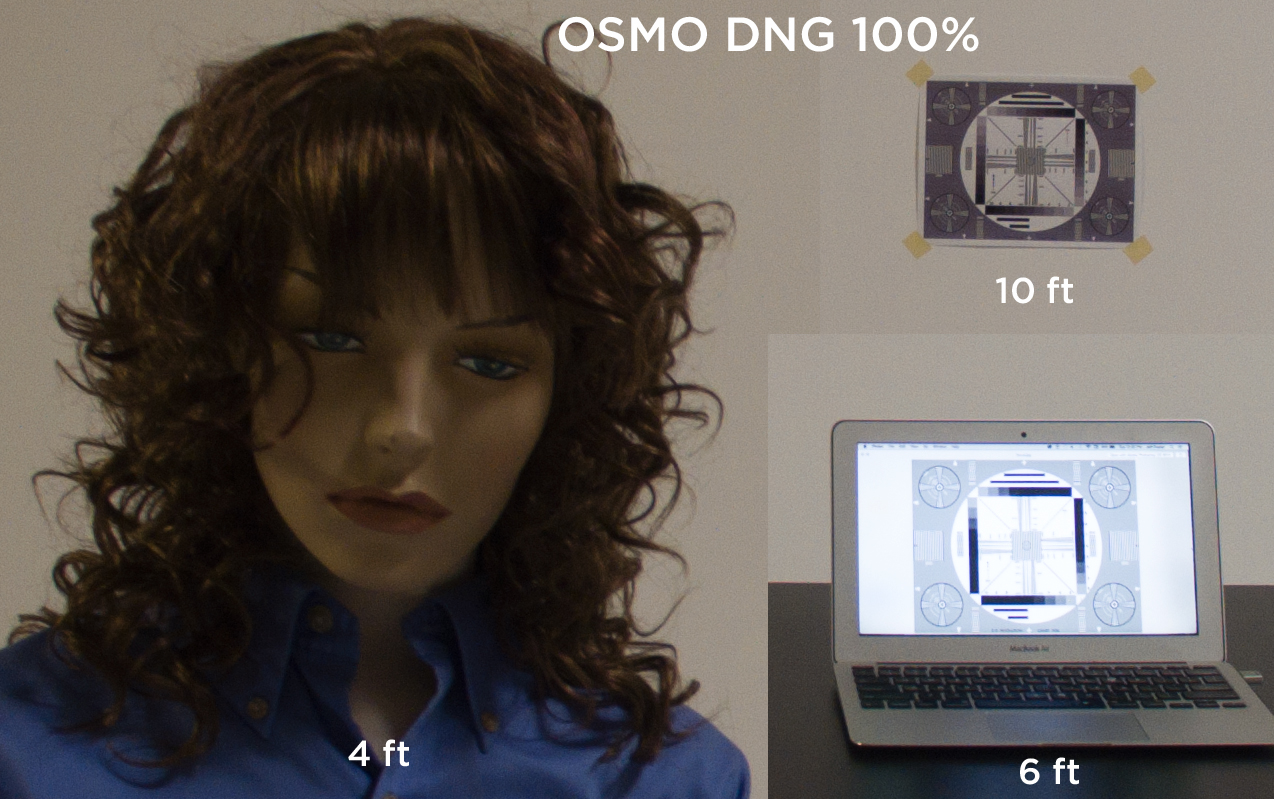 I shot some tests in the studio under low/ambient daylight conditions to see how the noise levels would be and how the focus and auto exposure functions responded. Click on the image on the right to expand it to see the details of the shot at 100%.
For the full frame uncropped image taken directly from the original DNG (converted to PNG only for web browser compatibility) click here to view/download and examine.
Shooting Panoramas with the OSMO
One of the still image options on the OSMO is the 360º pano mode. When this is selected and you click the photo button on the handle, the camera will automatically rotate a full 360º and fire off a single image every 45º to give you 8 images. You can stitch these images together on your desktop workstation with Adobe Lightroom or Photoshop or other programs like Kolor Autopno Giga.
 One thing I noticed when I opened the media folders on the microSD card, was there is a separate folder for the Panorama files (with a separate sub-folder for each group of images in a pano) so organization of the panos is much easier. However there is also an HTML file added to the Media directory that merely opens up the subfolders if you try to launch it, so I’m not sure what its purpose is.
When you’re taking the panos with the OSMO, the app on the your smartphone will process a stitched preview for you and save it to your Photo library. It’s only a preview file though and is pretty dreadful as a final result as you might expect on an iPhone pano, as you can see below.
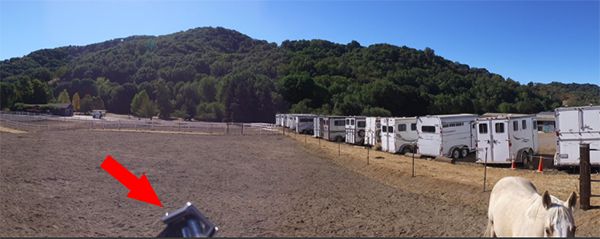
Also, depending on the tilt of the gimbal and how you’re holding the OSMO handle when you take the photos, you will find that your hand, parts of the smartphone/bracket or your fat head get in the way.
I’m thinking you may not want a complete 360º pano in the end but possibly only 240º or less, so perhaps you can position your body away from the main area you’re trying to capture and crop it out afterward, like this example looking out over the valley and reservoir below.
Audio options
The built in condenser mic is useless as tested. Besides the noise of the cooling fan and buzz of the gimbal motors, the low gain on the mic render it totally unusable for anything – save for possibly a loud (LOUD) clap board to sync purposes. You must use a powered boom or condenser mic (or wireless lav, etc.) through a powered mixer or source to boost the audio level going into the OSMO (via a mini-stereo jack on the front of the handle). The problem is, how do you mount a mic to the handle if you’re using it handheld and need the smartphone holder installed?
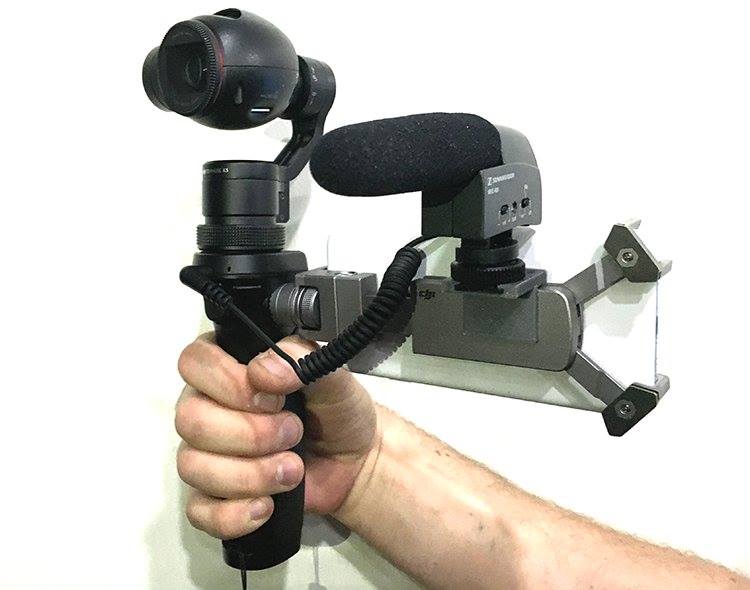 To solve this issue, Josh Gilson and Kerry Garrison over at Multicopter Warehouse came up with a device for getting an external condenser (powered) mic to work with the OSMO on their Cold Show Accessory Mount ($9.99).
This also places the mic far enough away from the gimbal to not only clear the camera pod movement but also separate it from the noisy fan and motors.
Uses Inspire 1 Filters
 The nice thing about the OSMO camera’s design is that it utilizes existing filters made for the DJI Inspire 1 camera. This set of Polar Pro filters work nicely to cut glare and offer a richer, less burned-out look in daylight shots.
This 3-pack includes a circular polarizer, and ND2 and ND3 filter, complete with protective carry pouches. The OSMO comes with a standard UV filter that unscrews off the front and these screw on in place. However, the Polar Pros aren’t designed to be stacked so only one can be mounted at a time.
Overview
This long-awaited prosumer-grade camera and stabilized gimbal is a welcomed addition for the generalist videographer and professional that needs a quick run and gun stabilized camera. I’ve known DJI for several years now and I’ve watched them enhance products shortly after they go to market with software updated and firmware upgrades quite regularly. Any issues people may be having with the OSMO with this first production run, will be addressed before you can take delivery of your own, and I will be writing updates and cover more features as I spend more time with it. Chances are, most videographers are going to be using the OSMO for B-roll and not have a need for audio, but the capabilities of this handheld device are just starting to surface, and I think we’ll see a lot of creative uses for it in the near future.
Price as tested: $649.00
Look for a more extensive review and some comparison testing soon.
For more info, questions and sales on the OSMO and all DJI products, the folks at Multicopter Warehouse who loaned me the OSMO for testing will be happy to help.
_______________________________________________________________
Jeff Foster is a published author of several how-to books and training videos in the motion graphics, animation and video production industries and is an award-winning video producer and artist. Visit his web site to learn more about his training methods, tips & tricks at PixelPainter.com

Filmtools
Filmmakers go-to destination for pre-production, production & post production equipment!
Shop Now