Filmtools
Filmmakers go-to destination for pre-production, production & post production equipment!
Shop Now
In our last “In Depth”, we took a look at the awesome “Find and Replace” feature, and in this lesson, I thought we’d talk a little bit about Bin organization, and more specifically, our Bin Columns, as they are something that editors (no matter which application they use) rely on all the time, in their day to day work. In Media Composer, they’re pretty simple to use, but there are some “under the hood” features you should know about, when creating your new Bin Views.
BIN VIEWS vs BIN COLUMNS
What’s important to keep in mind is that these two concepts, although different, work hand in hand with each other. Once you have set up your Bin Columns, you can save your Bin View, so that you can quickly switch back and forth between the different Bin Columns you might need to access. Normally, when I create a new user setting inside of Media Composer, I normally delete all my Bin Views, so that I can start from scratch with a clean palette. To do that, simply call up your settings (CMD/CTL+SHFT+=), head to your USER Settings, and then find your Bin Views, simply select them and hit Delete.
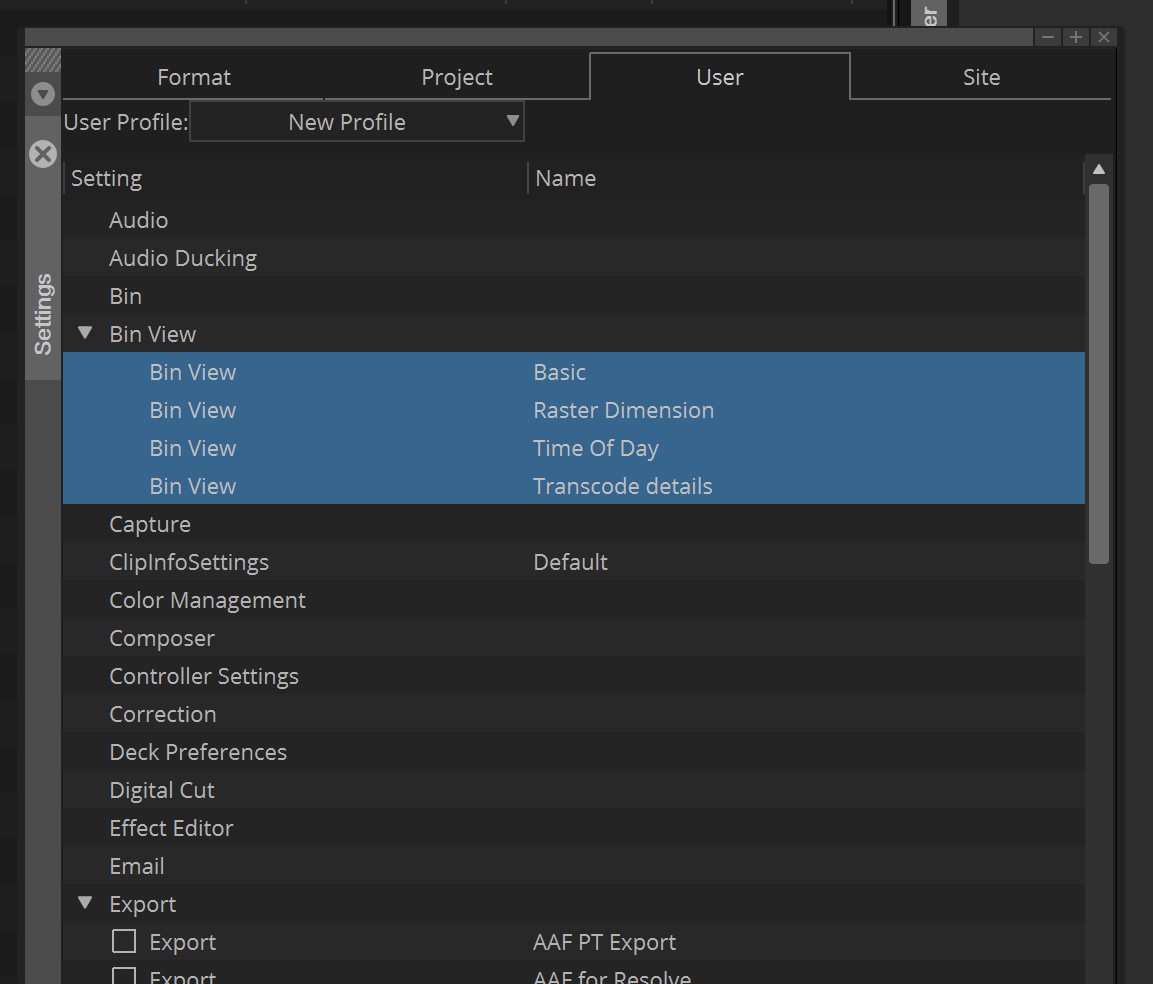
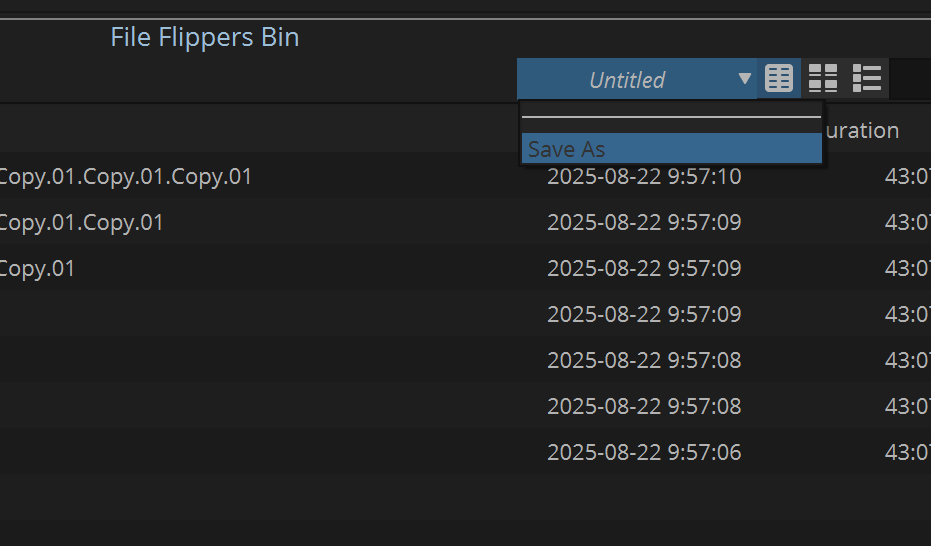
Once you’ve done that, you’re ready to create new Bin Views at the top of your bin, with the Bin View dropdown menu.
SETTING UP YOUR BIN COLUMNS
So, the next logical question is, where to I find my Bin Columns? Well, much like Find and Replace, you’ll find it in the Bin Fast Menu. Keep in mind that you’ll want to make sure that nothing is selected, to make your life easier finding the “Choose Columns” option. Keep in mind that, depending on your Media Composer version, can also right click on the column bar to find this option as well.
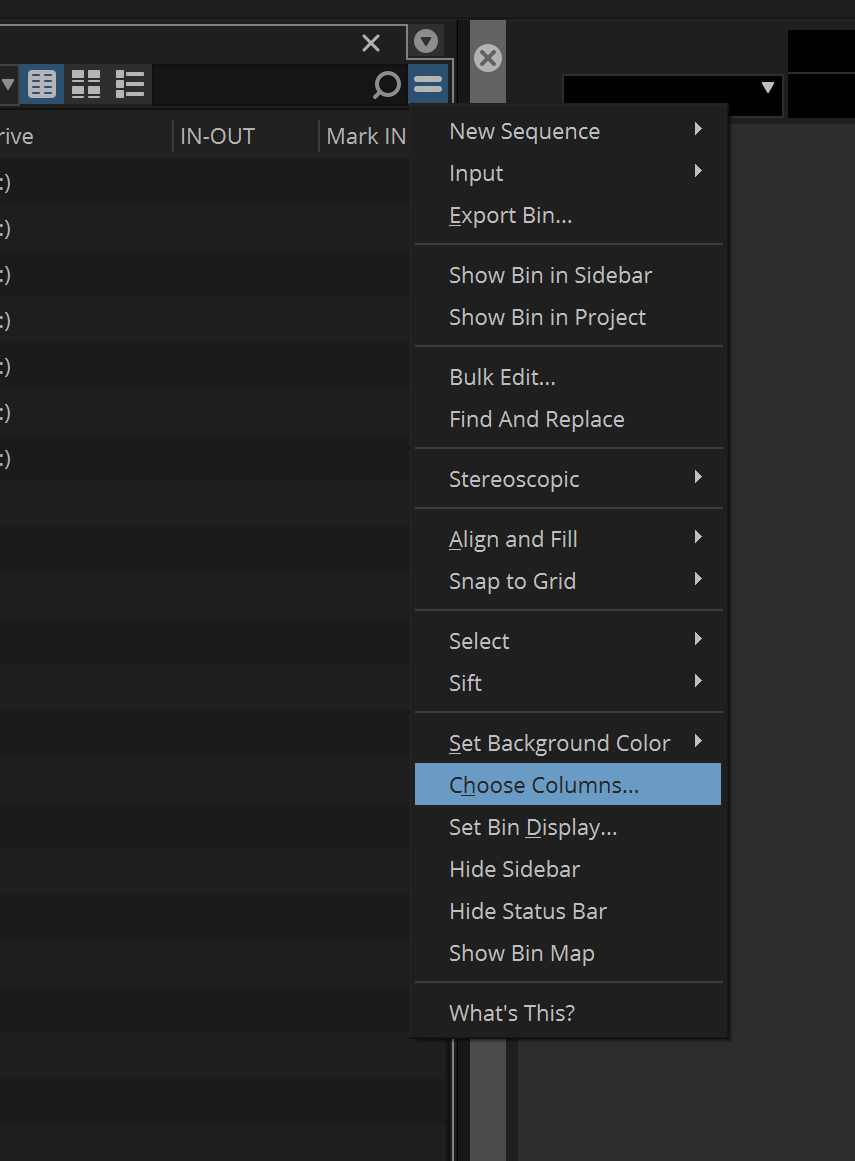 ” option.
Once selected, you’ll be brought to the Bin Column Selection window. You’ll notice that what is currently selected is what is currently displayed in your bin. Normally, the first thing I do here is click All/None to remove all selections, so I can start from scratch.

So, let’s create a simple Bin View using four Bin Column parameters. Drive, Duration, End and Start (that’s how you’ll find them in alphabetical order). Keep in mind that you can’t remove the “Name” column. It will always be there, even if you have no Bin Columns selected. Once you have them in your Bin, you’ll notice that they are in a random order, so you can simply click on the column’s name, and drag them into the order you like. I’m normally Name, Start, End, Duration and Drive.

Next, you’ll probably want to save this view, so simply follow the step above to head to your Bin Views dropdown, select SAVE AS, give it a name, and you now have your first Bin View with custom Bin Columns. This is all great, but what about situations where you want to enter data in a Bin Column that might not be in the “Choose Columns” selection window. That’s where you have the ability to create your own custom Bin Columns.
CUSTOM BIN COLUMNS
So, how do we create our own custom Bin Columns. Well, it’s much easier than it used to be. Simply right click on the Bin Columns name bar, and you’ll notice a new pop up window that let’s you customize your Bin Columns.
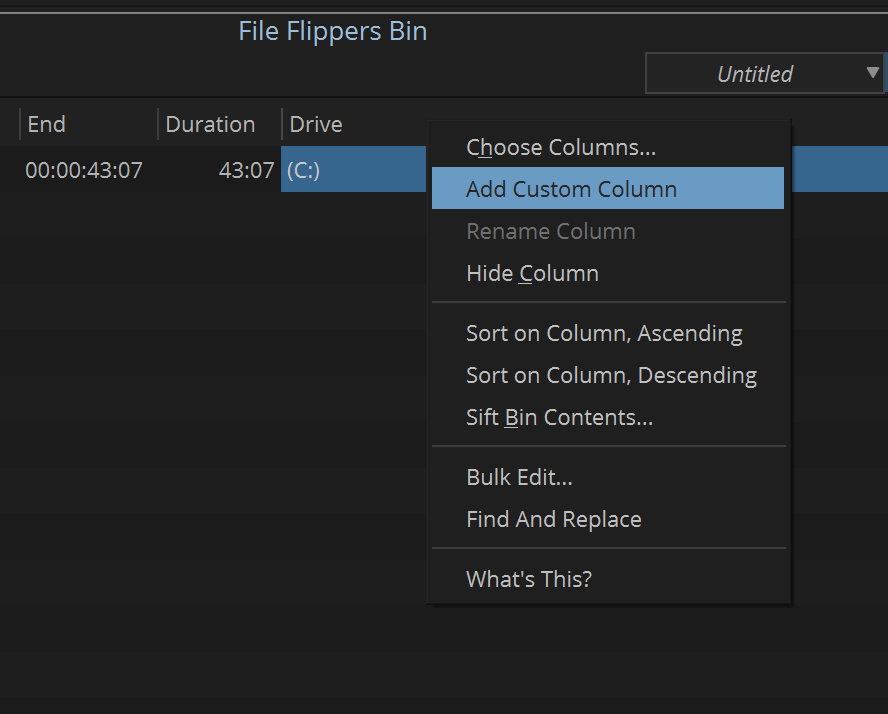
Once you’ve done that, simply enter your custom Bin Column name, and click anywhere else in the bin to lock it in. We’ll use Time of Day as our example. Now, you can simply type in the information that you want that column to have, and it will populate right away.
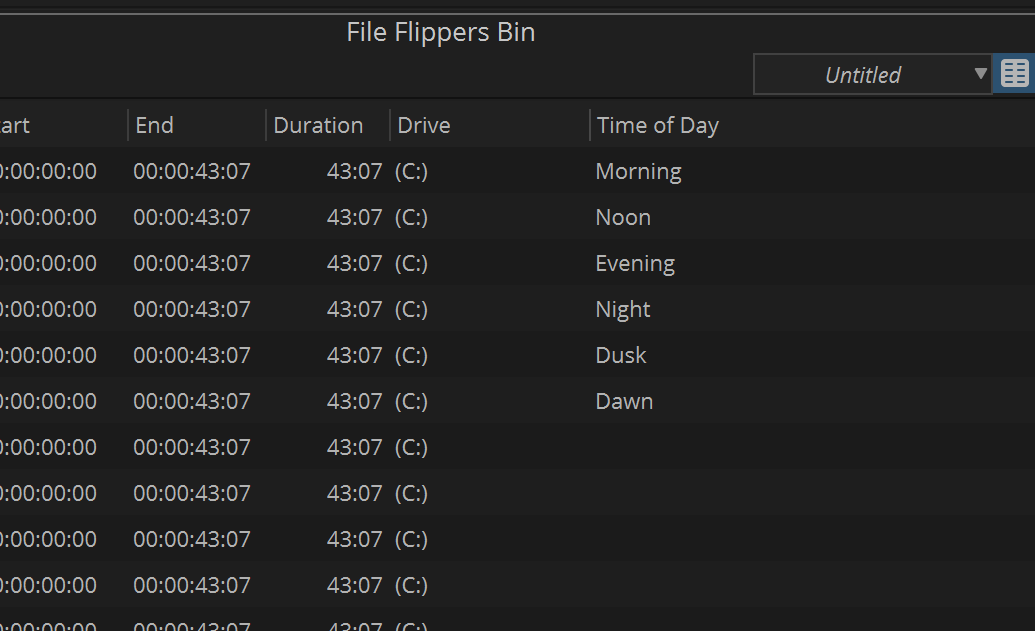
Now, once you’ve started entering custom information in your Bin Column, you can now press ALT/OPT and right click, and you’ll notice that you can now choose between any of the parameters that you’ve entered in the custom column.
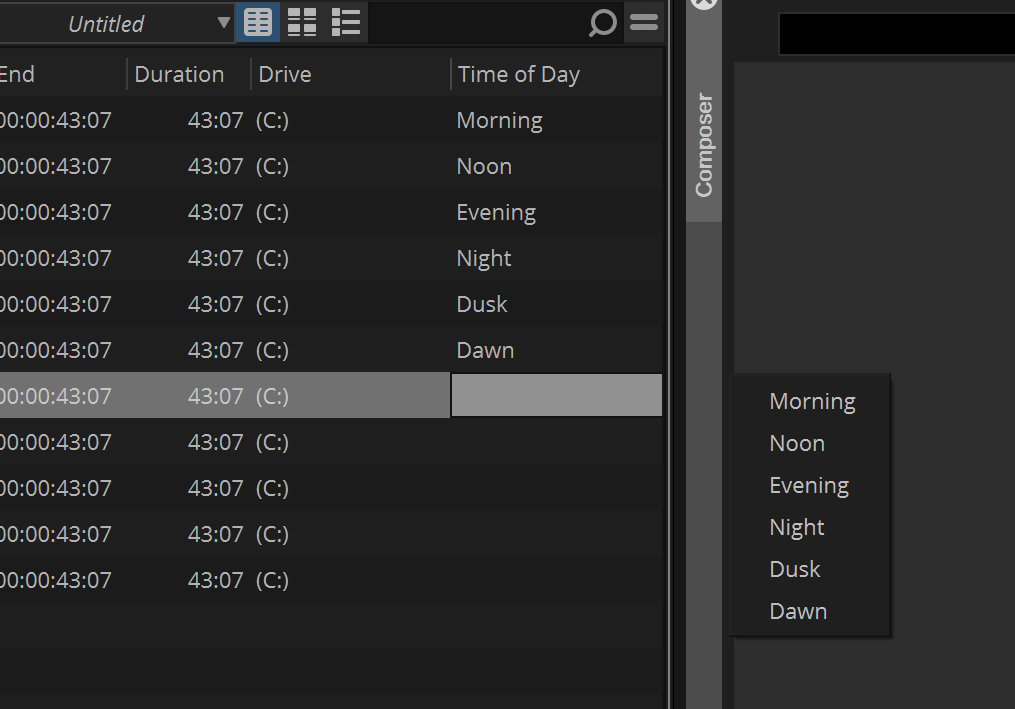
Now, you can quickly fill up the rest of the empty bin rows with the relevant information quickly and easily, instead of having to type out each of the entries manually. Now, keep in mind that because we’ve added a new column (custom or otherwise), we would need to save this as a new Bin View to have access to it later on, AND Time of Day is now accessible in the “Bin Column Selection” window down at the very bottom, in case you need to add it again, if it was ever removed.

As I mentioned in my last “In Depth”, we’ll be talking a lot about bins across the next few articles because they really are the central hub of your workflow outside of the timeline. Knowing how to manage them effectively will help keep your editing process as smooth and efficient as possible.
If you’d like to check out more of my “In-Depth’s” on Media Composer, you can find them here:
Media Composer Project Creation
Avid Attic
Alternating Left And Right Audio
Keyboard Shortcuts
Set Bin Display
Find and Replace
And you can download a 30 day trial of Media Composer at this link.