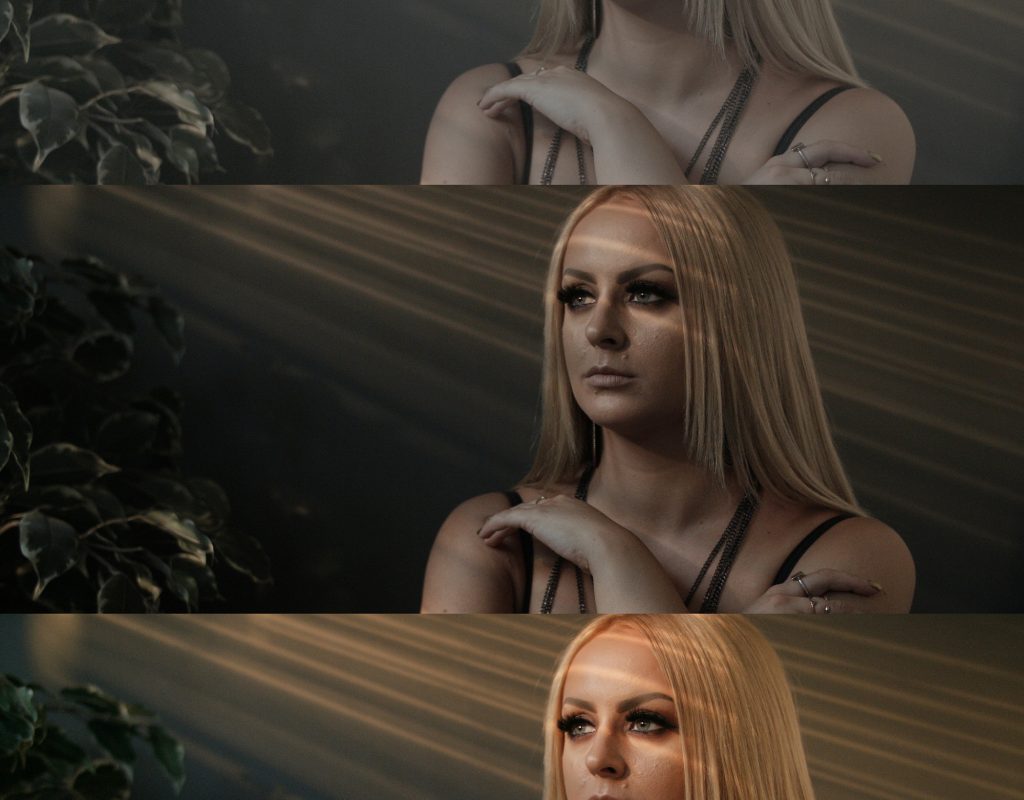
When working as a one-man band, you often need to take on all aspects of a production – this includes colour grading. Grading can be an especially time-consuming process. When building a look from scratch—and when you have a tight deadline to meet—you need a way to get your footage looking great as efficiently as possible, without skimping out and settling for a video that looks subpar in the colour department.
Enter LUTs, or Look Up Tables. LUTs are implemented in the colour grading process to transform one set of colour values to another. A widely used form of LUT is the 3D LUT, which is often used on-set as a way to view a roughly graded image, or in post production when the actual colour grading takes place. 3D LUTs can produce a complex colour grade quickly and efficiently, and two of the most popular forms of 3D LUTs are creative LUTs and film emulation LUTs. These give your footage a “look” – this can be wholly stylistic, or in the case of film emulation, a recreation of what your video would look like if shot on a certain type of film.
One thing you’ll hear often is that you shouldn’t just slap a LUT on your footage in post and leave it at that – if LUTs are applied, they should be used as a starting point for your grade. This is sound advice, as LUTs can only do so much for your footage. There may be certain things that need tweaking or changing in a shot; colour balance, temperature, contrast, maybe that red is too saturated, maybe it’s underexposed – the point is that the LUT can’t take care of all these problems for you, and in some cases, depending on what the LUT is doing to your footage, it can actually exacerbate the issues that are present.
So how can we streamline the colour grading process using LUTs, without spending hours tinkering with the grade, when you need to get things done quick? Well, it’s going to involve some experimentation – and yes – if you put a little time in now, you’ll soon see the benefits of a faster workflow when you need to make those deadlines!
One thing to note here is that we’ll be using LUTs designed for LOG footage, which means recording in your camera’s LOG format. Most capable cameras these days are able to simultaneously record in LOG whilst displaying your image in Rec. 709 (or a display LUT), so that you have an easier time viewing what you’re shooting.
There are so many LUTs available now, free and paid, and you want to be looking for the ones which are created for a specific camera sensor’s tonal response and colour science. For example, I might be primarily shooting with a Blackmagic Pocket Cinema Camera 4K – all I really need to do is type “BMPCC4K free LUTs” into google and I get a lot of hits. Generally, you need to do a bit of digging to find out what works for you and what doesn’t. There are a lot of fantastic free LUTs, but also a fair share of sub-par ones. Taking the paid route is worthwhile here, as companies like VisionColor and FilmConvert offer great tools for specific camera models, which makes the process much smoother and easier to tweak.
So you’ve downloaded some LUTs created for your camera that you like the look of. This is the part where you experiment. Systematically work through a bunch of your previous footage in Resolve, applying your LUTs and seeing how they affect the image. Don’t forget about the usual colour correction practices; you’ll generally be needing to adjust things like exposure, colour balance, contrast, temperature and saturation to get your footage looking correct. It’s important to get used to how these LUTs effect your footage; what fits, what doesn’t, how much work you need to do, what adjustments you need to make (if any).
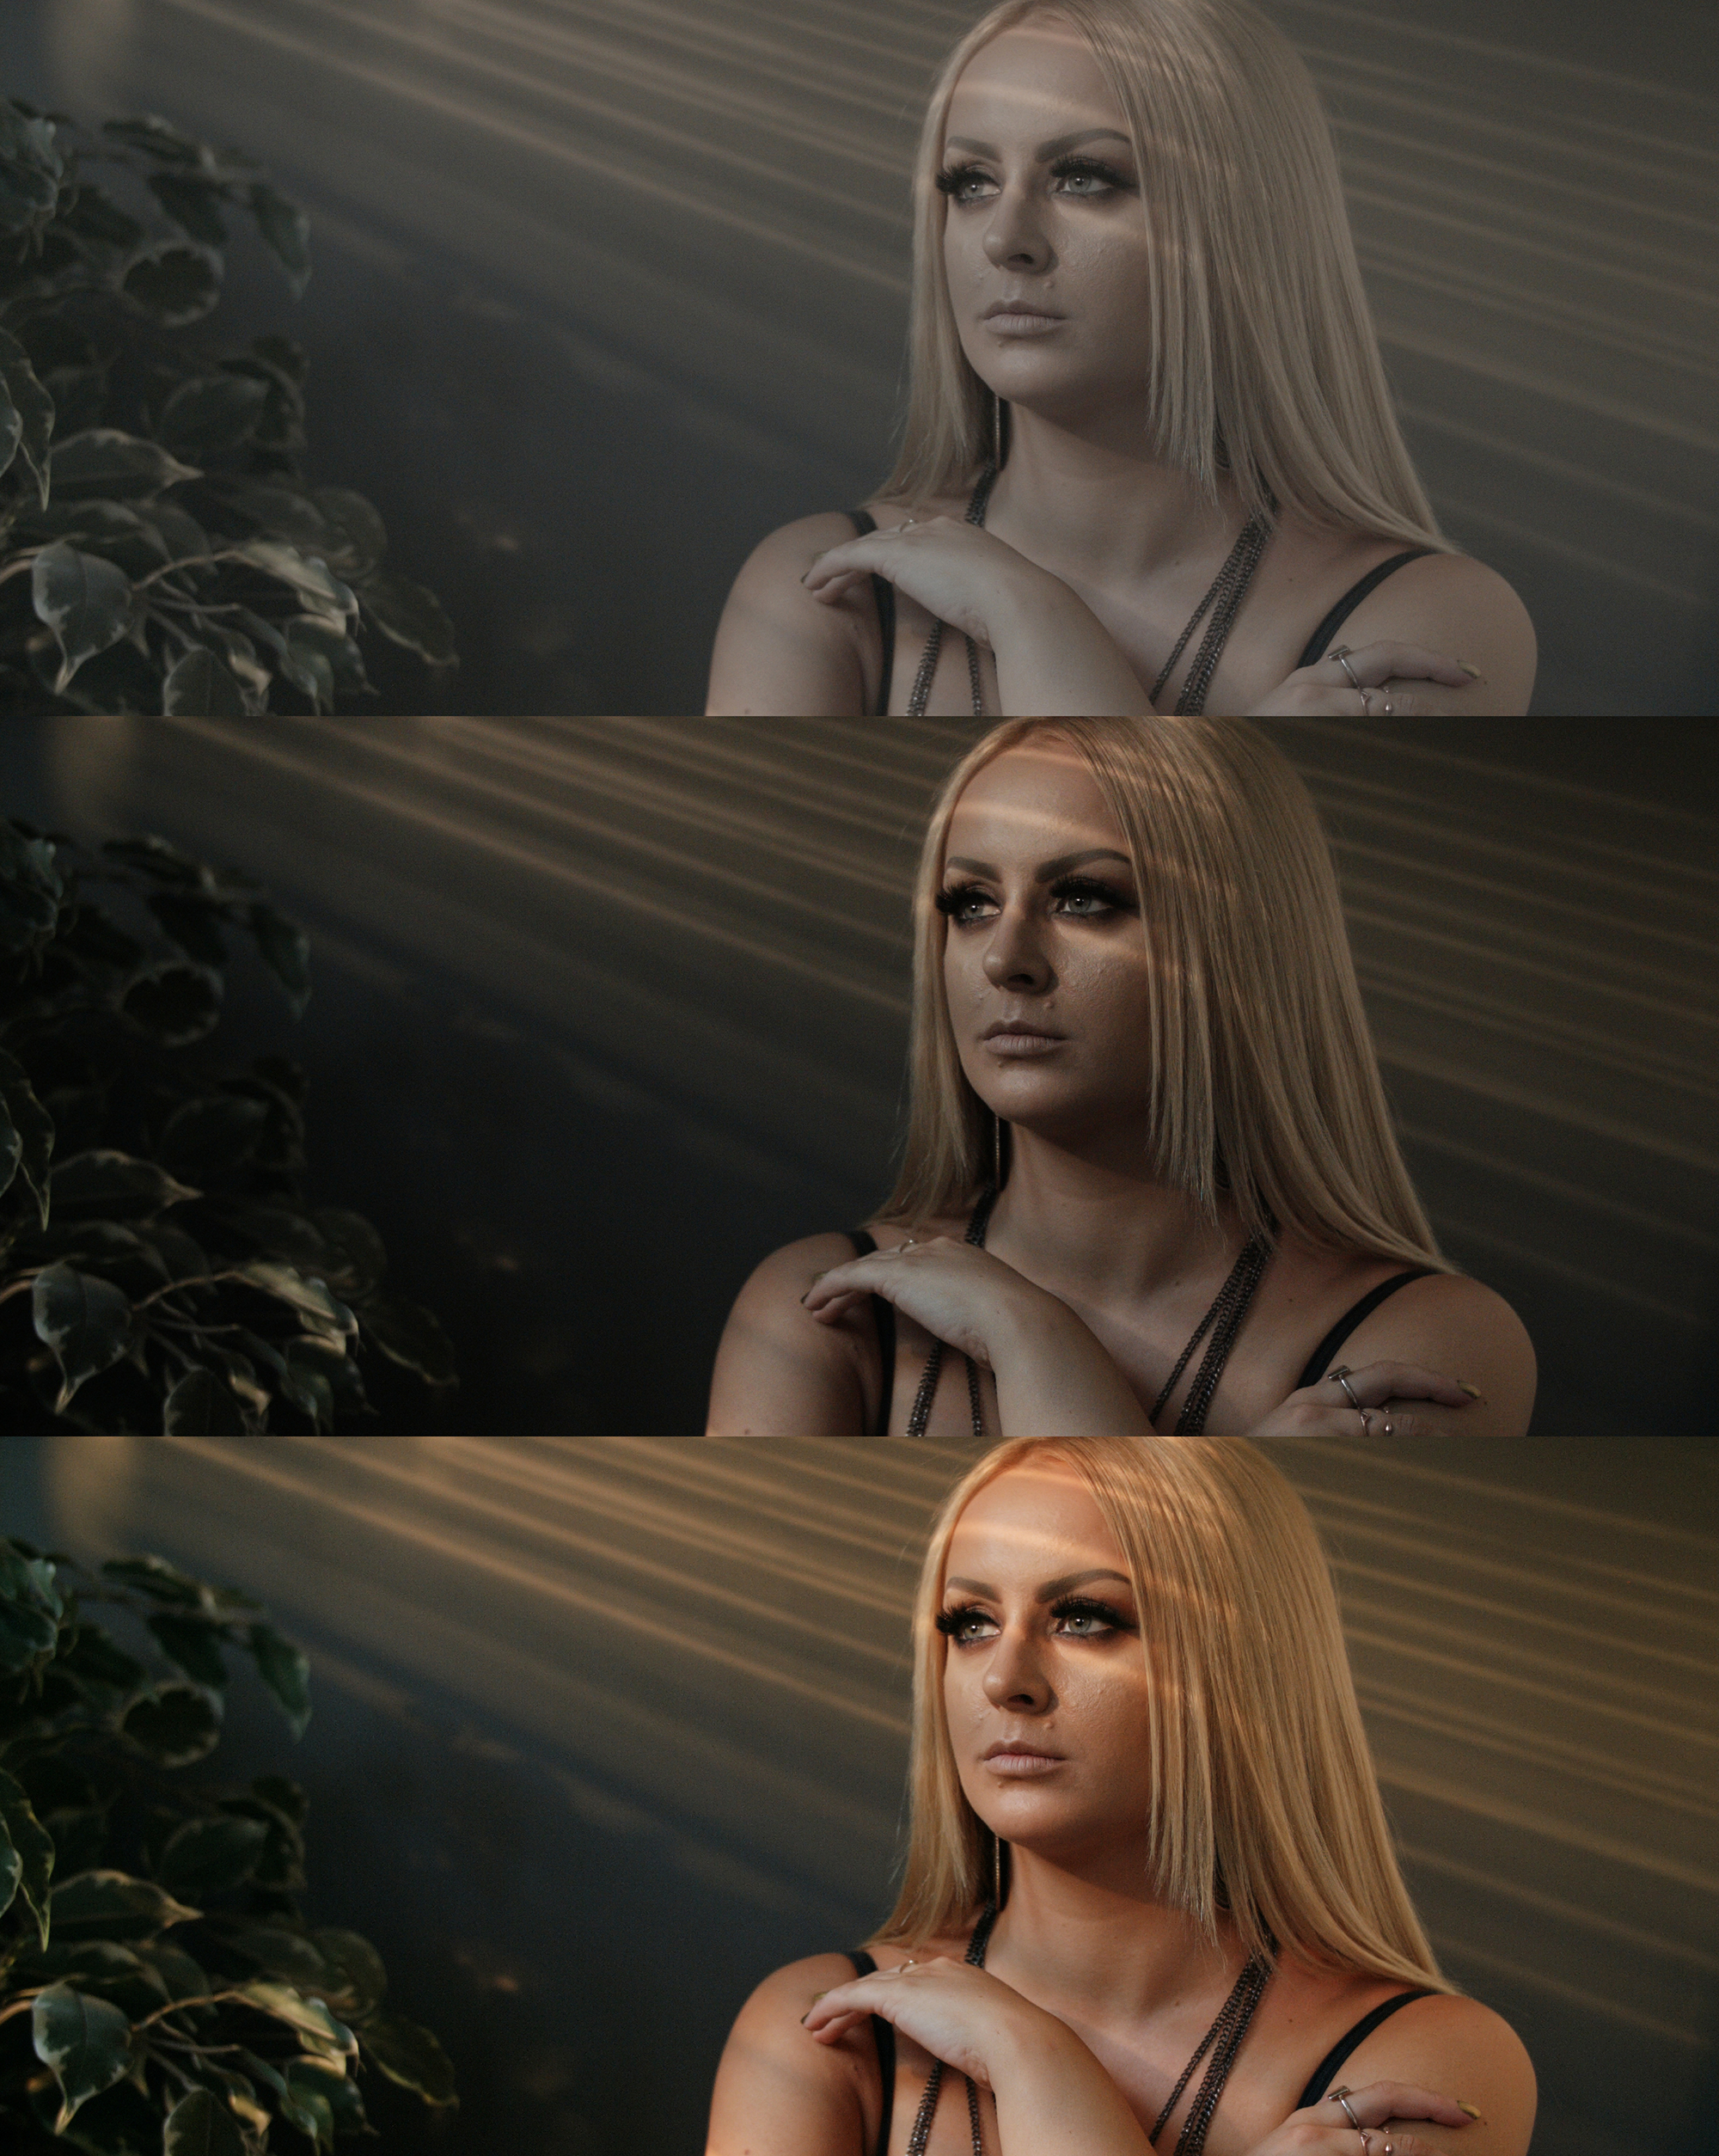
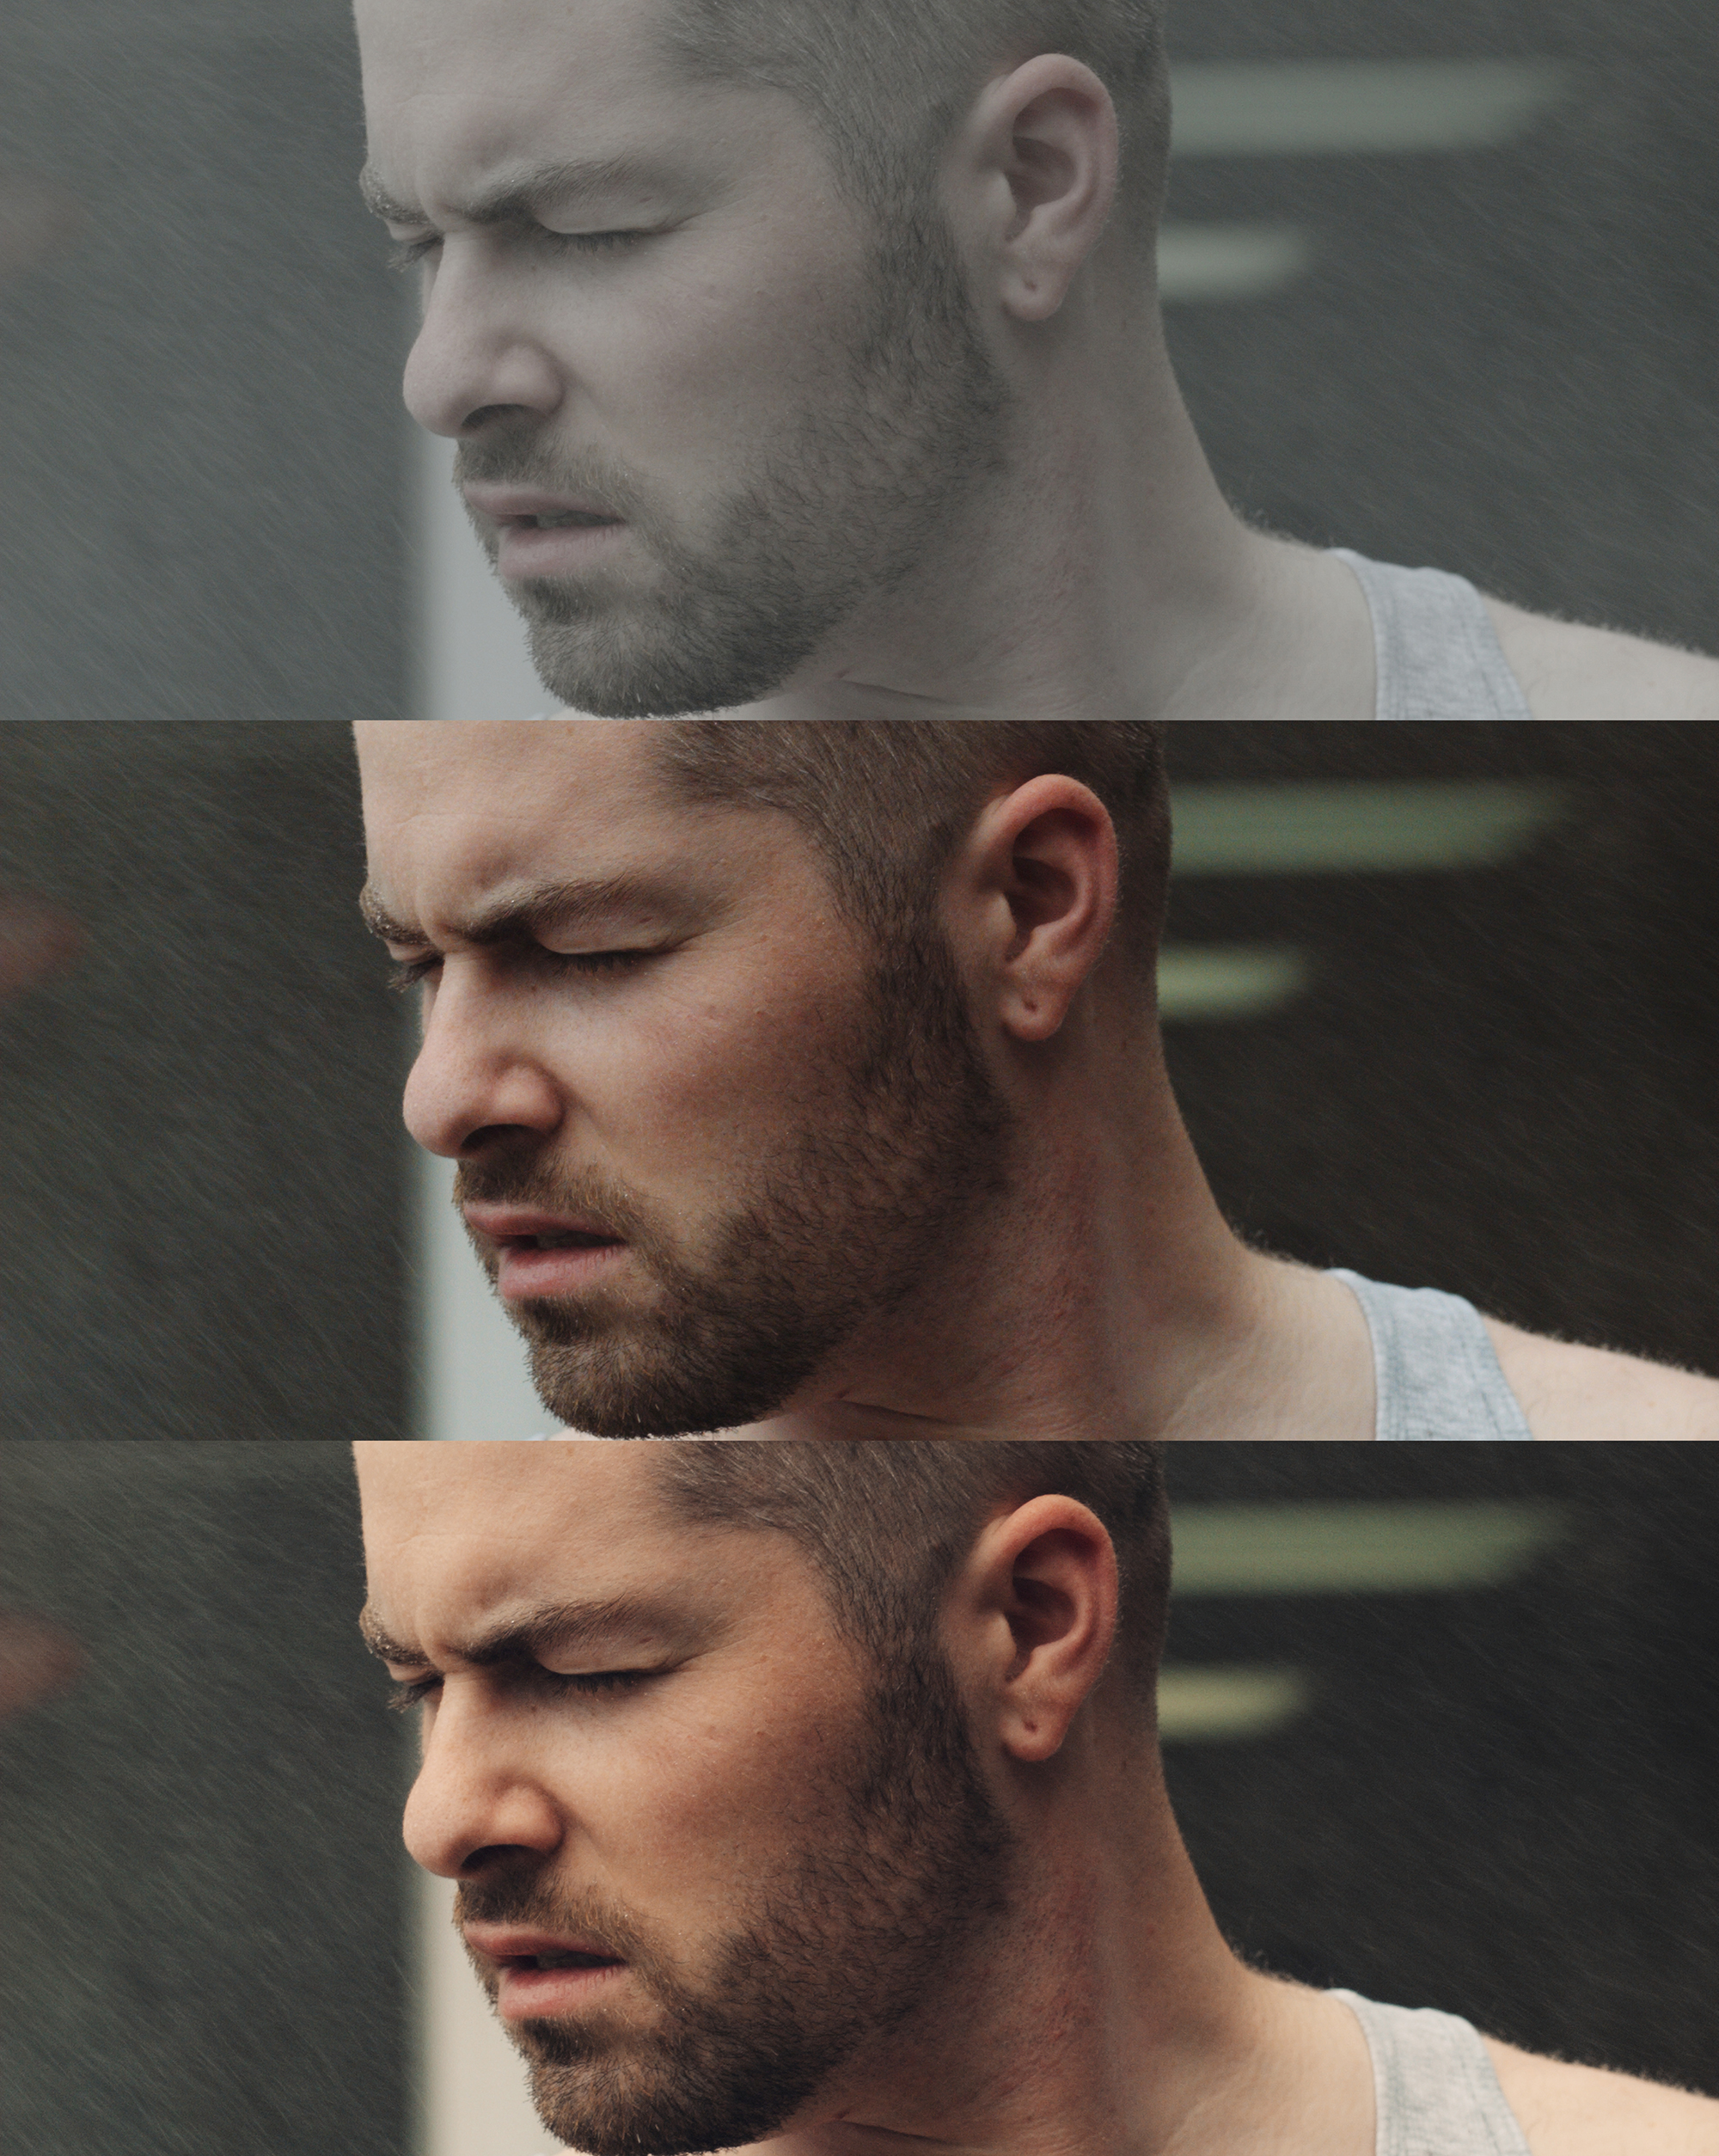
Take a few days to really figure out what’s working with the types of footage you shoot, and what’s not. What you may find is that some LUTs work great for certain things and some don’t – maybe you’ve found a creative LUT that looks absolutely great in a live music scenario, with changing lights and colour temperatures, but just doesn’t work well for your landscape shots, even with extra correction. Maybe you’ve discovered a film emulation LUT that has beautiful skin tones and a nice, cinematic look and minimum adjustments are needed.

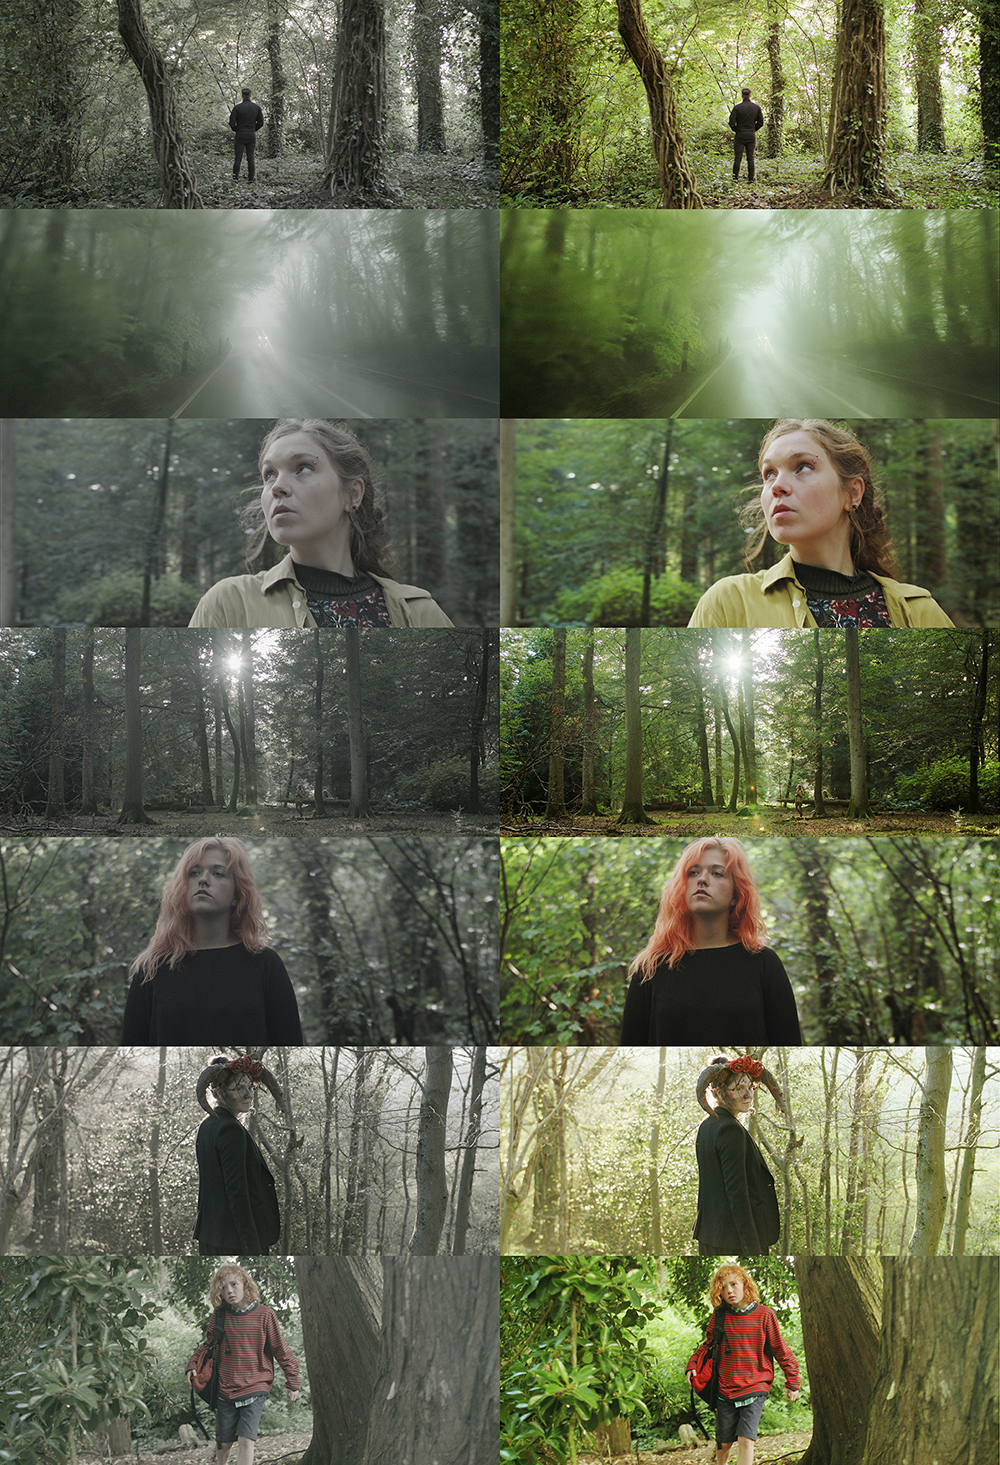
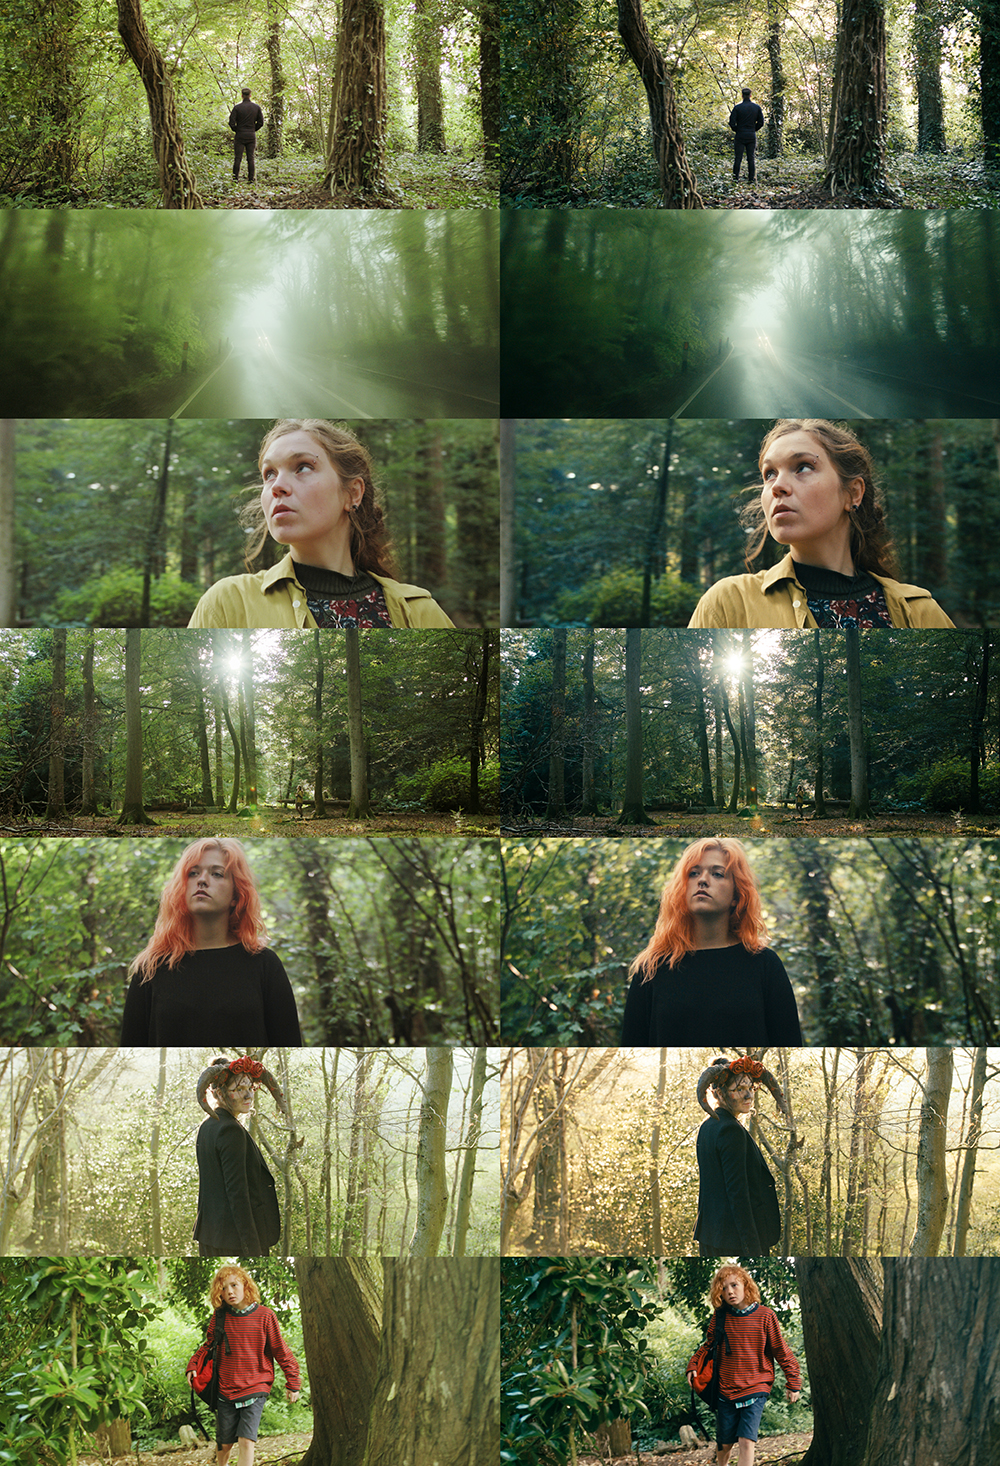
After you’ve really gotten used to working with some of these LUTs and are happy with the results you’re getting, you’ve already sped up your workflow exponentially. If you know that you can use a certain LUT on a certain type of shot and get quick results, you’ll be able to call back on this LUT whenever you shoot something similar again and be able to get predictable results. In the example of the shots above, you may be working on a music video shot in a forest and your client wants it to look dark, moody and cinematic. You now know how to get the base look for this immediately, utilizing our previously used LUT.
Continue this experimentation of grading using LUTs, across a range of different clips, in different situations and scenarios and eventually, you’ve taken the guesswork out of using your LUTs, because you know which ones will work where and for what purpose.
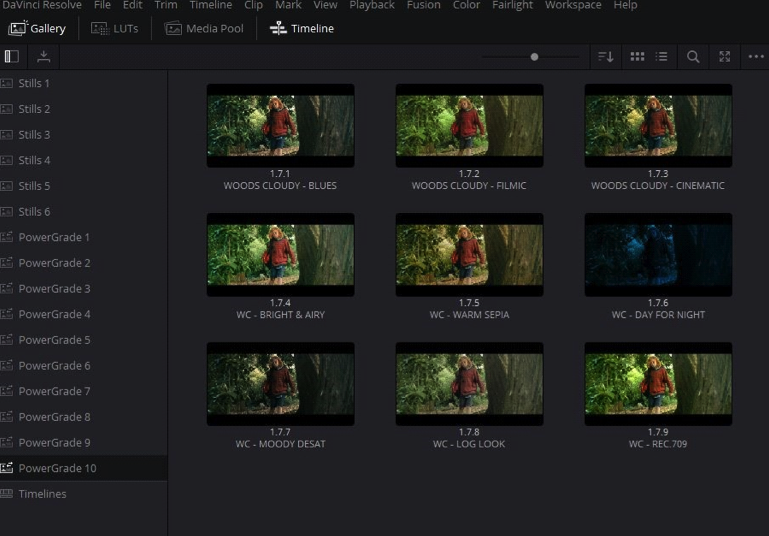
We can then make this an even quicker process for a variety of situations! Wherever you’ve used a LUT, corrected your footage and tweaked things to taste, you can save this look as a Powergrade in Resolve. This is similar to using Stills, where you save the colour correction and grading information from a clip and paste it onto other clips in your timeline, but unlike Stills, we can use the Powergrade across all of our projects.
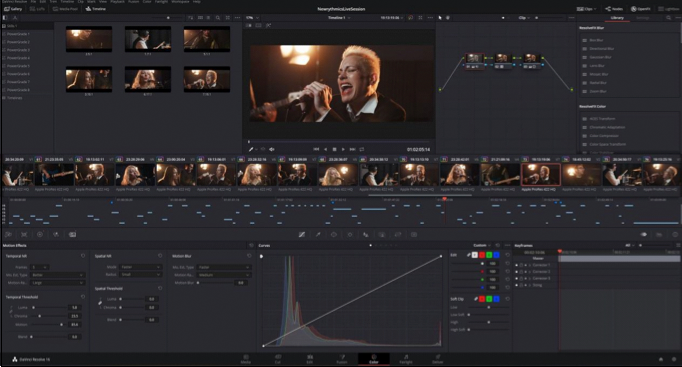
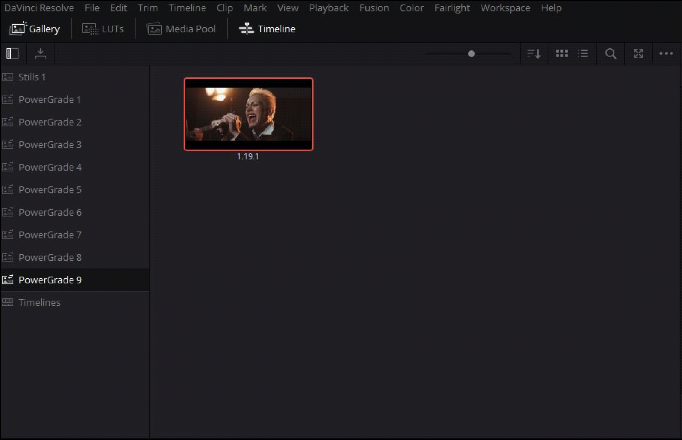
Powergrades can be saved and stored in the Powergrade folders in the left-hand column of the Gallery tab. These folders stay between projects, so you can always bring up a Powergrade for whichever project you’re working on.
So if we shoot another live studio session, using the same camera and a similar lighting setup, we now have our previous Powergrade to call back on. This has sped up our colour workflow for this new session massively, as we can simply apply our Powergrade and we basically have a one-click solution to the grade, providing we’re after the same look (some slight adjustments may need to be made, obviously things like exposure can be slightly different).
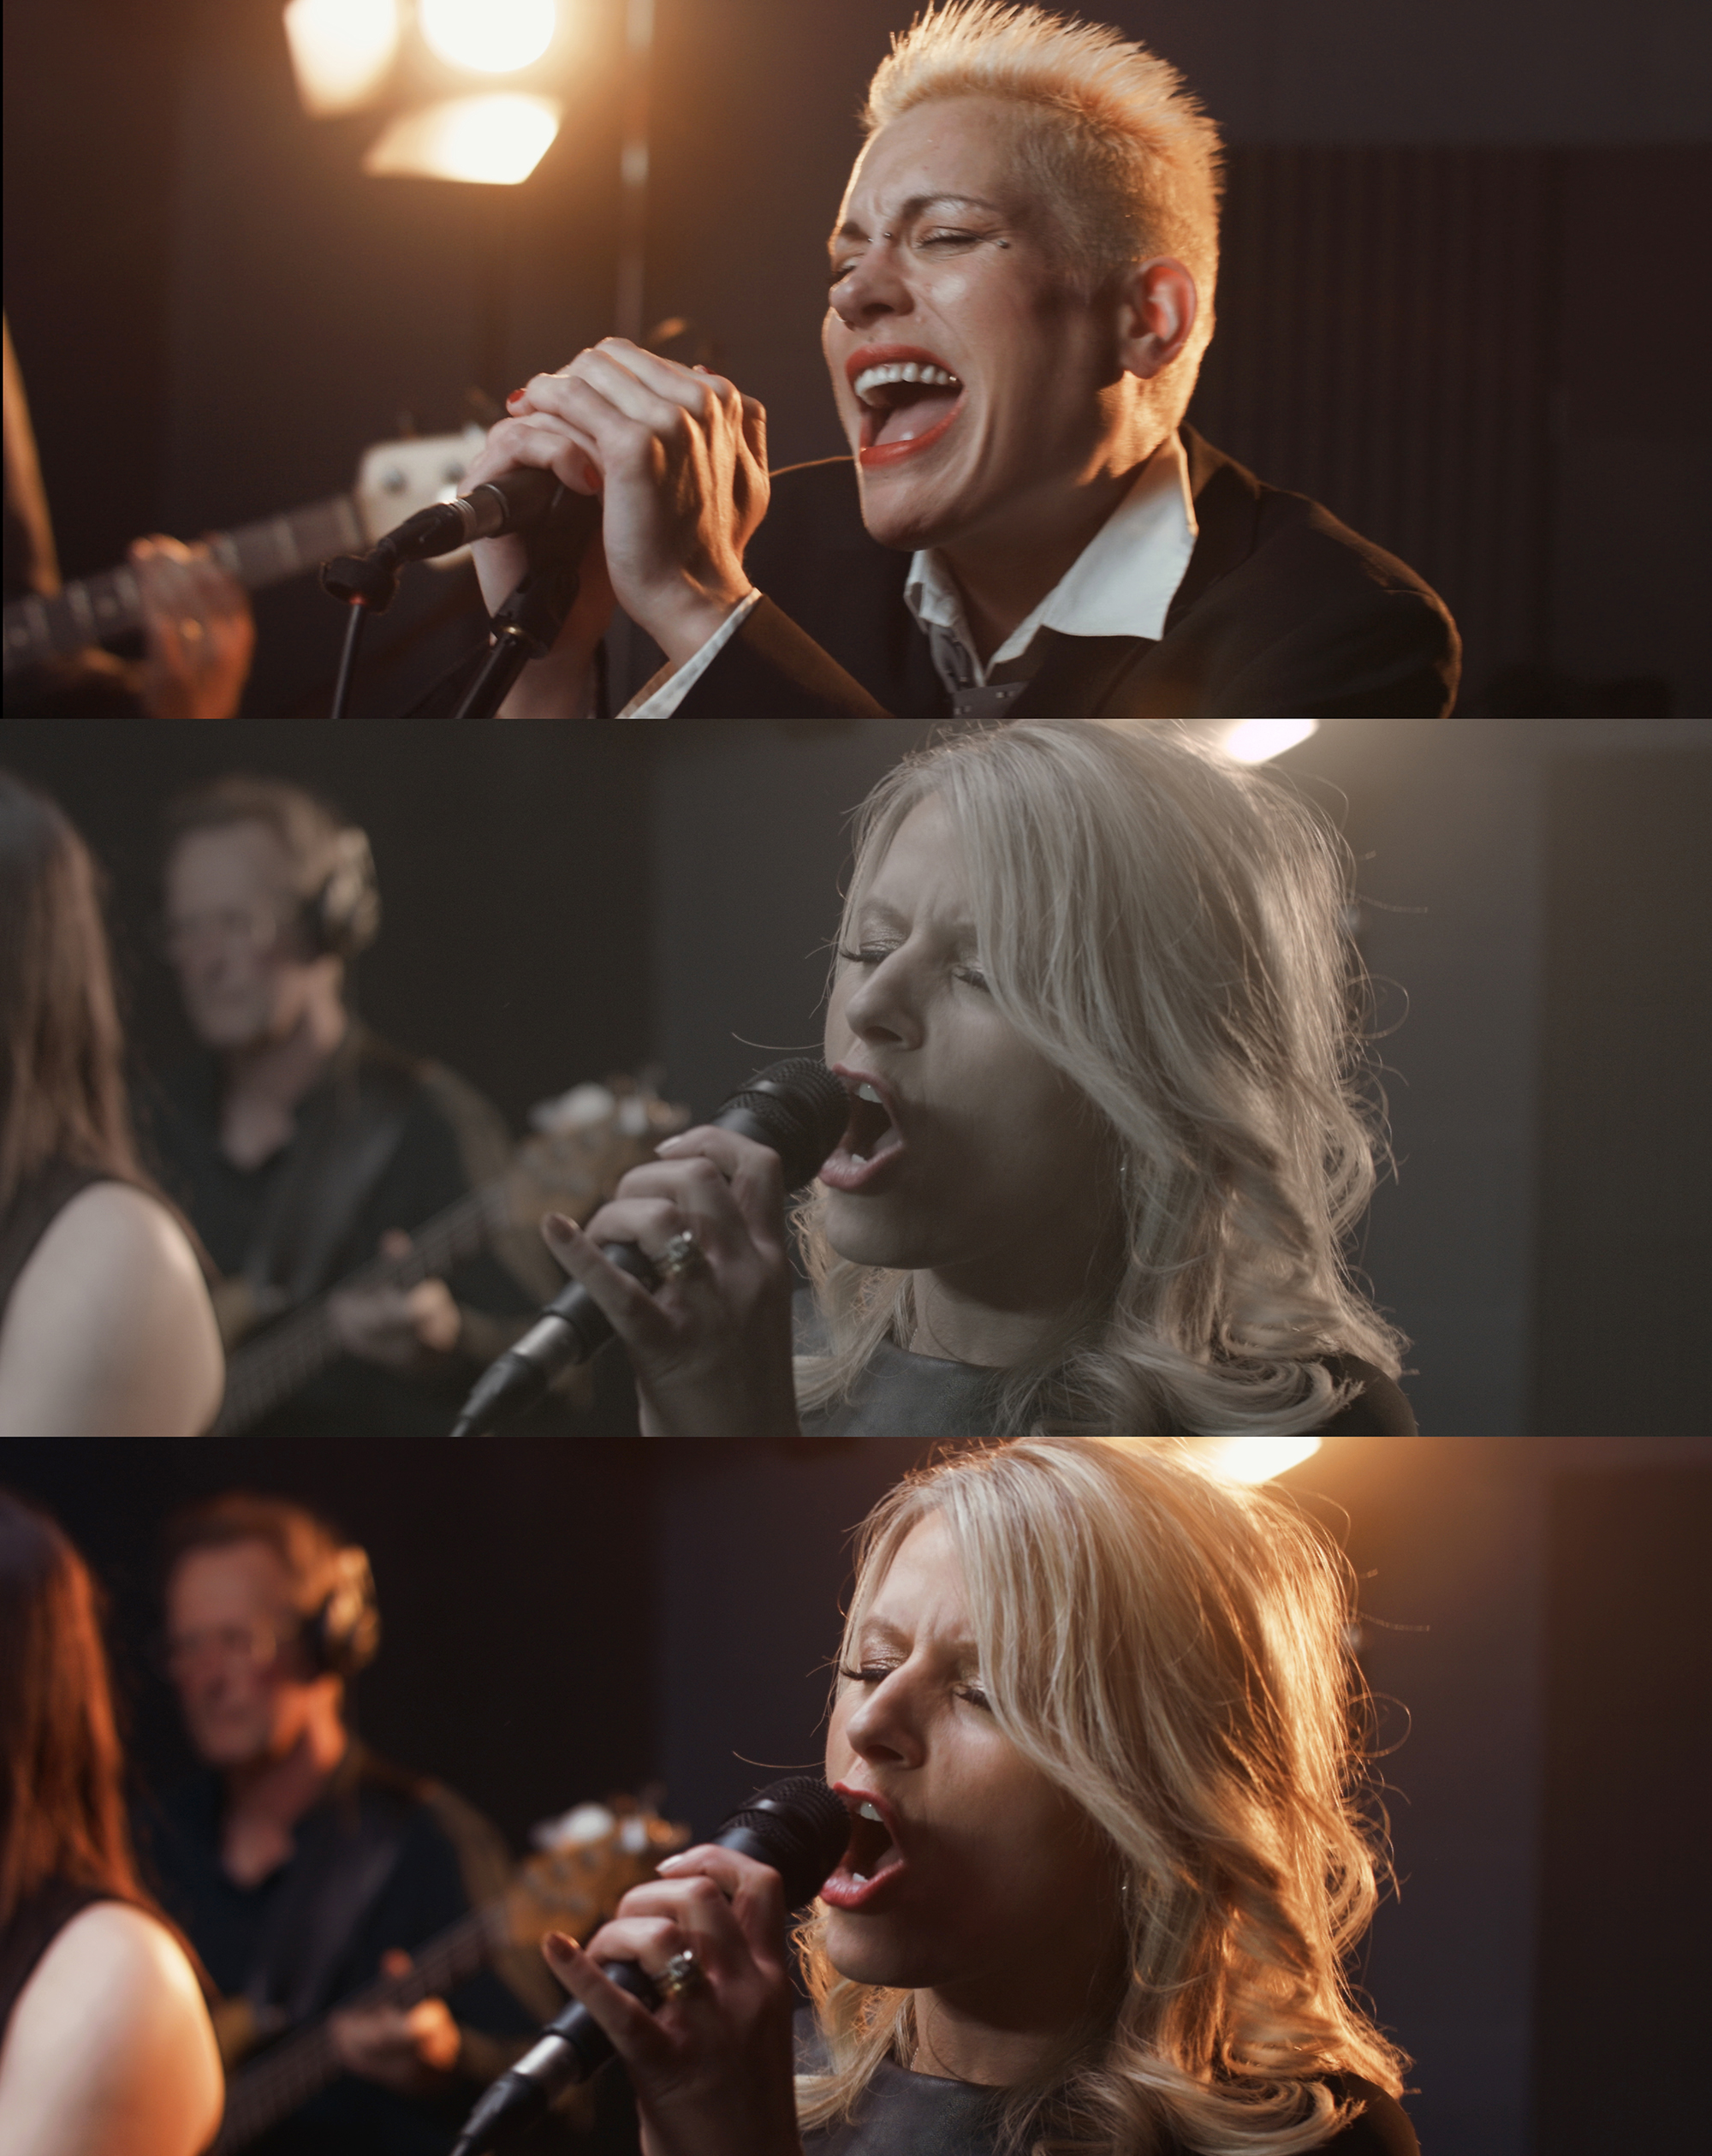
With Powergrades, you can start building out a library of looks and grades for different types of footage, making use of our previously attained LUTs. The best thing about this is that you can go back to these powergrades whenever you want and select the best-suited look for what you’re grading, at the click of a button. We can get as specific as we want when making our library of grades, so that we have a Powergrade for a large variety of situations. You can save grades for certain locations, types of weather/lighting and even group things by camera model if need be.
Now just to note, none of this will replace using a professional colourist. But when you’re in the position of working in a one-man band, you might not have the leisure of hiring one, or the time or money to take a course in colour grading!
Overall, LUTs are very valuable tools to help you learn how to handle your footage and give you certain looks, and Powergrades can help you to speed up this process – enabling you to achieve a professional looking grade quickly and efficiently, without sacrificing the quality of your work.

Filmtools
Filmmakers go-to destination for pre-production, production & post production equipment!
Shop Now