

Filmtools
Filmmakers go-to destination for pre-production, production & post production equipment!
Shop NowTL;DR: To save a New Sequence preset that includes named video and audio tracks, create and configure your sequence first, name all tracks directly on the timeline, then use Create Sequence Preset from the timeline panel menu.

Welcome to Tool Tip Tuesday for Adobe Premiere on ProVideo Coalition
One of the signs of an experienced editor: specific footage lives on specific tracks. For documentary/explainer work? My interview material and VOs go on V1 and A1. B-roll on V2. Music on A3. Every project, every time.
When I come back to a timeline a year later, I know exactly what I’m looking at/
Don’t set this up manually every time. Since your work next week will probably be a lot like this week’s, we should make this into a template.
There are different ways to handle this. One valid approach: build a template project with your preferred starting sequence and always duplicate it. If you’re not doing this already, you should be. Note: this may cause headaches with Premiere Productions.
But there’s a better way to handle the Sequence Settings. It’ll require two steps, with the end point of creating a sequence preset. It’s a workaround because the “Save Preset” in the New Sequence dialog box won’t save video track names.
Step 1: Set Up Your Sequence
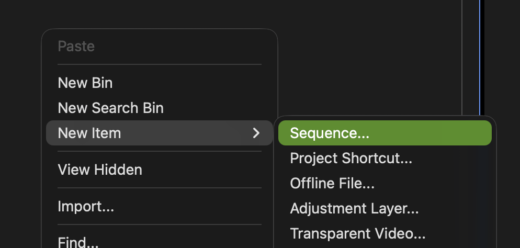
Create a New Sequence and dial in your settings.
I’m rendering in ProRes 422 and rendering as I go (if you haven’t read the , go do that). I’m also using Adobe Color Management.
Here’s the wrinkle: if you hit Save Preset from the New Sequence dialog, Premiere will save your render settings and color management. But it won’t save your video track names.
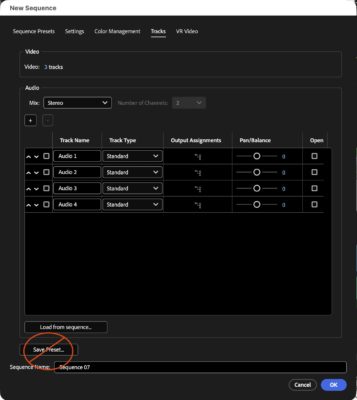
That requires a second step. Don’t save it here. Create the timeline.
Step 2: Name Your Tracks on the Timeline
Name all your audio tracks in the Audio Channels pane. That part works fine (and you can even load a timeline with existing track names). For video track names, you need to do it directly on the timeline.
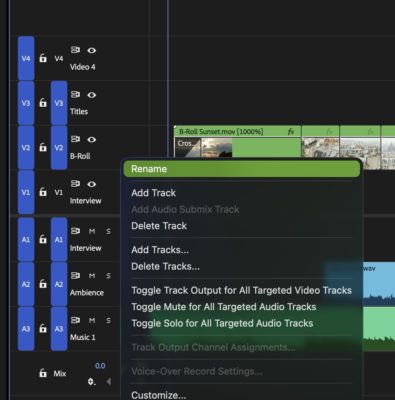
Right-click any video track header and rename it. Do this for as many tracks as your typical project needs.
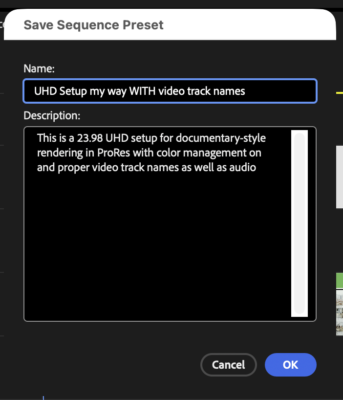
Once everything is named the way you want it, go to the panel menu at the top right of the Timeline panel. Not the wrench. The panel menu. Choose Create Sequence Preset…

Name it in a way that correctly describes it. Make sure you don’t make my mistake and add the date. These should get reviewed several times a year.
Quick Bonus: Share it
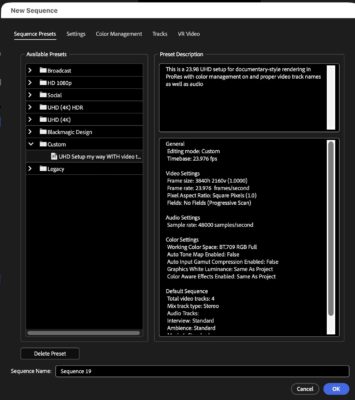
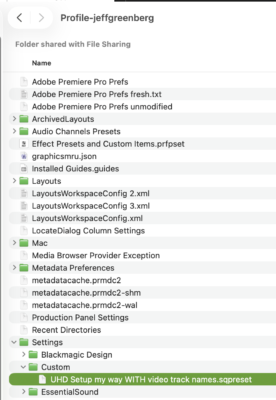
Your sequence preset is a file sitting on your hard drive. On your computer: Documents > Adobe Premiere Pro > 26.0 > [your profile] > Settings > Custom. You’ll see the .sqpreset file.
Back it up, or drop it on every machine in your group, so everyone on your team starts from the same template.
Final thoughts
Setting this up once means you stop rebuilding the same track structure from scratch every single time.
So, whether what you do is a regular vlog edit or a documentary explainer, when you start a new sequence, you’ll see your custom template set there with everything set the way you need, including video and audio tracks named the way you want
This series is courtesy of Adobe.