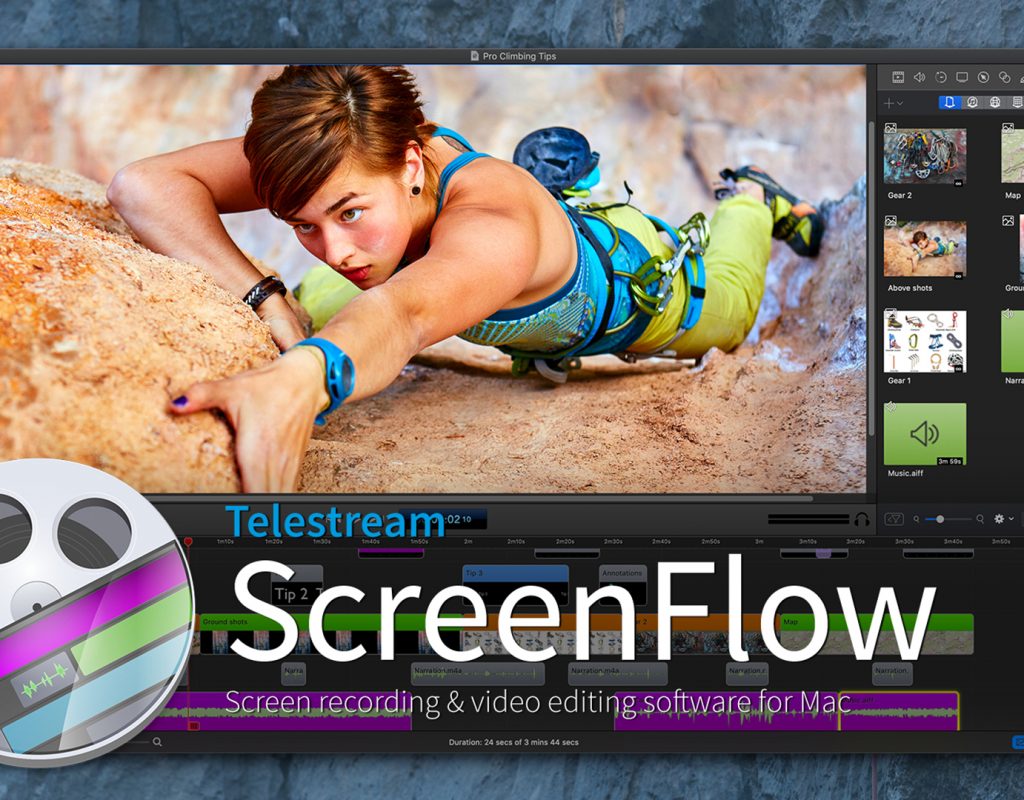
I’ve been doing tutorials online for a long time now, and I’ve done them on both Mac and Windows, and far and away the best application for recording your screen on any platform is ScreenFlow. Nothing beats its ease of use and quality. Telestream has released the next version of ScreenFlow, ScreenFlow 9 with some great and much welcomed new features. Let’s check them out!
COST
One thing that I’m glad Telestream has done is get rid of different pricing for ScreenFlow. Keep it simple. $129 US. Now, there are options for ScreenFlow 9 plus the Stock Media Library and Support, but to be honest, you really only need the core application. I personally have never needed to call support (or e-mail them for that matter), and the SML is 100% optional (again, I’ve never “needed” it) if you’re working on bigger projects, and have no knowledge (or access ) of After Effects to create your own motion background. So, $129 it is, and well worth it.
What’s New in V9
Multi-Screen Recording
This is a big on, and one that I’m sure a lot of people will welcome. Up until this release, we were only able to record a single monitor, well now there’s support for multi-monitor recording inside of ScreenFlow 9.
Timeline Tools Palette
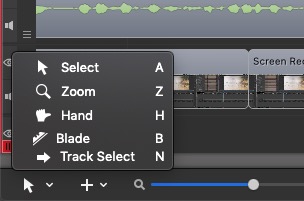
If you take a look at the lower left corner of the ScreenFlow 9 interface, you’ll notice that there is a “Pointer” icon, with a drop down arrow beside it. This is where the new Timeline Tools Palette is hiding. You’ll notice that you have access to Select, Zoom, Hand, Blade and Track Select, along with keyboard shortcuts, to quickly jump back and forth between the new tools, as you need them.
Clip Editor
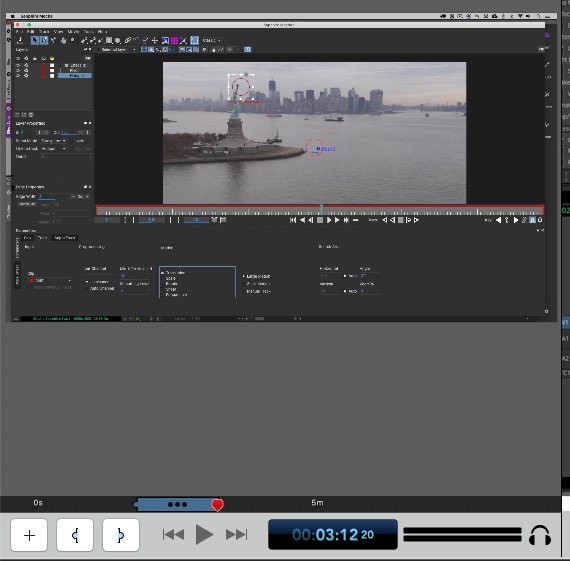
This one is a big one for me, coming from an editing background. Up until this release, “editing” clips was a real pain, as there was really no way to do it, other than to drop the clip(s) into your timeline, and do any trimming you wanted from within the timeline. Now, simply double click on any of your clips, to open them in their own “preview” window. Once there, you can play them, add in/out points, dynamically adjust the in/out points, by simply dragging on the I/O range marker, and then when you’re ready, simply hit “+” to add it to your timeline. Man, where has this been for 8 previous versions!
Work With Proxies
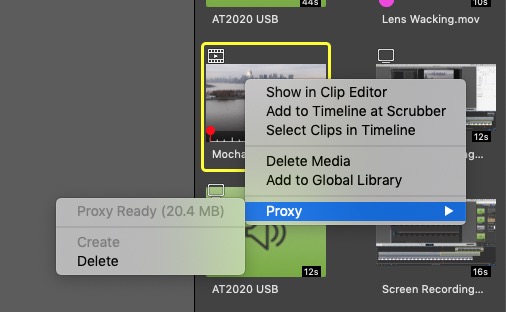
This is one feature update that I’m really happy with. Previously, when working with larger than HD material (I mean 4K and larger), ScreenFlow 9 would (depending on how fast your system is), have a noticable performance drop, due to the application attempting to process this material. Well, not anymore. First thing you’re going to want to do is head into your ScreenFlow Preferences, over to the new Proxy tab.
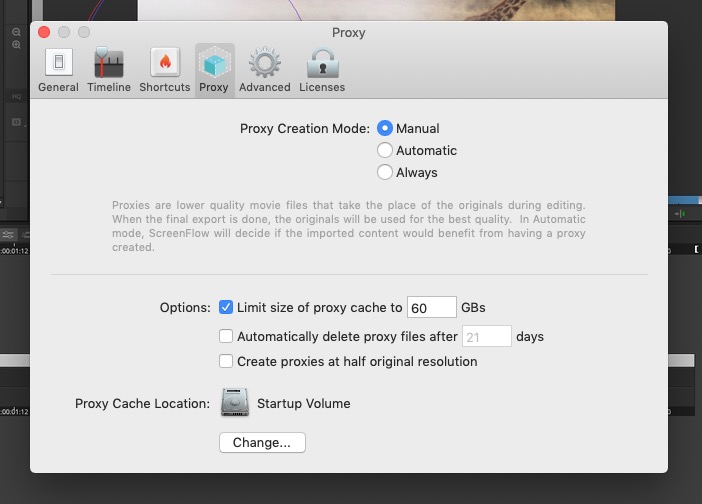
Now you can decide whether you want to create Proxies yourself (my personal preferences), have ScreenFlow 9 decide if proxies are required (Automatic), or just do it all the time (Always). Keep in mind that if you decide to go the Proxy route, when you’re ready to export, ScreenFlow 9 will automatically export your timeline with the original media, so everything looks as good as possible. If you’ve decided to go the manual route to create proxies, the process is pretty simple. Right click on a clip in your project and say “Create”. That’s pretty much it. You can delete if you need to, or simply set your preferences up to delete all proxies after a certain amount of time.
New Click Effects
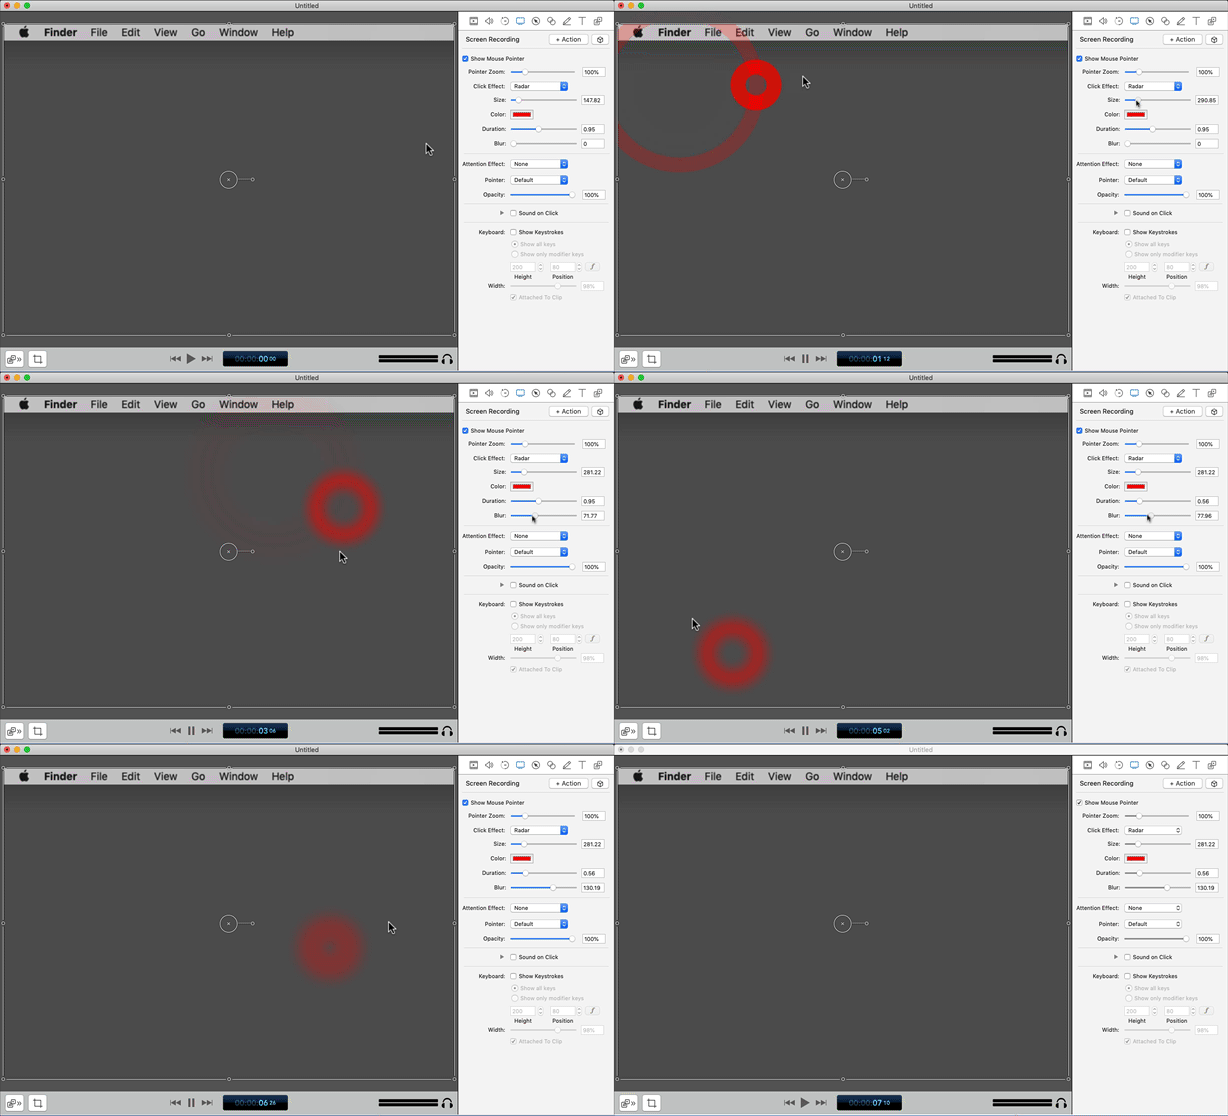
The Radar Click effect has received a major update. If you’re not familiar with the Radar click effect, it appears on screen every time you click the mouse and now, with the ScreenFlow 9 update, you can decide what you want your click effect to look like. Want the click on screen for long? Need it larger? Want it blurred? No problem. Screenflow 9 can handle them all!
Major Performance Enhancements
To quote the Telestream website – “ScreenFlow 9 is packed full of behind the scenes improvements to make sure your ScreenFlow experience is the best it can be. Updated capture card support, thumbnail image improvements and manual media management are just a few of the ways ScreenFlow 9 is the best ScreenFlow yet.” Normally, none of this really means anything, but I will say this. I have noticed a performance jump from version 8 to 9 where my timelines buffer a lot faster, and the application just seems to be quicker to use overall, and that’s really all I can hope for, moving from version to version.
ScreenFlow Stock Media Library
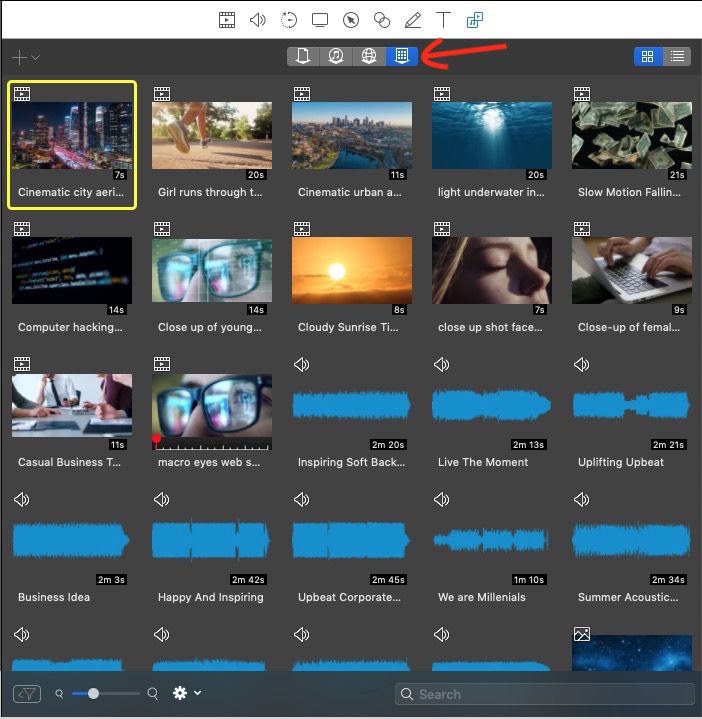
I believe this was added last year with ScreenFlow 8, and if you’re someone who creates more complex screen records, for $60, this is a pretty good deal. What you get access to is over 500,000 assets (images, audio video and more) with the built in Stock Library. You can simply navigate the library to find what you’re looking for, drag it right out, and onto your timeline. Simple and straightforward, and for $60 per year, it’s a pretty good deal. To access it within ScreenFlow 9, simply head over to the Media tab, and on the far right of the selection options at the top of the window, you’ll find it with all the media you have access to!
In the end, if I was ever to decide to switch from Mac to PC (which I won’t, but just sayin’), the only application that is “Mac Only” that I would miss, is ScreenFlow 9. The best screen recording application on the market is still the best. It really is the champ of screen recording applications for Mac, and just keeps getting better and better with each version released.
ScreenFlow is available now from the Telestream website, and there’s a free demo to get you running.

Filmtools
Filmmakers go-to destination for pre-production, production & post production equipment!
Shop Now