

Filmtools
Filmmakers go-to destination for pre-production, production & post production equipment!
Shop NowTL;DR created extended markers quickly on your timeline clips

Welcome to Tool Tip Tuesday for Adobe Premiere Pro on ProVideoCoalition.
Every week, we will share a new tooltip to save time when working in Adobe Premiere Pro.
I use Markers when editing in Adobe Premiere Pro a lot. Clip markers, timeline markers, extended markers, colored markers are just a few. I’ve made a Tool Tip Tuesday before about extended duration markers and marker text, but this tip is about another way to use extended markers. If you already have clips in a timeline, you can use extended markers you add in the Source monitor as a fast way to make notes on a clip or just identify clips in a method other than clip labels.
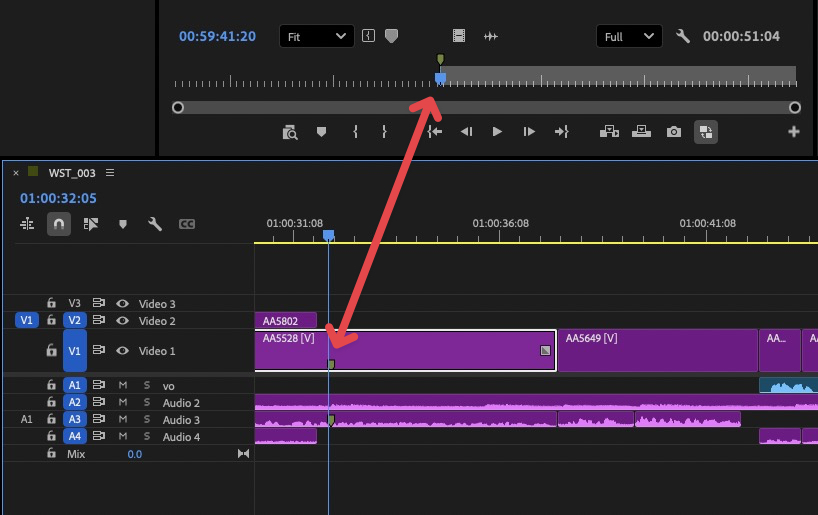
With a clip selected in the timeline, use the Match Frame command (defaulted to f on the keyboard) to open the selected clip at the frame your playhead is parked on, in the Source monitor. Then add a Marker (defaulted to m on the keyboard).
Here’s where the magic happens: if you option+click+drag on that newly created Marker in the Source monitor panel, you’ll extend that marker in the Source panel, and as you do, that marker will extend in real-time in the timeline.
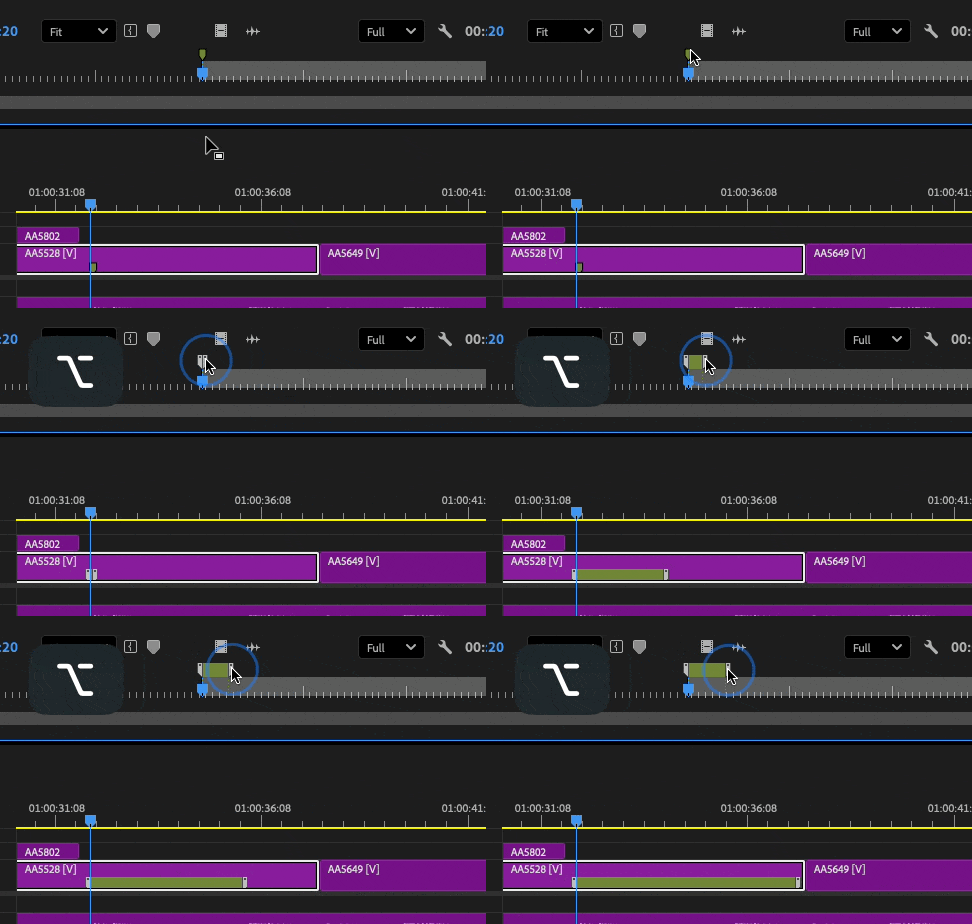
If you want to add text to that marker, double-click that marker in the Source and add text. I use this all the time to make notes on clips or to mark a section of a clip I want to remember or key in on.
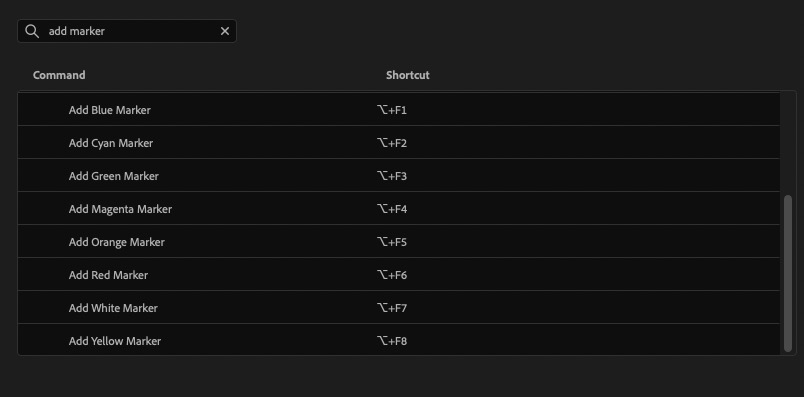
Bonus Tip: Map the add colored marker keyboard shortcuts for quick creation of different colored markers without having to open the Marker dialog box.
Markers are your friend, learn to master their creation and they can help with editing overall.
This series is courtesy of Adobe.