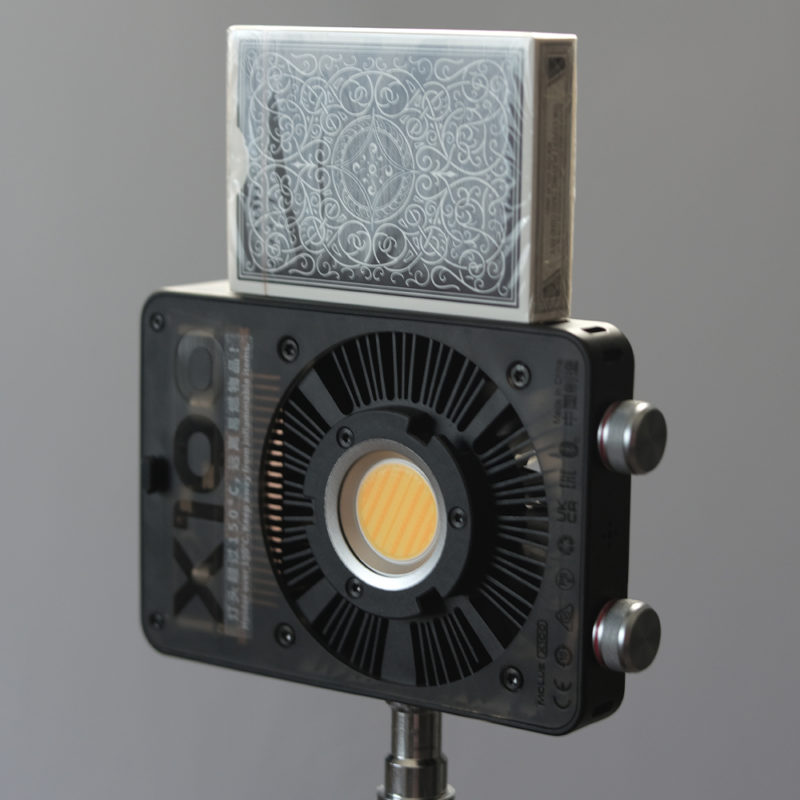


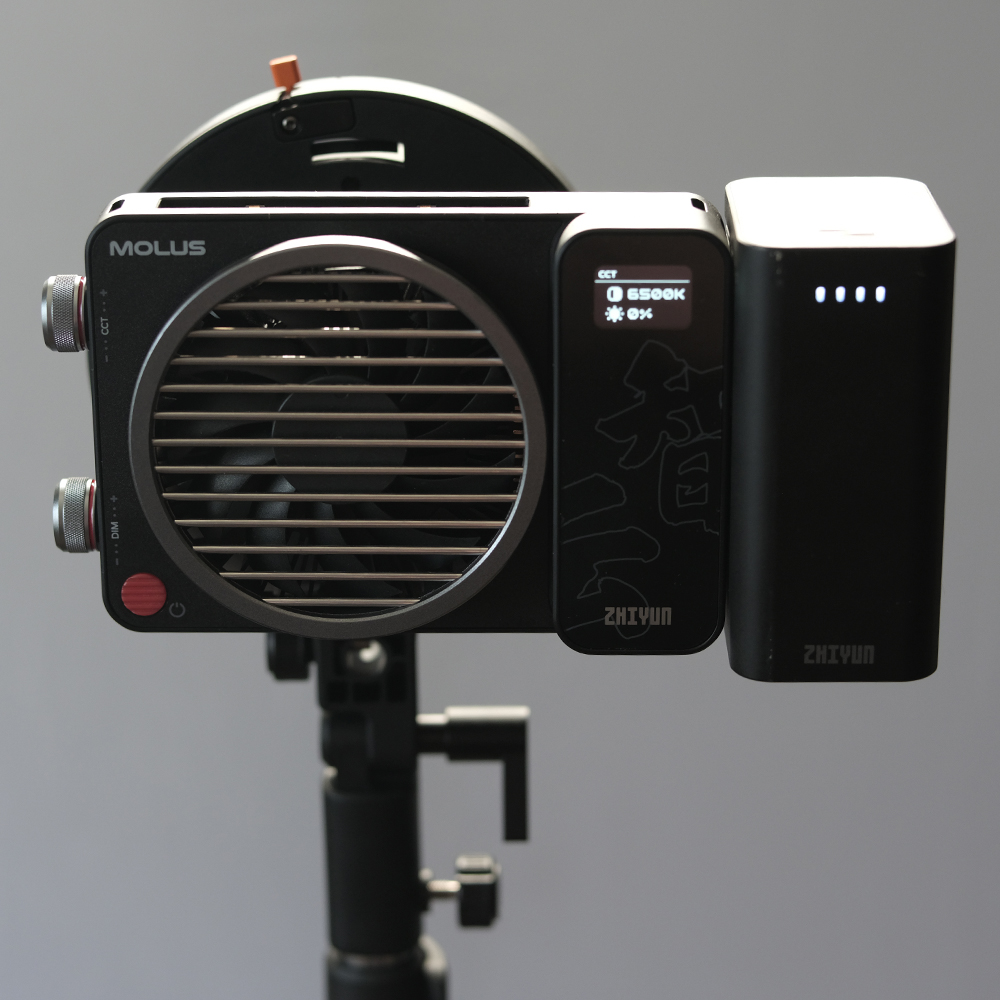
Can a light the size of a pack of cards punch above its weight?

Have you noticed that when you’re researching film lighting, common wisdom states you should get the biggest source possible?
Not necessarily a big light, but a big light source. So even a small fixture shot into a larger piece of diffusion works, but in that case you do need a bit of extra oomf from the fixture so you can actually get some exposure on the other end. With LEDs it did seem like the power-to-size ratio scaled linearly but nowadays we have smaller, less expensive fixtures coming out that pack quite a punch, but it’s hard to know just off of a stat sheet because in the past, with Tungsten, the wattage always meant the same output; A 2K light from Arri basically gave you the same power as a 2K from Mole Richardson (RIP). But now, what does 100W mean? It obviously means the power draw, but what about the output? What if it’s not efficient? What if it’s really efficient? Well, I’ve got a Molus X100 from Zhiyun here, so let’s find out what it’s got to offer. In a professional industry primarily using big soft sources with massive output, what can a more modest offering give us?
There really is no reason for the fixture itself to be big.
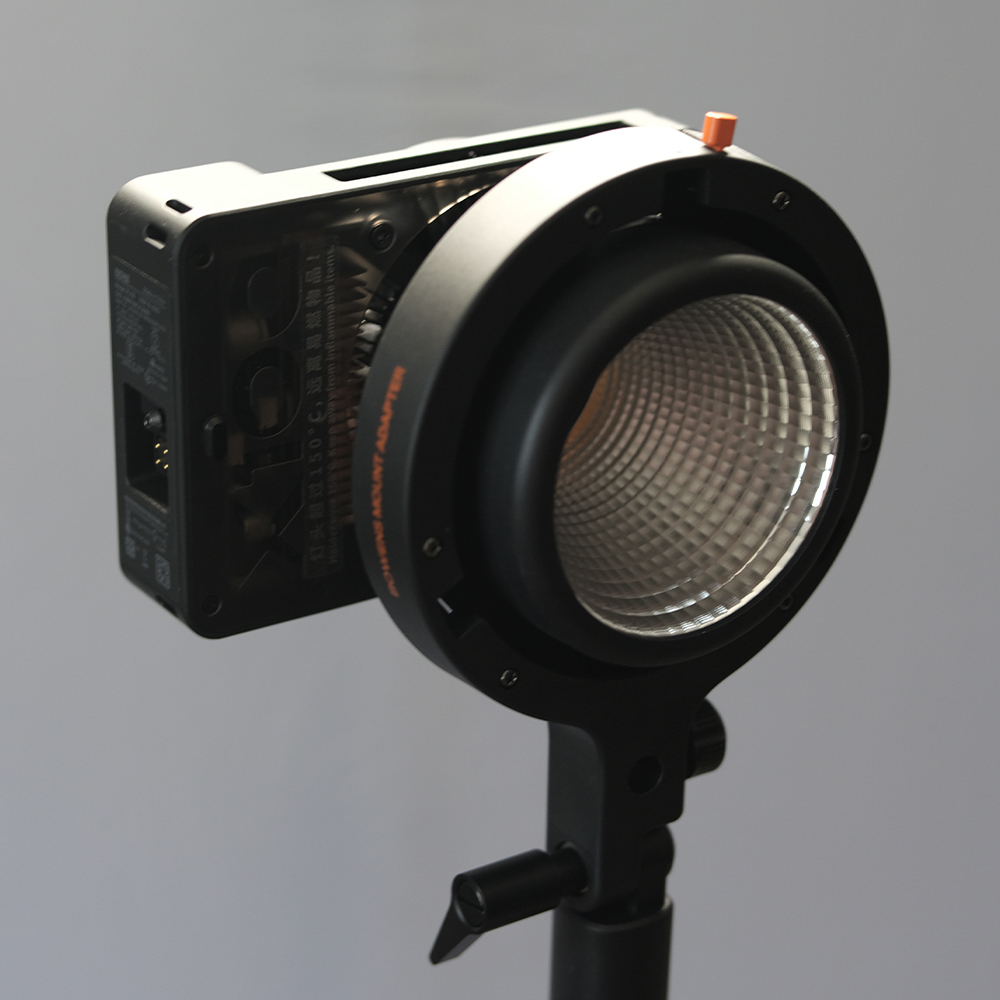
Sure if you don’t want to diffuse the fixture at all then yeah, something like a Skypanel or massive light cloth makes sense, but that’s only one way to save space. The other way is to break a slightly more traditional COB, which happens every day. So in that regard, a small palm-sized fixture like this Molus is pretty nice. I travel a lot for my Documentary work and bringing a whole lighting kit can be daunting when it has to go through the often over-zealous baggage handlers at airports around the world. Being able to safely pack it away, maybe even in your carry-on, is a nice prospect. But even so, there are more lights than just your key! Small fixtures like this are perfect for accent lights, hair/scratch/rim lights, or those dreaded location bathroom scenes where it seems like you can’t put anything anywhere.
A big thing to remember is you don’t need to “start small” when putting together your first lighting kit, but to know if you need to.
Small doesn’t always mean inexpensive. If you’re not pressed for space, technically the cheapest option is often a phenomenal one in the form of an older Tungsten unit, where you can get a 4-Light kit of 1K Arri Fresnel units for roughly the same price as a single X100 right now on eBay. Tungsten is the king of light quality, pretty much unmatched in the LED world, so there’s certainly a world in which those 4 lights will go way further than any LED for the price, let alone this one. That being said, on paper the X100 with its reflector attachment gives you nearly the same output as the Arri 1K at full flood. So that’s interesting. It should be noted that 1Ks at full spot are nearly 9x brighter, though, so that’s something to keep in mind. The point is there’s no objectively “right” light for your kit, especially when you’re first starting out on a budget, but these newer LEDs are certainly compelling.
So let’s start with output then. What can this light get you if you are just starting out, or need a portable light for your work.
While this kit Zhiyun gave me comes with a small softbox, that really doesn’t do a whole lot in terms of softness because the size in relation to your subject isn’t enough to really read as “soft”. In other words it is technically softer, and it does restrict spill which is nice, but if it’s me I’m just going to go for a larger piece of diffusion on a stand, and in the spirit of “just starting out” or travel kit viability, I’m going to go with a 5-in-1 reflector as my modifier and use the diffusion as opposed to the reflector “skin”. Another option which I’ve used plenty is a shower curtain, as it can be strung up nearly anywhere to soften either film or natural light sources, packs away very tightly, and can be used as a bit of padding in your kit if necessary. There is a Bowens adapter that you can get for the X100, which is great, but large softboxes take up quite a bit of room and the little wires can be easily bent or broken in transit. At home, go nuts. Puzzlingly, on the RGB versions of the X100 and X200 there is no Tint control or X/Y input (which isn’t surprising as that’s largely a more “pro” feature), so unless you actually need actual color in a light, I’d save the money and get the Bi-Color version as seen here, or the X200 if you wanted more punch and a few extra features like the V-Mount for power or the slim fresnel attachment.
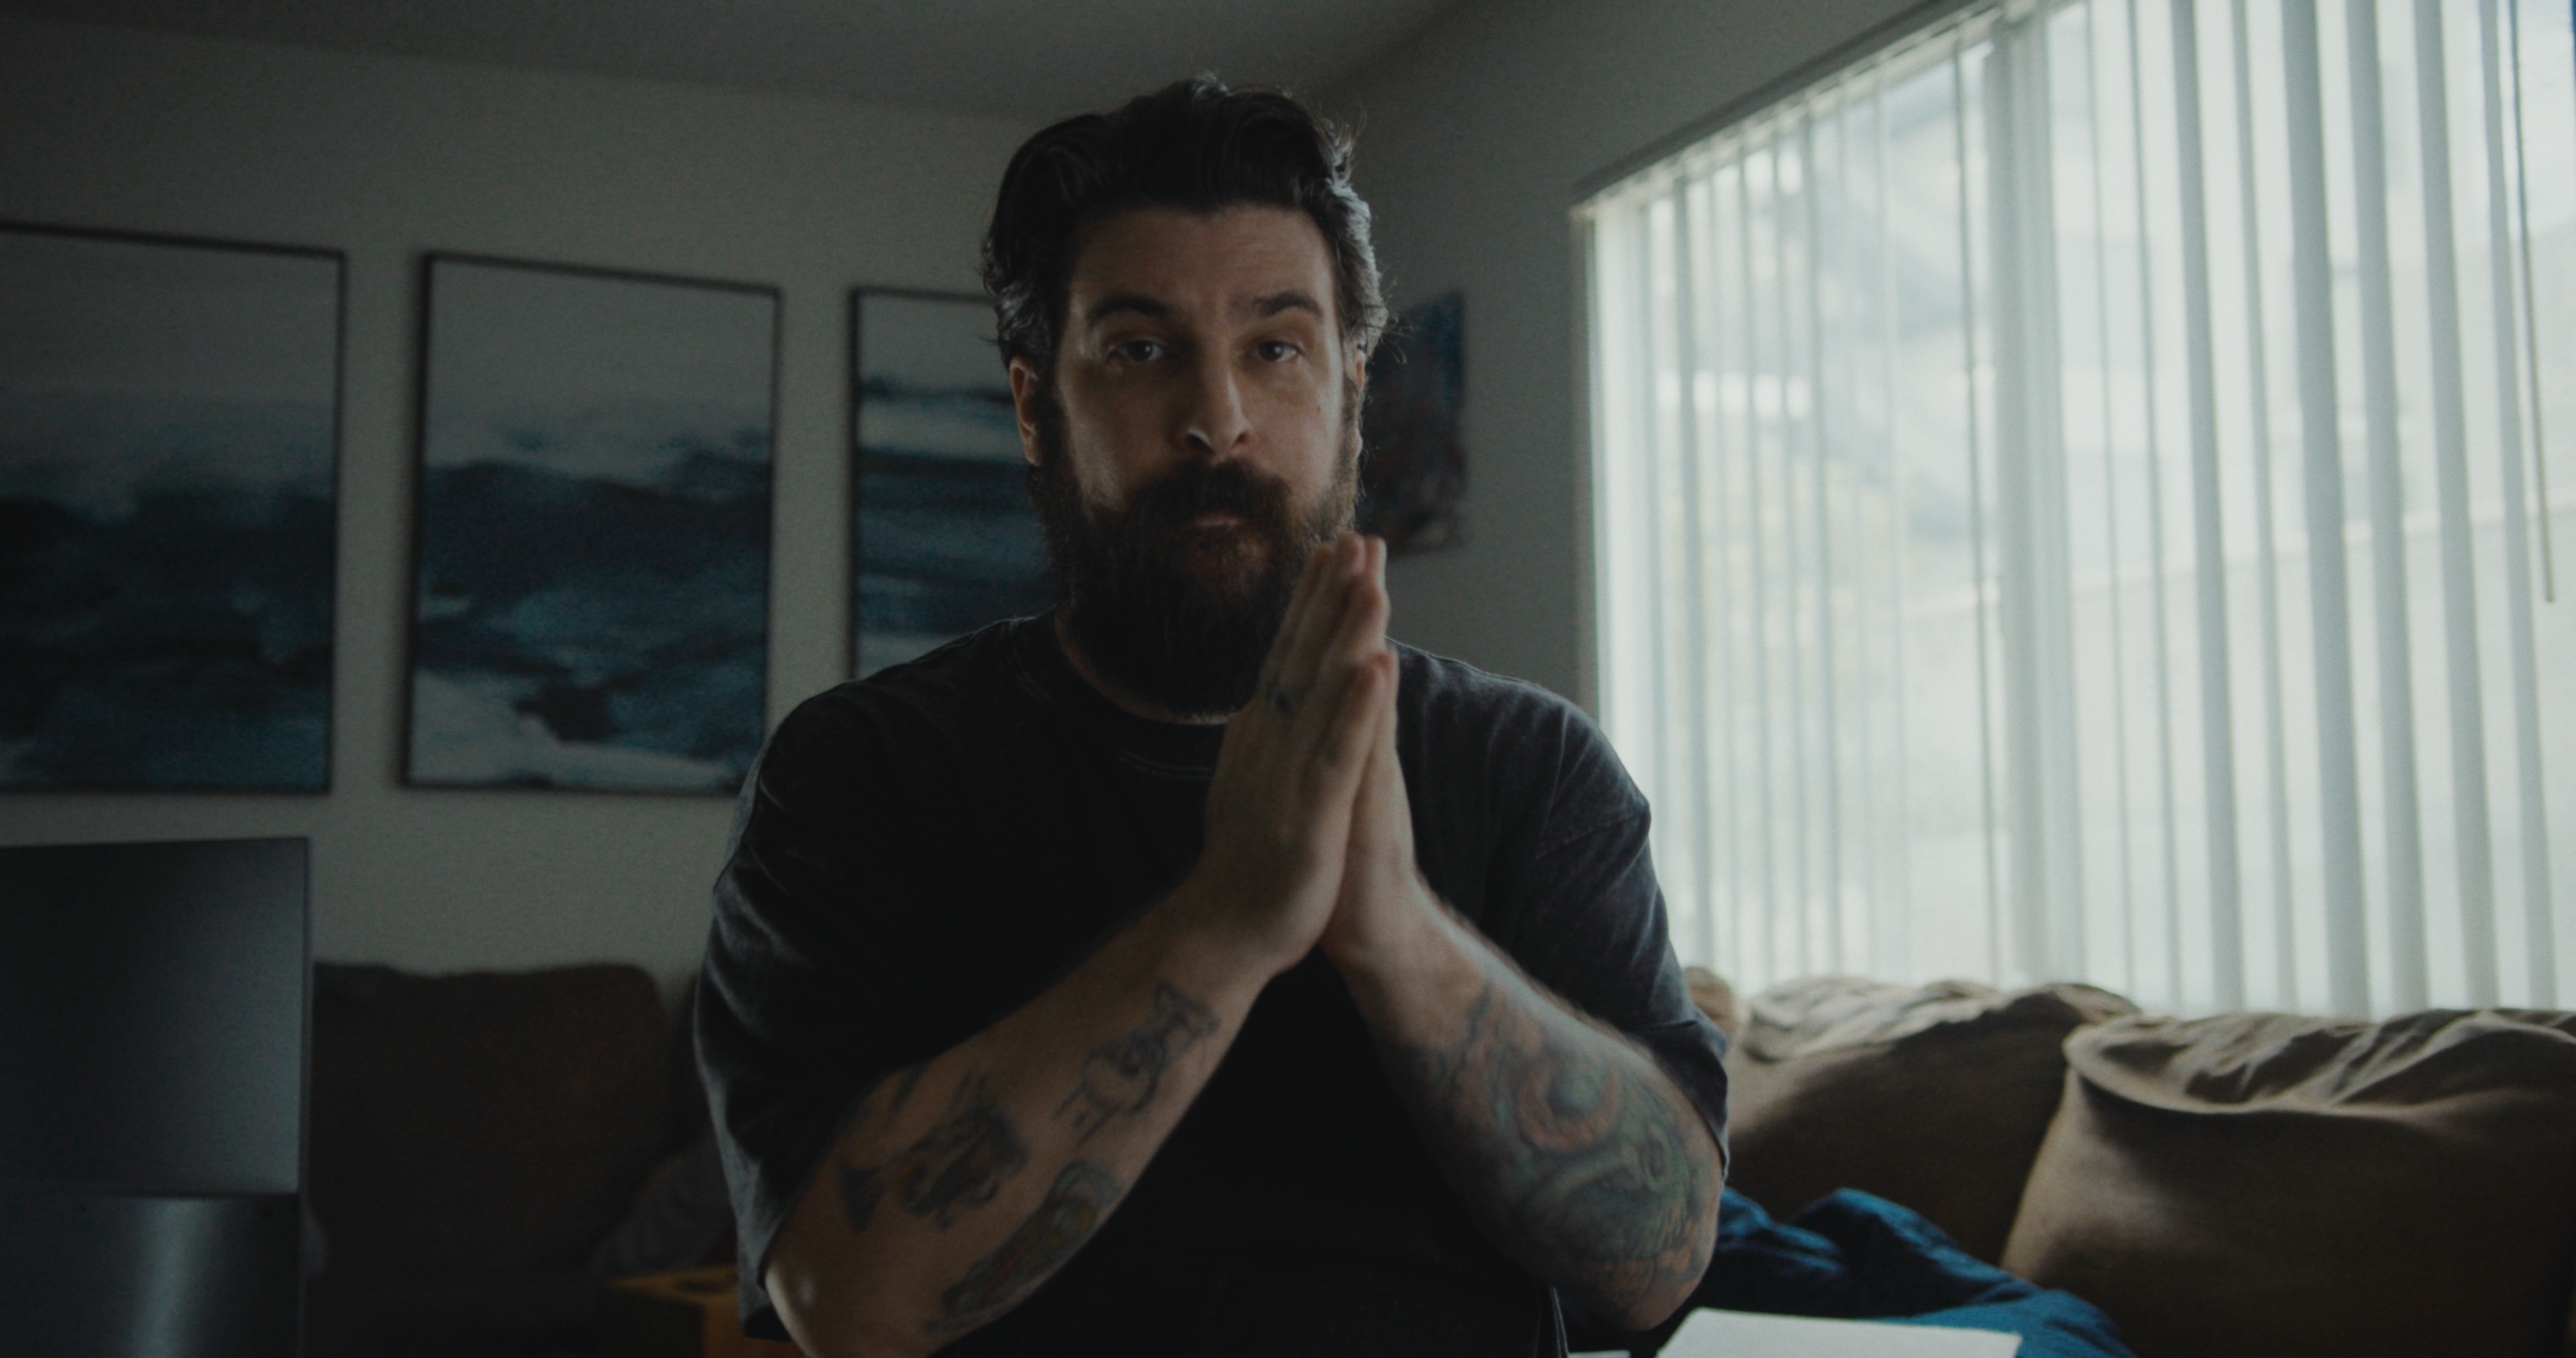
Now normally a light like this wouldn’t be considered for a key, but it actually is powerful enough that in certain situations it’s perfectly viable.
Setting it up here in a sort of traditional interview-type orientation, I’m getting nearly an f11 at 100% through the 5-in-1 running off the proprietary battery. Your other power options are DC power and PD off of a power bank, but your cable and type of battery in that case is crucial as under-specced cables/batteries will limit your max output. In any case, f11 is quite good and unless you’re having to overpower a really hot window should be plenty for that kind of work. It should also be noted that the 5-in-1 is a little sourcey, which may not be ideal, in which case potentially using the mini softbox as a double-break could be worth trying, as I did in my example, although without the reflector attachment we do lose some output: in this case about a stop and some change landing us at f5.6 and a half (all of these measurements are at ISO 800, 24fps by the way). Another thing to note is that with the included power brick you’ll only get about 30min of runtime at 100% so that’s something to think about. If your interview is running a couple hours as they often do and you need all 100%, the battery may not be the way to go, instead opting for DC power from the wall.
So what about the metrics? All this power output is for naught if the spectral output is poor.
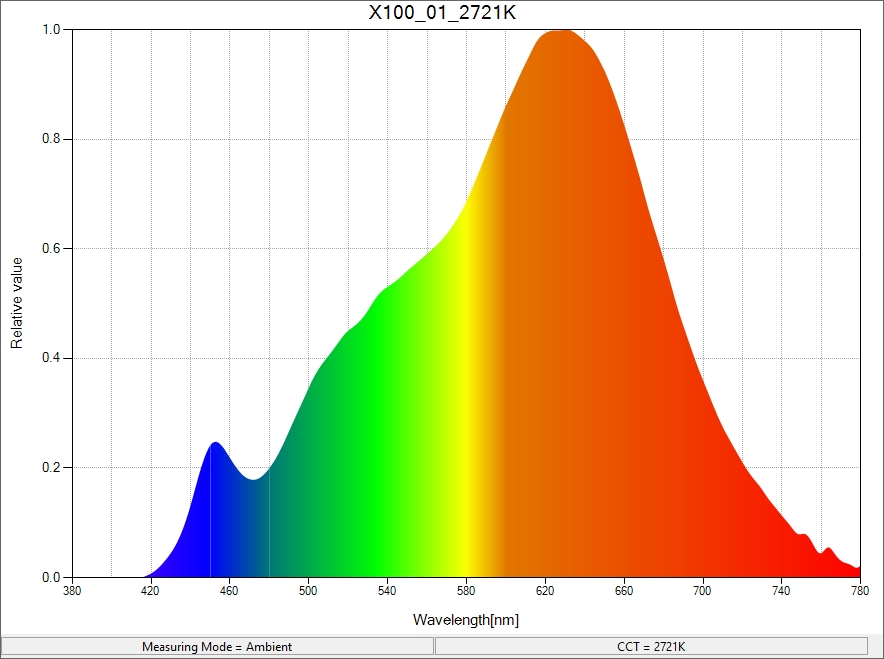
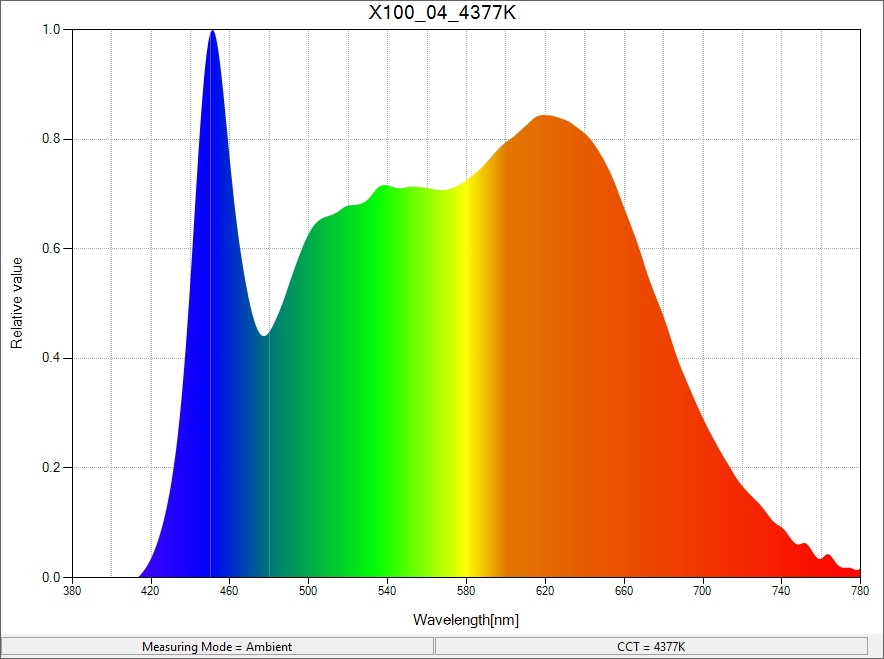
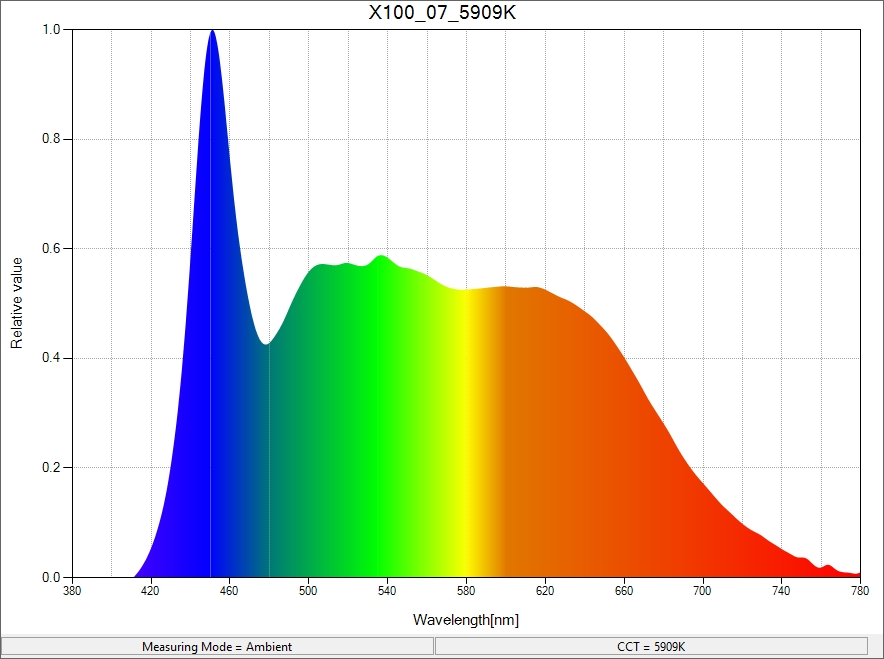
Well luckily for us, the X100 is putting out a very competent spectrum of light. It isn’t the best I’ve ever seen from this category of light, but we’re talking a few points difference here or there from perfect and I’d be more than happy to use it on a real set. One thing I did notice was that the actual WB could vary by a few hundred Kelvin from what you set on the unit and unfortunately this is common with almost every LED light and isn’t unique to this one, so this just reinforces my previous advice to either get a color meter or at least be sure to gut-check by eye to see if everything’s matching up appropriately. As this unit has a pretty standard range of 2700-6500K (stated, apparently more like 5800 at the top end), investing in a small basic gel pack could come in handy to get you the extra Kelvin you may need. Not too big of a deal, just something to keep in mind. I always carry the Lee Master Location Gel Pack with me on shoots to balance any lights I can’t control, like in an office setting, so that’s a non-factor for me.
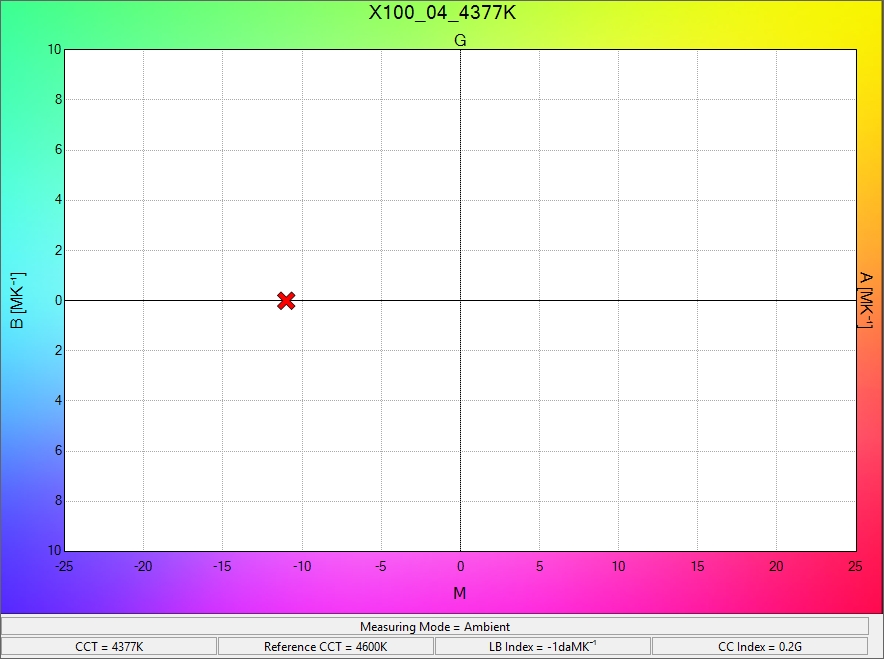
In any case, I did a small battery of tests at 2700K, 4600K, and 6500K at 100%, 50%, and 1% and these are my findings at a 5’ measurement distance:
| K DELTA | 100% | 50% | 1% |
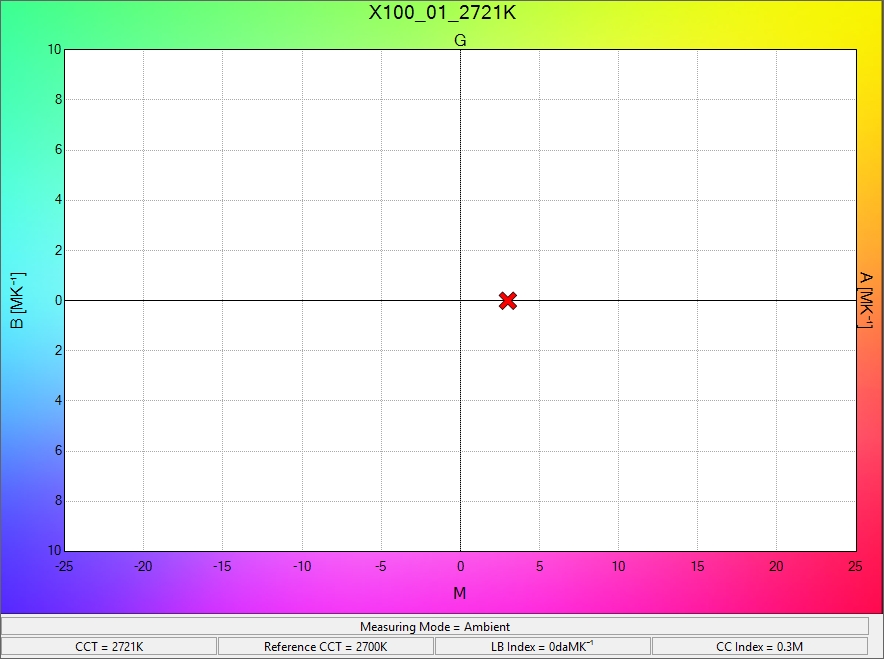
| 2700K | f16½ – 2721K | f16 – 2719K | ~f8 – 2692K |
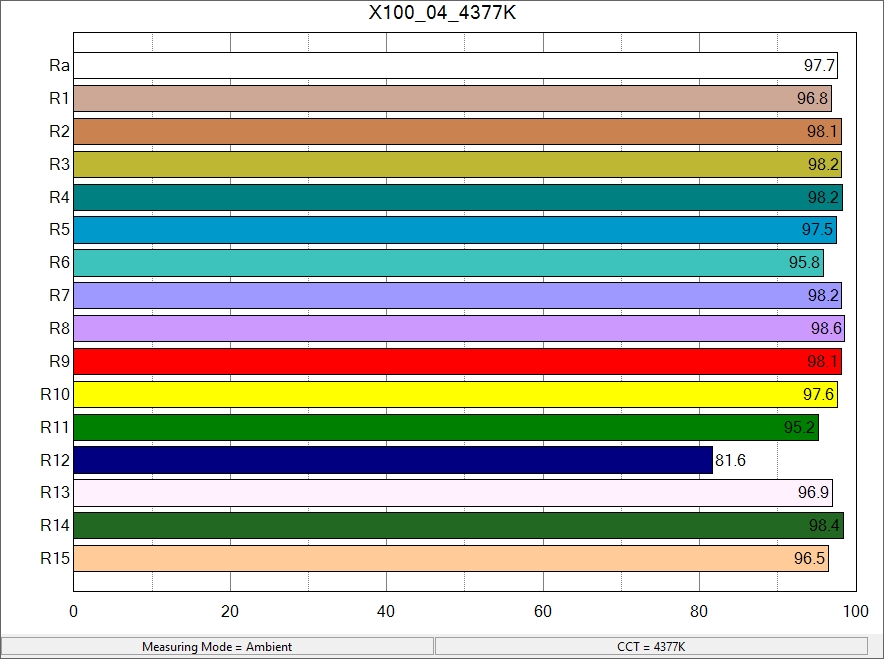
| 4600K | f22 – 4377K | f16½ – 4397K | f8½ – 4361K |
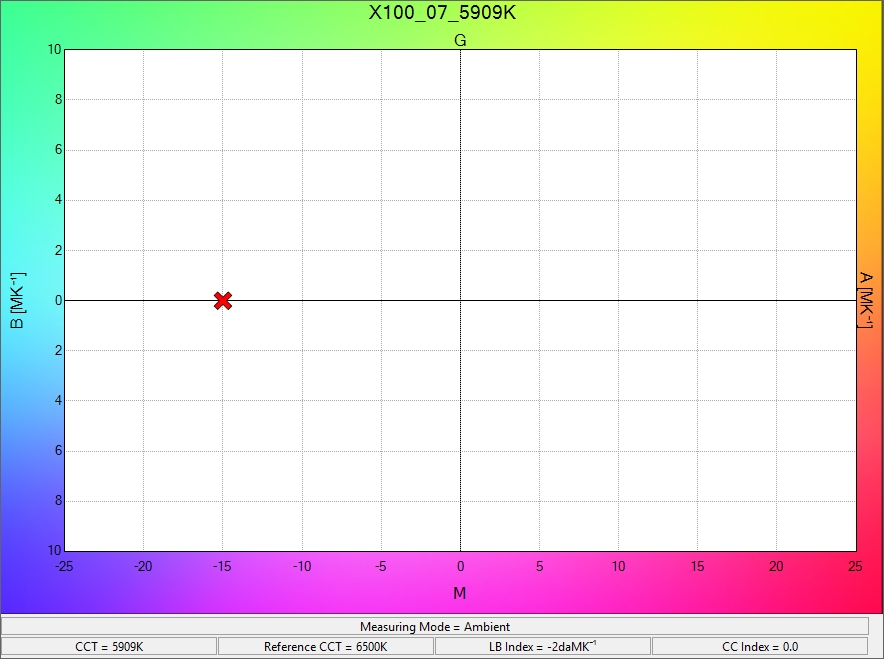
| 6500K | f22 – 5909K | f16½ – 5885K | f8 – 6133K |
Very interesting results up there at the top end, where at 1% the light actually got “more” accurate to the set number, but we can see that we’re not quite hitting that 6500K number we’d like to see but again that isn’t uncommon in budget fixtures so It’s not a huge ding against the X100, but is something to be aware of.
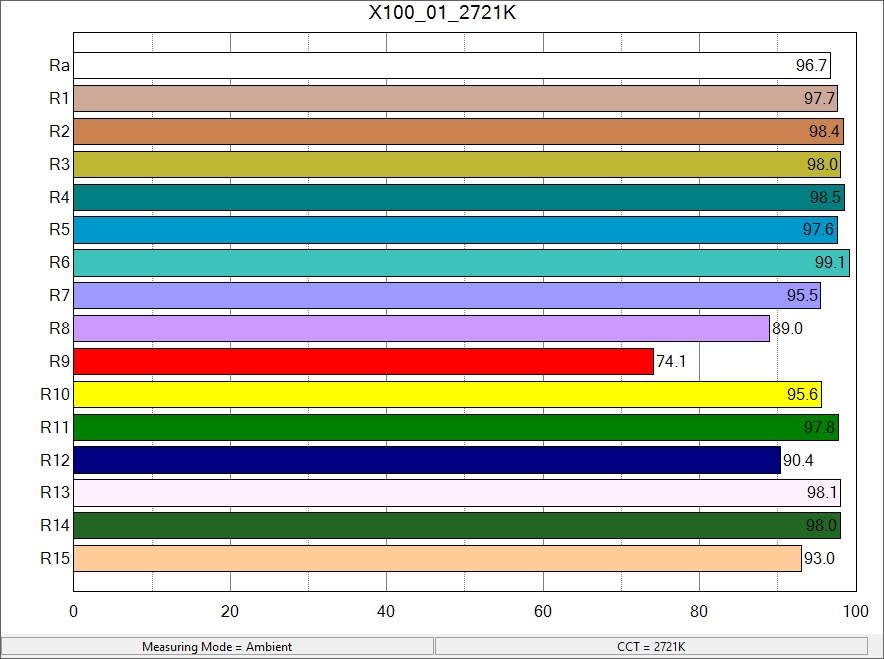
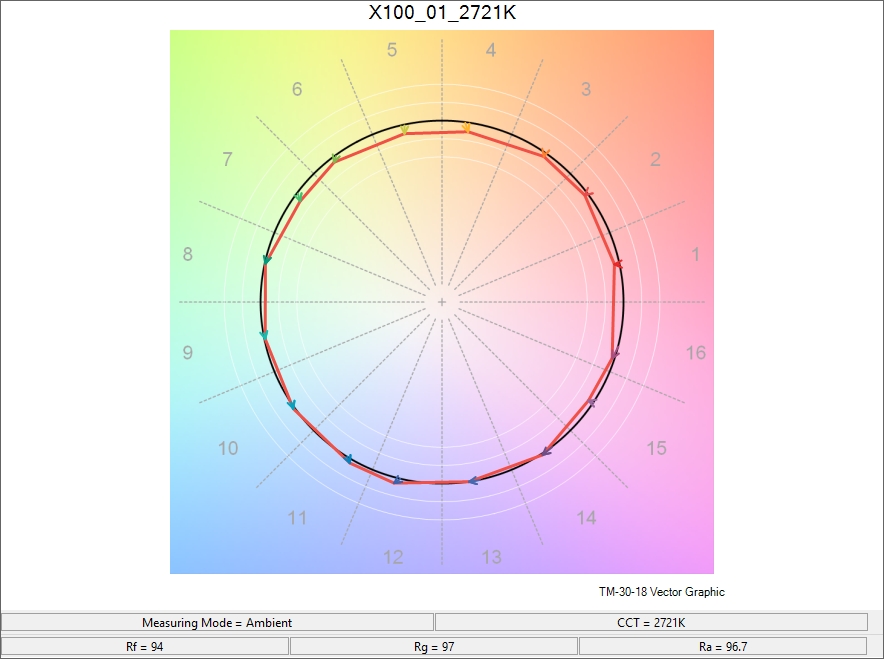
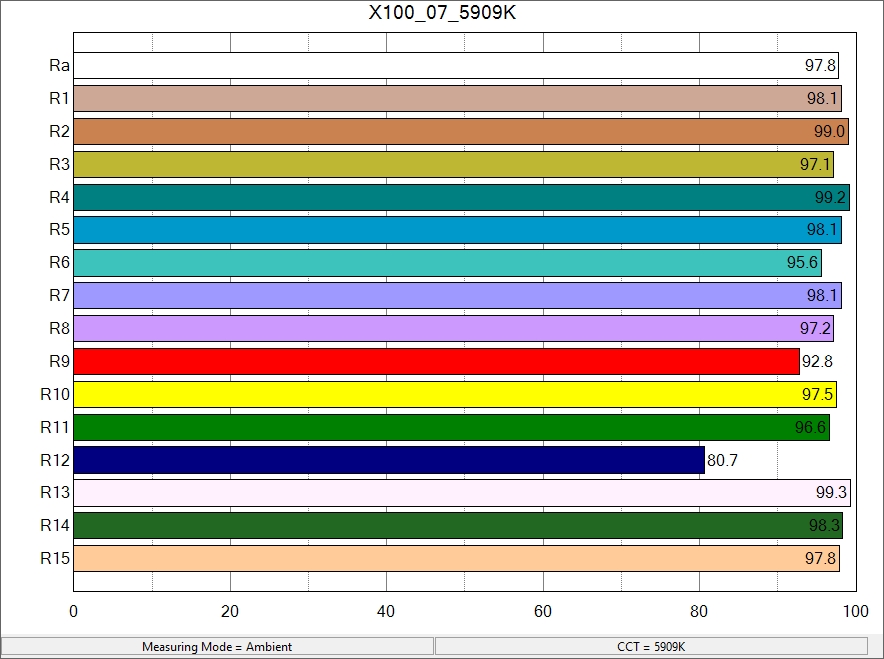
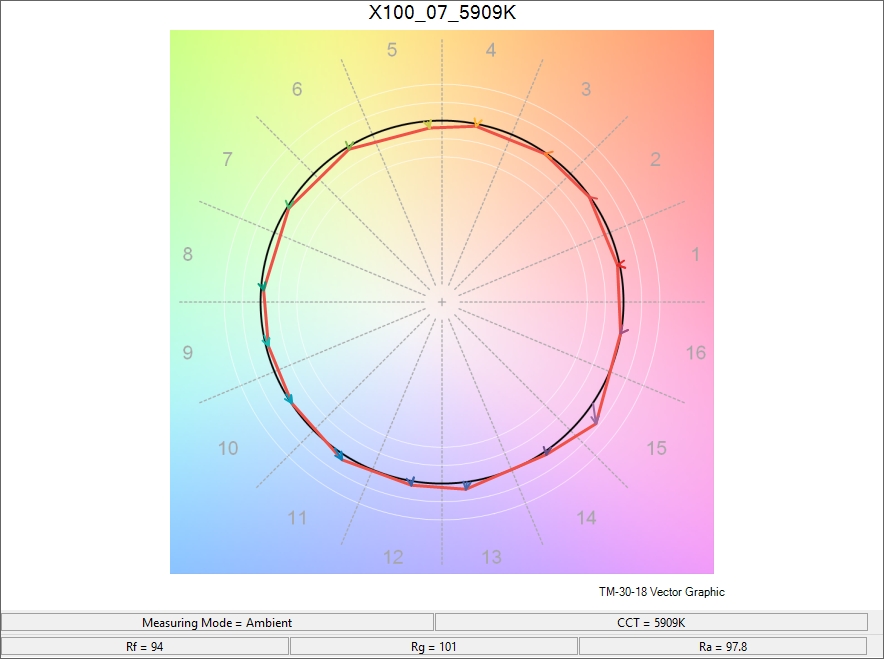
From there, here are the spectral findings (TM-30 is Rf/Rg):
| METRICS | 100% | 50% | 1% |
| 2700K | TLCI – 95
CRI – 96.7 TM30 – 94/97 |
TLCI – 96
CRI – 97 TM30 – 94/97 |
TLCI – 96
CRI – 97.3 TM30 – 93/98 |
| 4600K | TLCI – 98
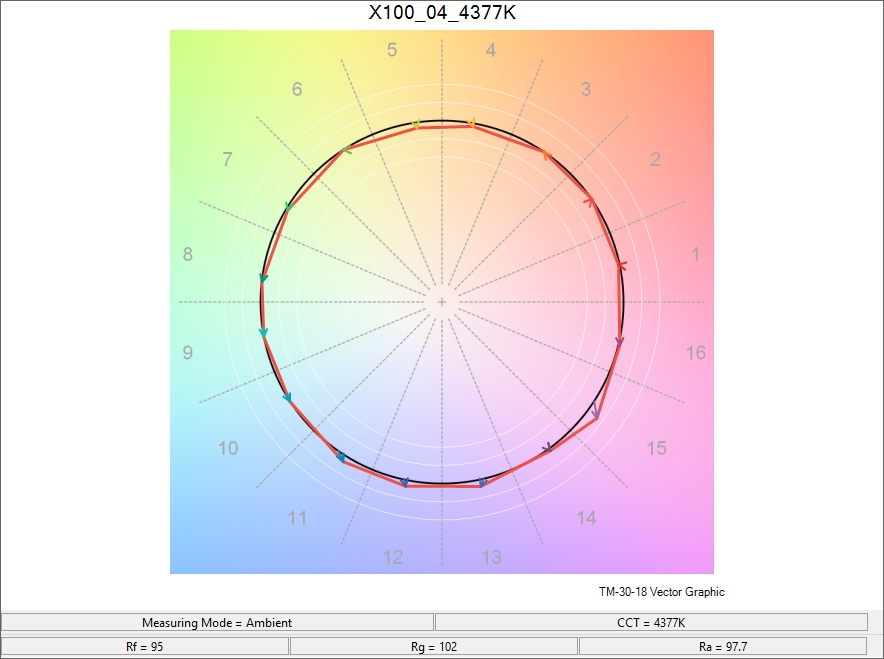
CRI – 97.7 TM30 – 95/102 |
TLCI – 98
CRI – 97.2 TM30 – 94/102 |
TLCI – 98
CRI – 95.9 TM30 – 93/101 |
| 6500K | TLCI – 99
CRI – 97.8 TM30 – 94/101 |
TLCI – 99
CRI – 97.9 TM30 – 94/101 |
TLCI – 99
CRI – 97 TM30 – 92/100 |
Pretty standard results there that I’m perfectly happy with. I did also note a small green shift on the low end, skewing more magenta in the middle and evening out at the top. Again, pretty standard. The 100% graphs are below but all the data has been added to my Light Comparitor page if you’d like to check it out.
2700K:
4600K:
6500K:
The App.
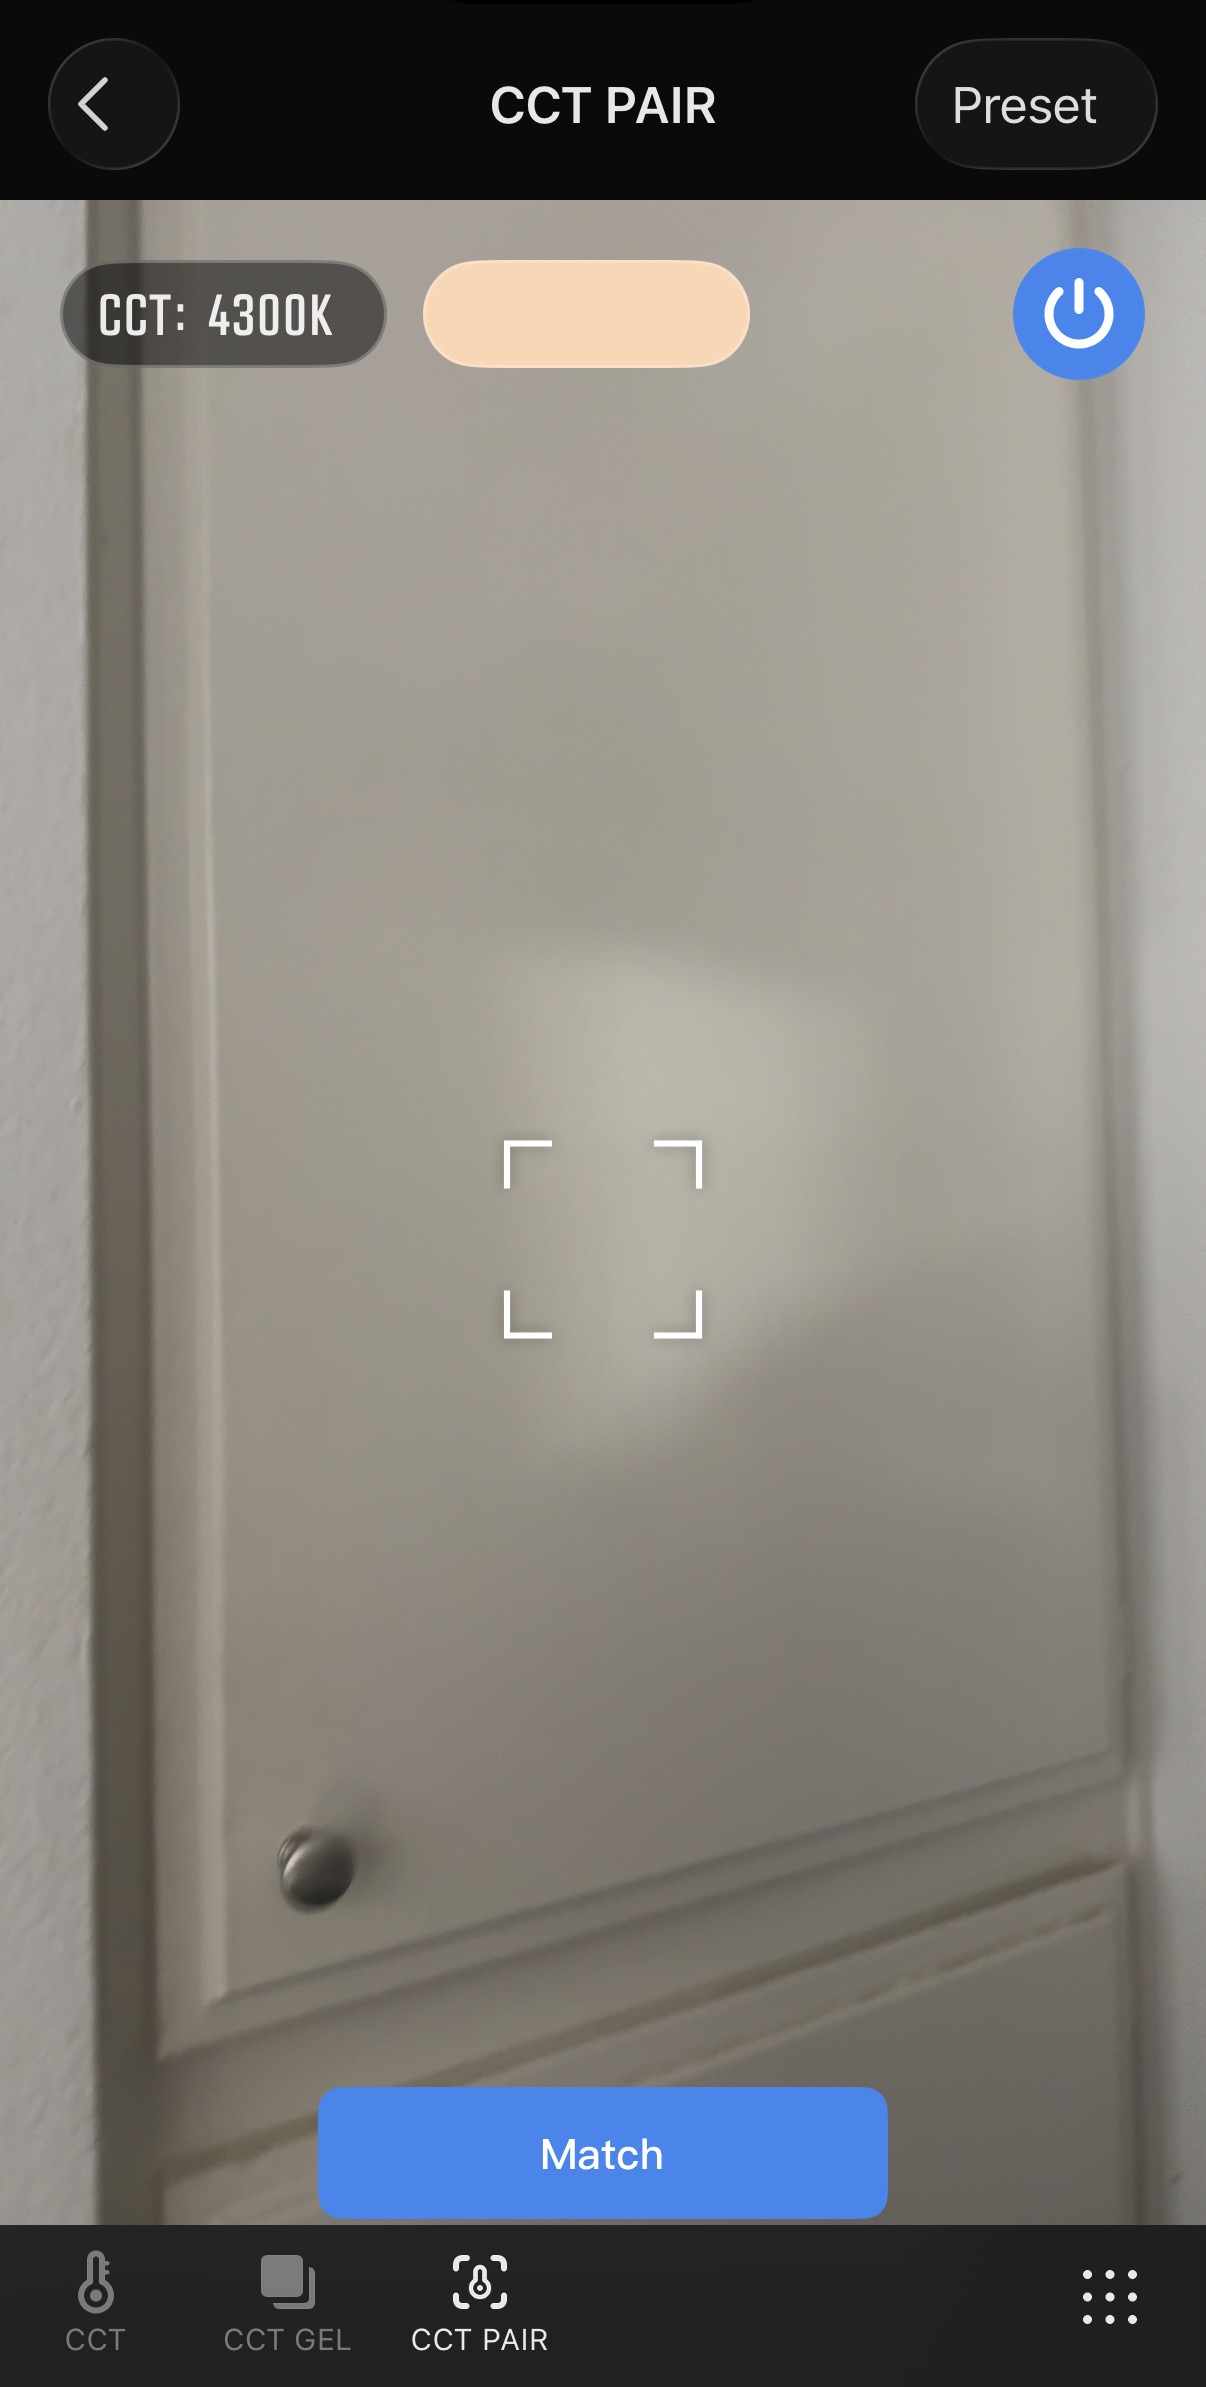
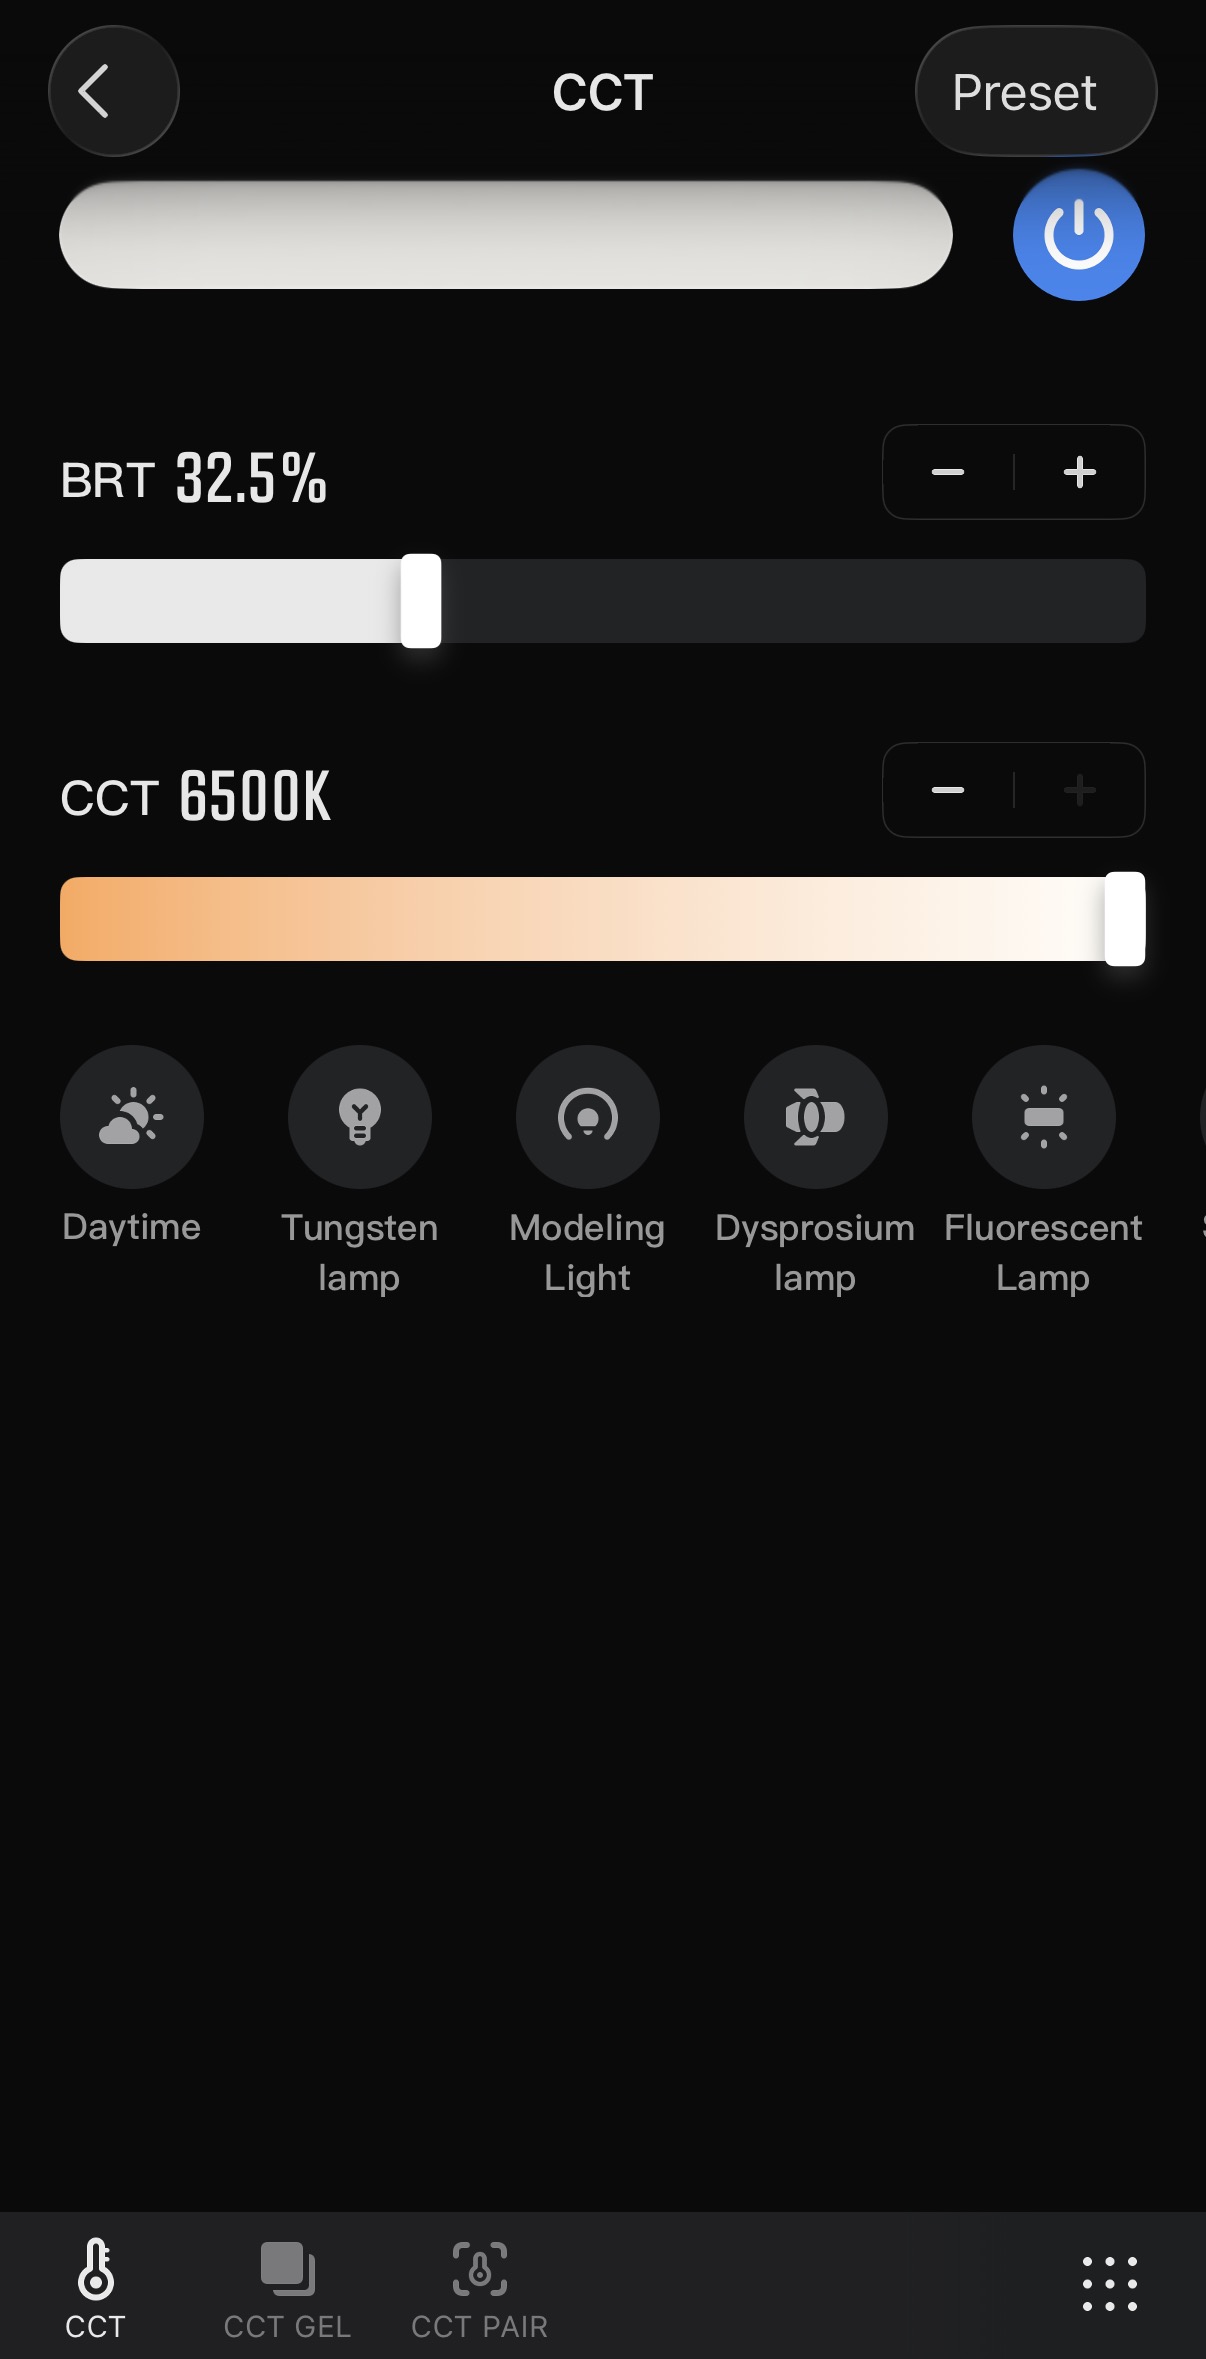
Unlike a few other more budget-conscious lights I’ve tested, the “ZY Vega” app found my X100 instantly and added it with no issues. As this is a simple Bi-Color lamp, the options are sparse (just CCT and Power) but there are CCT Gel and CCT Pair options, allowing you to adjust the lamp to mimic full, ¾ and ½ CTB or CTO combos, as well as match a light source with your phone’s camera, respectively. Now, CCT is never really “accurate” to real lights (for myriad reasons), which is where RGB fixtures can be really helpful with tint adjustments or even better, X/Y coordinates, to “pollute” the light “accurately”, but the CCT Pair does seem to get you relatively close to matching with an existing source, which is really handy. From there you can adjust the CCT to taste (you should definitely trust your eyes when doing this type of thing, assuming you don’t have a color meter to be sure). While it can be frustrating to have multiple apps for different light manufacturers, as opposed to a universal standard like DMX, I’d much rather my light have any app at all as opposed to none. Once the light is where you want it, usually rigged in a way that’s hard to get to, it’s nice to be able to adjust it from your seat or while metering or whatever without having to call out to someone else or make trips to-and-from the fixture. Two little things I’d love to see changed in an update are 1) whatever the popup in Chinese says, would be great to have in English as I don’t know if that means I’ve done something wrong and 2) I’d like it if the settings reflected what was capable of the light. For instance, when on a low-powered Battery source (like if it limits you to 25w) you can still “set” the light to things above 25% on the app, but the light limits itself to 25%. Same thing going under 1%, you can set the app to 0.5% but it just turns off.
Besides all that, what are the unique use cases for such a small light?
Obviously we’ve mentioned a hair or scratch light, which could be hidden and mounted nearly anywhere, or those aforementioned tight spaces, but what else can we use something like this for? Well, something that immediately comes to mind is a boomed or handheld source. Something that really broke my brain when looking at BTS photos from Fight Club was seeing a grip holding a Kino tube on a boom pole over Tyler Durden as he was on the moving walkway in the airport scene. “Of course!” I thought “There doesn’t need to be 60’ of tubes above the talent to cover the travel space, you can just walk with a single one! The camera doesn’t know the difference.” I used this trick on a spec ad for a competition, for instance, putting some bulbs in a paper lantern and walking with the talent outside at night as a mobile key. This would be a far better option as powering those in a portable way was… a unique challenge. Another great use case would be for photography! Digital sensors haven’t only benefited cinema cameras, stills cameras are far more capable at getting good exposures in near-pitch black situations, so even at 5% this could give your image some good shape in a really compact, mess-free package (plus running it that low will give you a few hours of runtime as opposed to a few minutes, which is nice). Another thought is, when you’re just shaping natural light with maybe a bounce card and some neg, something like this with the little softbox could be a great little eye light to put the cherry on top, and again you barely need any power for an eyelight so you’d get a decent amount of runtime off the battery brick or honestly any PD source at those levels. There’s also an umbrella slot in the Bowens mount adapter/reflector, so that’s an option if you’re trying to get a soft source in a small area. You could either shoot-through or reflect, depending on your needs.
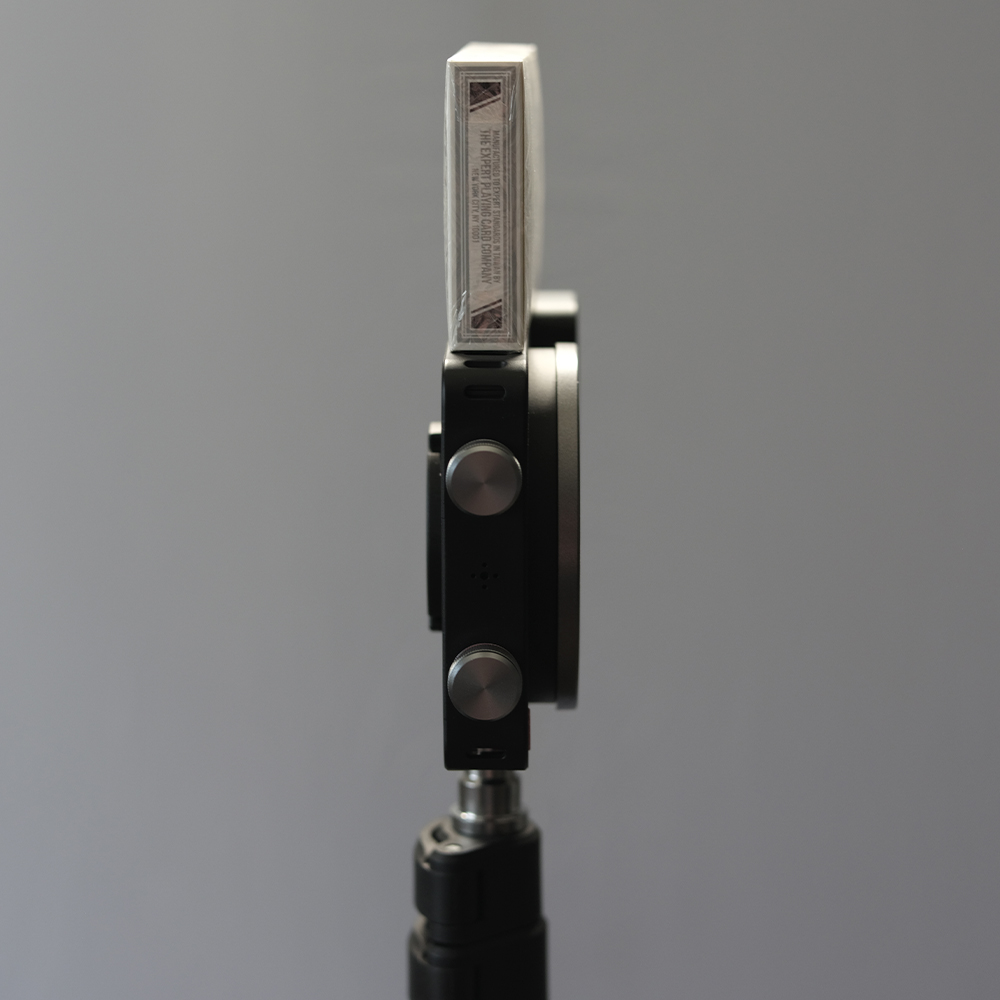
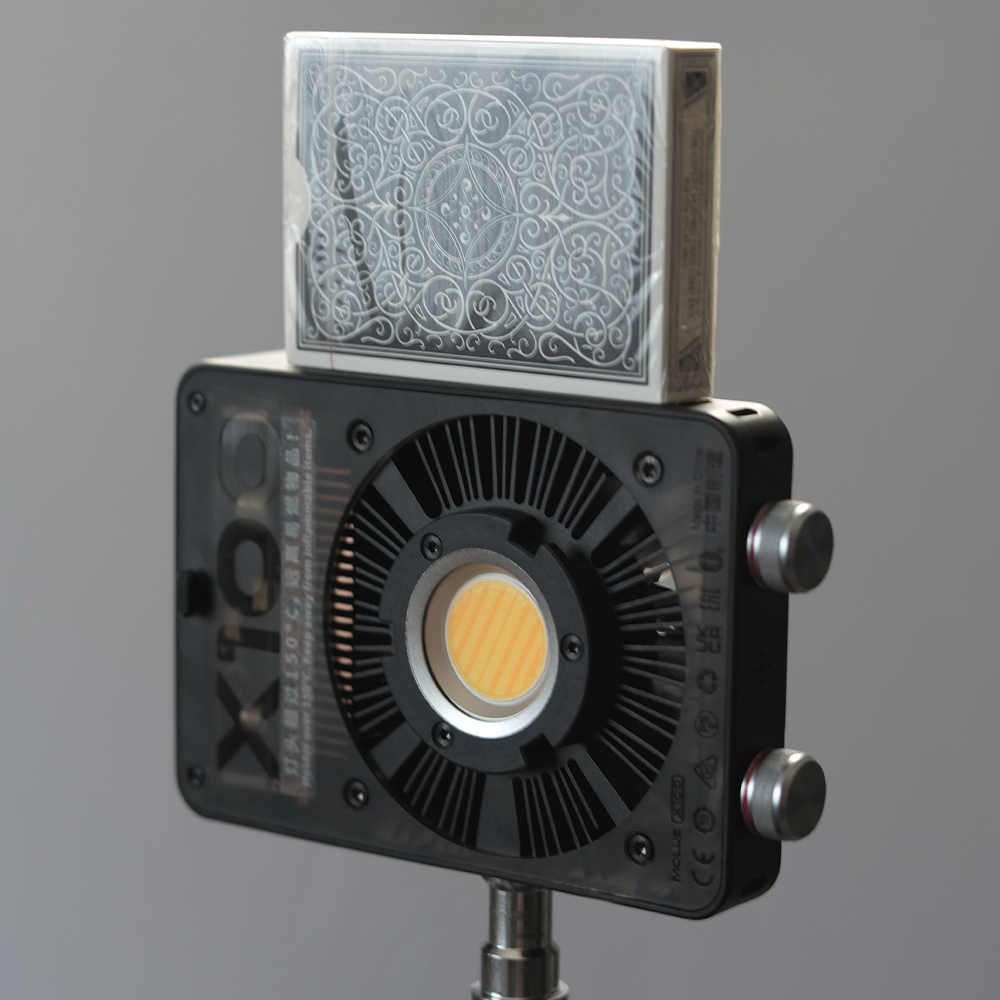
Overall, this is a great little light.
It feels like it was only a couple weeks ago where even a 60W LED had to be housed in a relatively large, Source 4-style body and now we’ve got this thing on the scene giving us a ton of punch in a package the size of a couple decks of playing cards. Incredible. Outside of the somewhat limited upper-end, I will definitely be bringing this with me on my doc shoots where space is always at a premium but image quality can’t suffer. A mobile key, a great accent light, outdoor low-light scenarios, I can think of a ton of places this can work for us. At $320 for the “Pro” package I got, containing the mini softbox, a reflector dish, the Bowens adapter/reflector dish combo (my preference overall as it gives you a tiltable neck), a battery, and DC power cable I say that’s right where it should be priced. The one light I was going to compare it to that I reviewed a year or so ago doesn’t even exist anymore, so it does seem that Zhiyun currently holds the market for tiny powerful lights like this. Comparably-powered units in this price range aren’t as small, so if space is at an absolute premium then this is a no-brainer. Any questions you may have, sound off in the comments below!
This review was supposed to be by way of a “real” shoot, which kept getting pushed, so for the sake of timeliness I went ahead and did a more traditional review here, but when that shoot finally gets done I’ll add that video here!