

Filmtools
Filmmakers go-to destination for pre-production, production & post production equipment!
Shop NowNew tools in Final Cut Pro 12.3

The big three editing apps (Final Cut Pro, Premiere, Resolve) all copy features from one another, sooner or later. Sometimes this doesn’t take long (FCP’s Voice Isolation was copied by Resolve, Resolve’s curves were copied by FCP and Premiere) while sometimes it takes over a decade (Premiere’s timeline now displays a ripple operation similar to the new FCP rather than the classic FCP).
Resolve’s Magic Mask inspired FCP’s (faster) Magnetic Mask and eventually Premiere’s Object Mask, and these similar features are very useful in all these apps. Auto Mask is, for now at least, only in FCP, and it’s stunningly good. It’s not tracking, and in many cases, it’s a better solution.
Instead of tracking an item, person, object or anything else through a shot, it simply recognizes people, or parts of people, parts of a scene, or even pets, live on every frame. This approach is remarkably resistant to occlusion, making it a practical way to perform selective color correction and lots more besides.
Though I covered a few ideas in my initial article on FCP 12.3, it’s worth a second look. Let’s start with an overview before getting into the weeds.
Auto Mask basics
There are two simple ways to begin.
- To use Auto Mask to control visibility of a clip, add the Auto Mask effect (in the Masks and Keying category) directly to a clip.
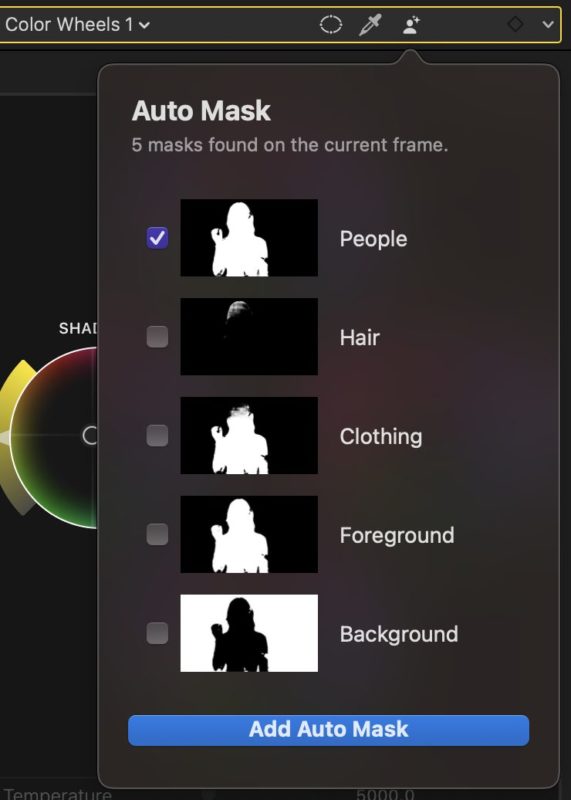
- To use Auto Mask to restrict an effect or color correction, click the new Auto Mask button that’s visible in every effect header. (Shape Masks and Color Masks are now also available here.)

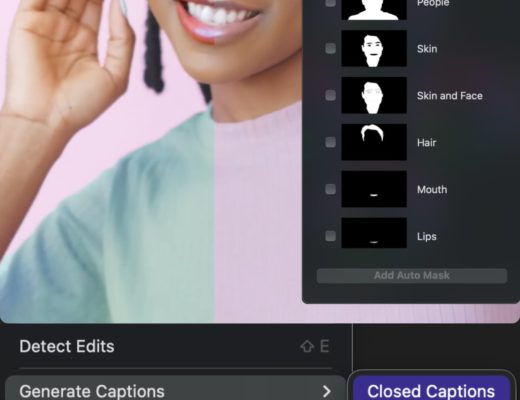
In the Auto Mask menu, you can now choose what to reveal — here’s the full list or 17 possible masks:
Person
- People
- Skin
- Skin and Face
- Hair
- Facial Hair
- Mouth
- Lips
- Teeth
- Eye
- Eyebrow
- Clothing
Scene
- Sky
- Foliage
- Foreground
- Background
Animals
- Dog
- Cat

Each Auto Mask can be added, subtracted or intersected with others, so you could select, for example, animals in the foreground that aren’t cats. Shrink/Expand, Erode and Blur can also be adjusted for fine-tuning.
When applied to color corrections, you’ll have the standard Inside/Outside switch, to let you easily access change both sides of the mask, but if you need to, you can invert a mask using the menu to the right of an effect header.

The Magnetic Mask, Color Mask and Shape Mask are all still here too, giving you many ways to amend an Auto Mask. This isn’t always necessary, but sometimes a shape won’t be recognized correctly on every frame, causing all or part of an object to flick in and out of the mask. Lips viewed from the side may not always be found, for example, and if a subject is wearing over-ear headphones, the gap between their head and the headphones may come and go.
Still, in most shots, Auto Mask is reliable, useful, and fast.
OK, basics sorted. Let’s get into some practical workflows for Auto Mask.
Correcting color parts of people
This is one of the most obvious uses, but also one of the most practical. While not all subjects are sensitive about their appearance in professional videos, many are, and Auto Mask opens up whole new categories of potential changes.
For example, a subject may not like how their lipstick shade appears on camera, and while changing it could have once been a tricky fix, it’s now pretty straightforward, because you can add Color Wheels, then apply an Auto Mask to Lips. Do check that the mask has been correctly detected on every frame, though.

Teeth can be easily whitened by a saturation reduction with exposure adjustments, and an Auto Mask set to Teeth. Eyebrows can be darkened or lightened too. Skin adjustments work well, so if a subject you film regularly wants to even out a changing tan across a series of videos, now you can. Clothing is straightforward to select, but as all clothes will be selected, you may need a further color, shape or magnetic mask to limit it.
Before you try to turn dark hair blonde, here’s the most important rule I learned during my time as a retoucher:
- Retouching, like any lie, is easier to get away with if it’s close to the truth.
To put it another way, smaller changes usually look better than big ones.
There’s more to color than you may have considered, and changing hair color is not a simple hue or brightness shift. Color Wheels are a good place to start, as you’ll probably want to carefully consider how to push the shadows, midtones, and highlights in saturation and hue. A hue rotation can sometimes be helpful here too. If you need finer control, Curves is what you need.
For a great demo of what’s possible, check out Jenn Jager’s video:
Censoring mouths
This is a nice one if you need to cover up a mouth during outbursts of profanity, and it’s easy. Blade around the section you need to cover, then find the Stylize category of video effects, add the Pixellate effect to that section, and apply an Auto Mask set to Mouth. Adjust the size of the blocks, then Expand and Blur the mask to suit. To handle audio, add the Test Oscillator audio effect to the bladed section to replace it with a suitable beep.
For a video version of this tip and several more ideas, check out Brad West’s video here:
Colorizing black and white videos
By applying different color corrections to different parts of a person, it’s possible to restore color to a black and white image, one part at a time. You could even achieve a similar effect using a color image as your starting point, but you’d probably want to use the Tint effect rather than color corrections to achieve that flat-color look.
Robin Kurz’s video covers many other tips alongside this one:
Sky Replacements, simple and advanced
The easy one here is a simply color correction. Add a Color Wheels or something else, tweak some settings, add an Auto Mask set to Sky. This can make a light sky deeper or more vibrant, but to truly replace the sky you’ll need to add your own new sky.
Robin covers most of this in the video just above, but if the shot’s moving, you’ll also need to track in the replacement shot and possibly fade out the edges. The Final Cut Bro, Dylan Bates, covers all this here:
Integrating titles with your scene
This common effect was already quick to create with Magnetic Mask, but Auto Mask makes it even easier. To follow along, you’ll need a tripod shot containing foreground and background elements like people.
- Duplicate the clip above itself by option-dragging, making sure the clip doesn’t move in time.
- Select the original background clip, then hide it by pressing V.
- Apply Auto Mask as an effect to the top clip, then choose Foreground, or another option that will retain your subject(s). Sky (inverted) would work if you want to add text over the sky in a drone shot. Check that the selection has clean edges throughout the clip, and if it needs the occasional tweak, add a magnetic, shape or color mask.
- Add a title (animated or still) between the two clips and position it in place.
- Select the original background clip, then reveal it by pressing V.
This technique is shown in both Brad West’s and Dylan Bates’s videos above.
Relighting foreground or background
We humans look to the light, and while a traditional tracked shape mask is probably the best way to simulate a light following a subject, if you need to darken a background or lighten a foreground, Auto Mask is a great way to create a subtle change.
This is easy to do — apply a Color Board, Color Wheels or Color Adjustments to a clip, then mask to Foreground or Background. You can also change exposure more selectively, so if a subject’s clothing or skin is a little darker than expected on camera, that’s easy to fix too.
Selective visual effects
If your project allows you to embrace a lo-fi aesthetic, you can go wild with Auto Mask, changing a person or everything around them. Try:
- Stylize > Halftone with an Auto Mask set to Person to make people into newsprint versions of themselves

- Comic Looks > Comic Ink with an Auto Mask applied to Hair to give someone comic book hair

- Tiling> Visual Echo with an Auto Mask set to Person, then inverted, to place the original person on top of their clones

- Tiling > Kaleidoscope (or any other filter that applies heavy changes) with an Auto Mask set to Person or Foreground to create a silhouette effect

- If you have access to third-party effects like FxFactory Pro, try limiting effects like God Rays to just backgrounds — this can look great too.

Note that effects which move the image around will still be bound to the original mask position, but if you want to try Handheld applied to a person, offsetting the shot within the outline of the original person, go for it.
What doesn’t work so well
Although it’s easy enough to change the color of skin, smoothing skin to decrease the appearance of wrinkles is less easy. Gaussian Blur is not the right tool for the job, and though turning it down from 100% is a good start, it’s too plastic and waxy: not what clear, smooth skin looks like. None of the built-in blurs in FCP quite tackle this problem correctly.
I’m working on a skin smoothing plug-in myself at the moment — ask me if you’re keen to try it out. Right now, the best recommendation I have is to use Pixelmator Pro’s Selective Clarity adjustment, turning the midtones down. Yes, this app works on video, but no, it doesn’t work as an FCP effect. You’ll need to export your clip, process it, export it, then bring it back above the original clip and apply an Auto Mask set to Skin.
The same caution applies to using any kind of blur on the background of a clip — it usually looks fake. To do this properly, we’d need to use a depth mask and apply blur selectively across the whole image, and I don’t think I’ve yet seen this done really well. Wide apertures on large sensors still have a place.

Also, though you can use Auto Mask as a replacement for a green screen, flickering can sometimes be an issue with the smaller masks, and around edges of larger ones. I’d like to see more control over temporal stability to make some trickier masks easier.
The only other issue is that though playback of Auto Mask is pretty good (not 100%) it can noticeably impact render times. Use ⌃R to render specific clips if you need full-speed playback.
Conclusion
Simply, Auto Mask makes it much easier to quickly isolate many parts of a shot without tracking them first. This makes it quicker to experiment with new kinds of shots, and helps you make changes that would have been too tedious, difficult or time-consuming to track before. It’s not the solution to every problem, but it’s useful enough that I’d expect to see it pop up in Resolve and Premiere soon enough. Grab the latest FCP 12.3 update and take a look.