

Filmtools
Filmmakers go-to destination for pre-production, production & post production equipment!
Shop NowDisconnected clips, keyframe easing, natural motion blur and additional transcription languages

After a bumpy release — Apple had some internal tech issues — Final Cut Pro 13 has arrived on the App Store. Though the 12.4 point release added support for the new iPhone 18 Pro cinematic mode a few weeks ago, this adds many more features, some of which are pretty important.
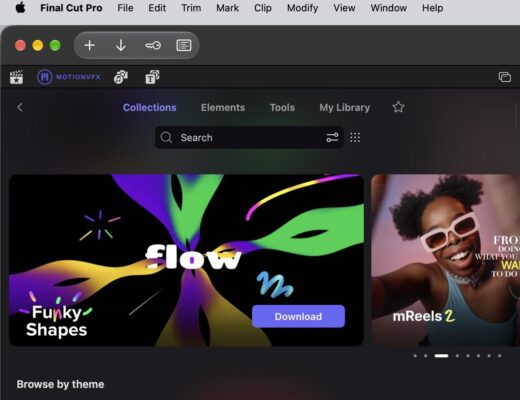
This article is a deep dive into the new features available for all users in Final Cut Pro, with a quick look at additions to Motion and Compressor as well. However, I won’t be talking about the MotionVFX tools and thousands of templates in this article, because we’ve got a whole separate article on that right here. If you haven’t subscribed yet, the MotionVFX goodies plus the new Content Hub video and photos may well be enough to swing your decision.
Either way, existing purchasers can read this article without jealousy, as all the other new features discussed in this article are included for all users, subscription or not. Let’s dive straight in.
Disconnected clips and more
The most obvious change in FCP 13 is that connected clips are more explicitly displayed. When you select a clip on the primary storyline, clips connected to it are shown with a dashed outline, indicating more clearly that they’ll move if the parent moves. (The same dashed outline is also applied to captions, which can be attached to any clip.)
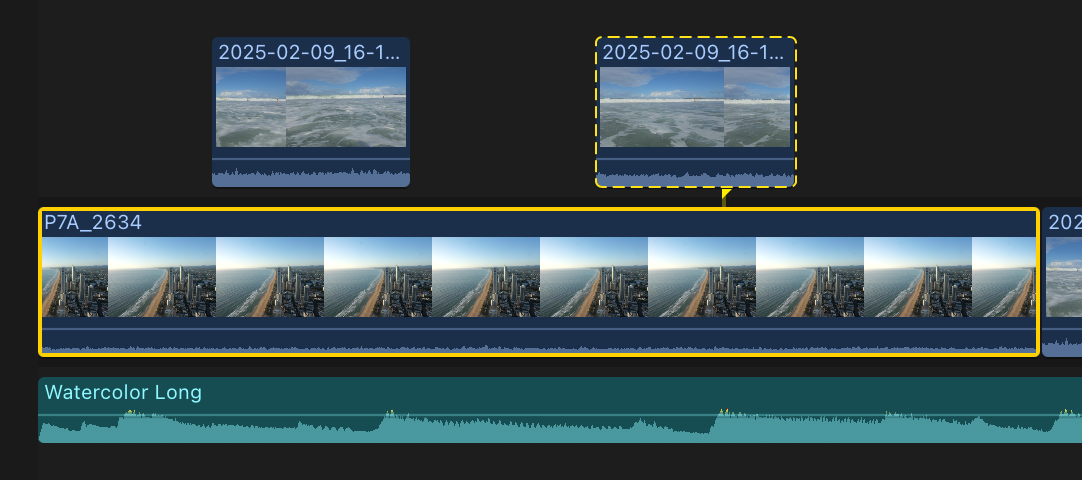
But… disconnected clips? Since that concept probably a little confusing (especially if you’re not a regular FCP user) let’s step back to take a broader look first.
Though the magnetic timeline seems at first to be all about the relationship between clips on the primary storyline, the more important feature is actually how clips above and below that primary storyline are connected to clips on that primary storyline. If the magnetic timeline was just about the primary, it’d just be like making ripple the default edit operation.
Connected clips prioritize local sync relationships, so that a b-roll connected clip can take over at a particular moment in a primary a-roll clip, no matter where that clip travels, a sound effect can stay positioned at the right time. This feature avoids manual clip management that you have to deal with in other NLEs, but it does create a little complexity.
For example, if you want to connect background music, you have to attach it to one of your primary storyline clips. You’ll then build several sync relationships along your timeline, between different parts of the music and different clips — and that’s not something you want to mess up.
In a traditional NLE, once you’ve edited most of a timeline to music, you’d stop using the ripple tool to avoid disaster, but in FCP, you’ve had to be more careful, because ripple is the default operation. You could:
- Attach the music to the first clip, and make sure you don’t touch it.
- Place the music on the primary storyline, and connect clips (and secondary storylines) to it.
Of course, not every connected clip is music, and sometimes you might also choose to reconnect a connected clip to a different clip (with a ⌘⌥-click) to let it move with that clip instead. You might also override connections with the ` (grave) key, or use the Position tool.
We now have another, simpler option: any connected clip can be permanently disconnected, with ⌥` (option-grave). Effectively, that clip is now connected to the timeline ruler, though there’s no visible connection. (If these shortcuts don’t work for you, switch to the new Default keyboard command set, then re-add your custom shortcuts.)
When you make edits that move the ruler (like trimming the start of a primary storyline clip) you may see these clips appear to move. They haven’t! You’re still rippling, and the clips on the primary storyline have moved instead.
So yes, for those who don’t want FCP to ever move anything, switch to the Position tool, disconnect all your clips, and you’ll be set. Disconnecting a clip is also a great way to deal with music tracks, and with any clips that need to retain a fixed position in time. It’s a fully manual mode that’s ideal for specific kinds of timeline surgery. If you ever have to locate a clip at an exact position in the timeline — and make sure it never moves — it’s a good solution for that too.
Will editors use it? Yes, but not all the time. In most situations, in most jobs, I don’t need to mess with overrides or moving connections; the magnetic timeline works really well. But if you’re an editor who hated FCP’s connection system, you can now simply turn it off.
Keyframe easing
As the co-creator of Keyframe Toolbox, a tool that brings full keyframe graphs to Final Cut Pro, I was personally a little apprehensive — have we finally been Sherlocked? As it turns out, keyframe easing is a welcome addition to FCP, but it’s far from a fully-featured graph editor.
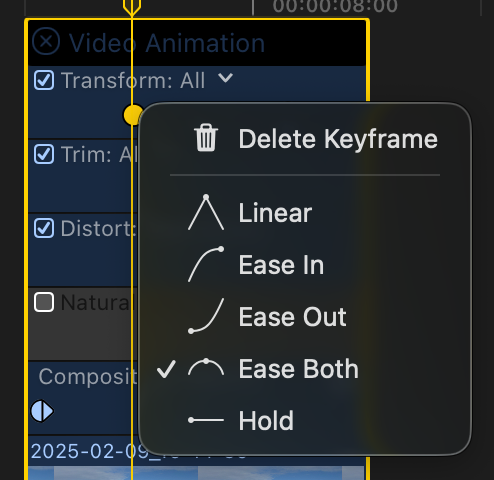
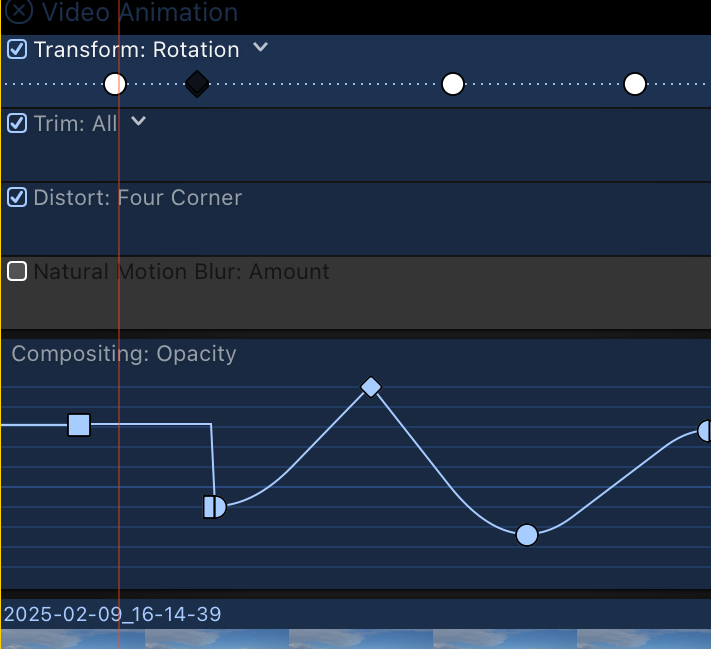
In the Video Animation pane (⌃V on any timeline clip) you can now right-click on a keyframe to control its easing, choosing from Linear, Ease In, Ease Out, Ease Both and Hold. That’s a big improvement over simple Linear-only, but I’d still really love to see keyframe graphs for all individual properties. It’s a real shame that the Opacity graph does show a graph, but I can’t access a similar graph for a Crop Left or Rotation.
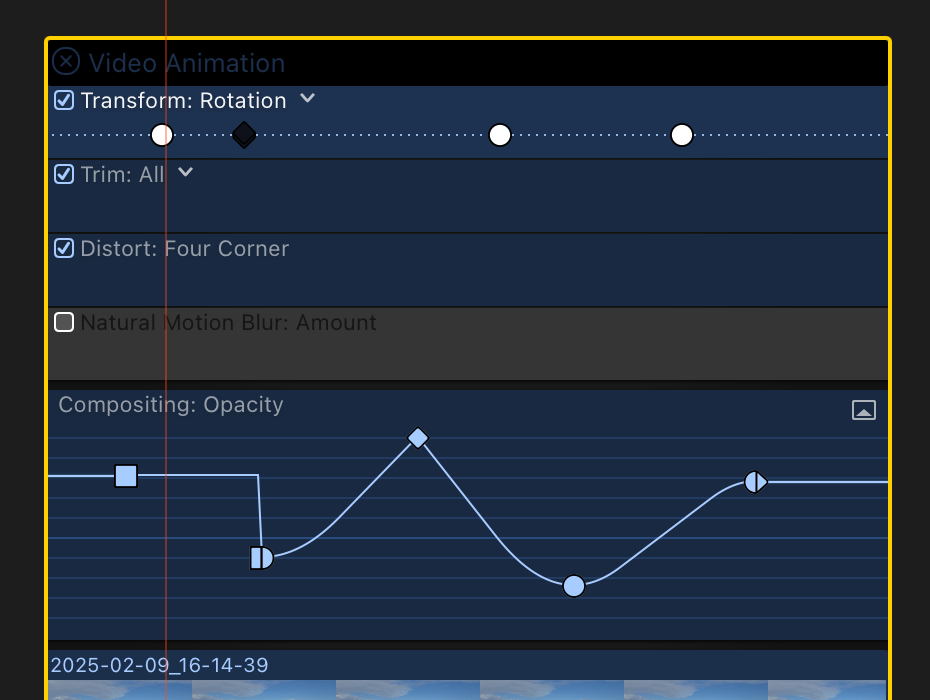
It is possible to see a graph for some controls on some effects — Amount on the Gaussian Blur, for example — but this is far from universal.
On the upside, you can now control Transform keyframes well in the Viewer, with separate controls for smoothing the path and the speed. That’s helpful, but since not all animation involves movement, it’s not quite enough.
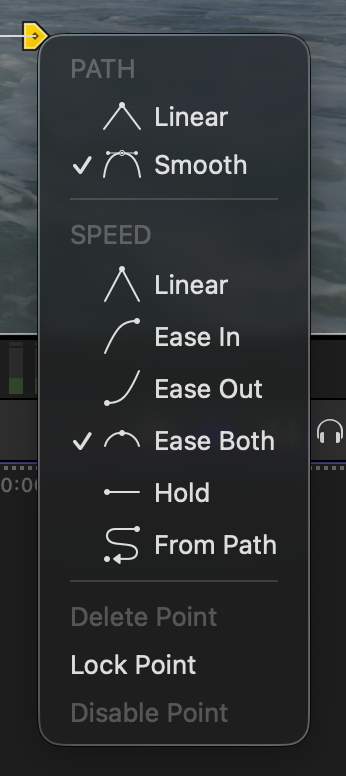
I’d also like to see these easing controls in the menu next to each property in the Inspector; right now, the only place you’ll find them is for Position in the Viewer, and the Video Animation panel for everything else.
Keyframe easing is definitely a big step up, and it adds much-needed control over how parameters change over time, but if you (like me) want more than it provides, I have a product you may be interested in. (Yes, full disclosure, I profit from sales.)
Natural Motion Blur
Choppy motion is inevitable when you find yourself outside on a sunny day without neutral density filters. It happens constantly on phones, but also on action cameras and with many professional cameras too. ISO settings have limits, aperture controls depth of field as well as light (and is often fixed) and if you crank up the shutter speed to control exposure, your clips will feel like a fight scene.
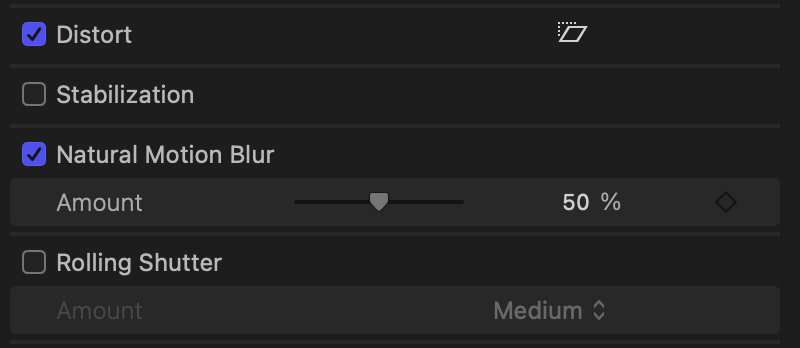
Now, on any video clip (not titles or motion graphics) you’ll see a new section in the Inspector: Natural Motion Blur. Like Rolling Shutter just below, a simple checkbox turns it on, though you’ll find an Amount slider rather than a menu with preset choices.

This feature doesn’t take too long to process, and it can help. I have seen a few artifacts and skipped frames, so it’s not perfect, but in a moving image, it’s certainly an improvement over not using it at all. Of course, if using an ND filter is possible, do that instead.
Transcription in additional languages
Transcribe to Captions, Transcribe to Subtitles, and Filter by Transcript now support a much wider range of languages: Cantonese, Mandarin Chinese, French, German, Italian, Japanese, Korean, Portuguese, and Spanish. You’ll also see these language choices in Import settings.
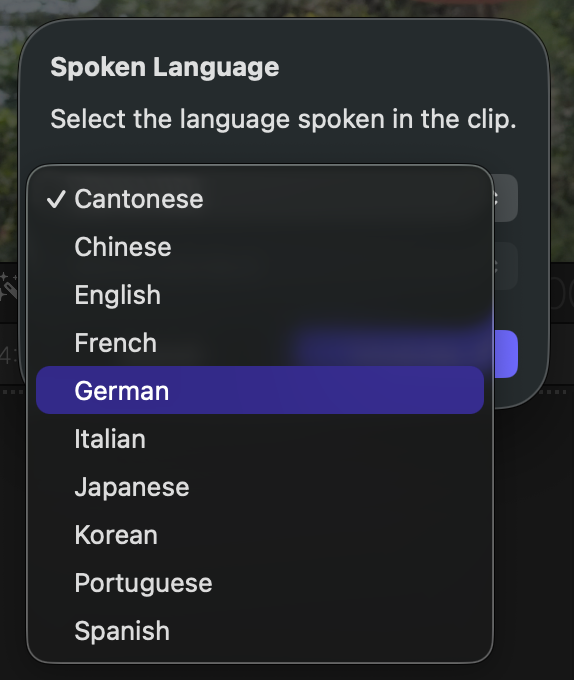
Within many of these languages you’ll find additional local regions, so if you choose French, you can specify Belgium, Canada, France or Switzerland. German includes Austria, Germany or Switzerland, and English now includes a wide selection of accents: Australia, Canada, India, Ireland, New Zealand, Singapore, South Africa, United Kingdom and United States.
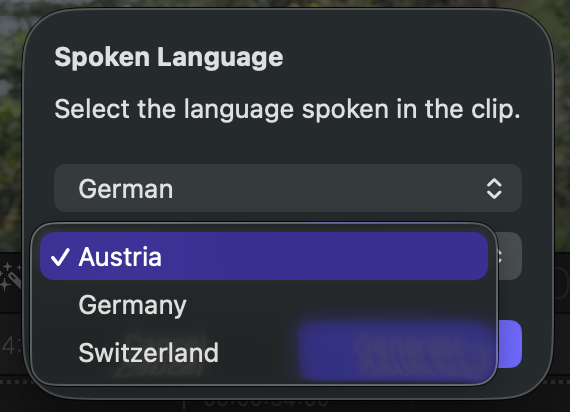
With a voice-over I recorded myself, I found only minor timing differences between 12.4’s English and 13’s English (Australian). Testing a German-language source, Apple’s transcription produced very similar results to Parakeet in MacWhisper, even down to the word “gesundheitsschädliche”.
As a native English speaker with very limited Japanese skills, I can’t be the best judge of how well FCP is doing on its transcription. However, FCP 13 was able to transcribe the longest phrase I can still say (but not write) accurately: “動物園に行きましょうか ?”

For most of the world that doesn’t edit in English, additional language support is incredibly welcome, and it’s just a shame it took a few months to arrive. FCP 13 doesn’t change the situation regarding text-based editing, though: you can only search a transcript, not see it directly. If you want to see transcripts in FCP, yes, I co-created an app for that too (ScriptStar) but many other apps have appeared if you want a more word-processor–like editing experience.
Edit in Pixelmator Pro
Pixelmator Pro still images are now much easier to work with in an FCP timeline. You can import Pixelmator Pro files directly into FCP, add them to timelines, and then right-click them to edit them directly. There’s also a button labeled “Edit in Pixelmator Pro” at the bottom of the Inspector. Either way, note that this is separate from exporting a still frame to Pixelmator Pro, which is still possible from the Share menu.
In Pixelmator Pro itself, press ⌘S or pressing the Save to Final Cut Pro button in the top right corner sends changes straight back to the FCP timeline, which instantly updates.
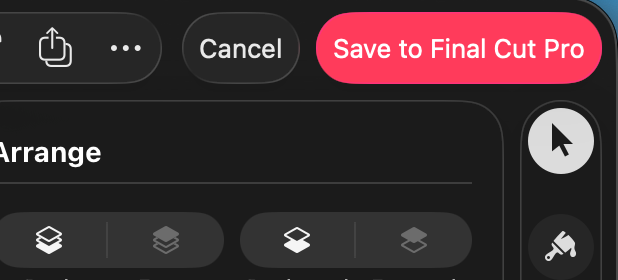
This could really help workflows that involve changes to slides and other complex images, since it’s now easy to add layers to a format that’s a first-class citizen in FCP. (Photoshop files with layers could be imported, but that workflow had a few limitations.)
I’m working on a slide-heavy project at the moment, and while it’s making use of Motion templates to include animation in these slides, I think I might choose to use Pixelmator Pro for some similar jobs in the future.
A new command-line tool
The new “fcptool”, hidden inside the app package, lets command-line users (and LLMs, and developers) perform library-level operations: copying and moving events, exporting, validating, and so on. Automation of FCP has been possible with CommandPost, SpliceKit and other tools for some time, and I’d expect to see more of this in the future.
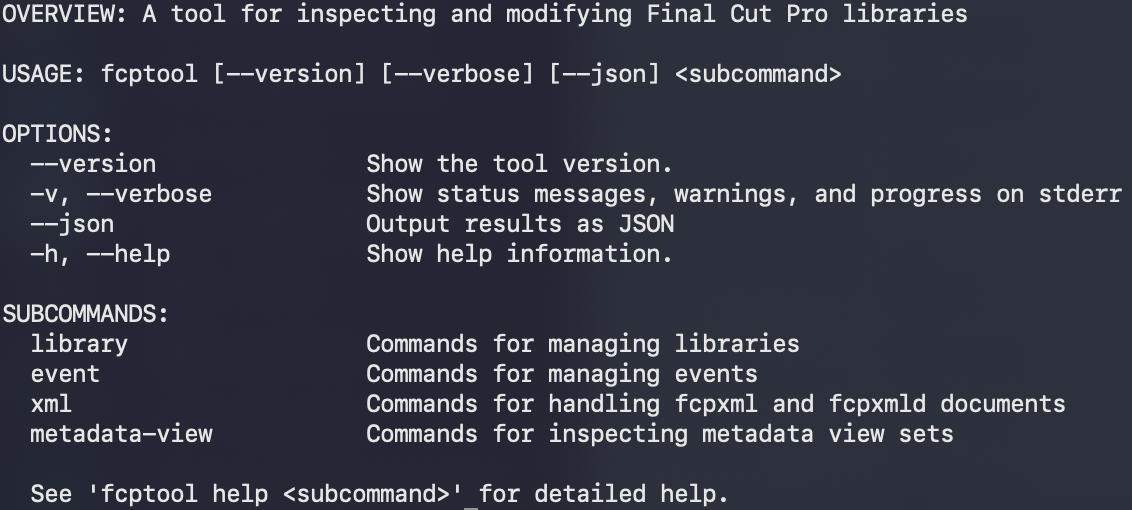
DaVinci Resolve chose to include an MCP server to make it easy to connect your own AI services, and Adobe have built in an AI Assistant — let’s see what else Apple do next.
Viewer panning when zoomed in
When working with the Viewer, you can now zoom in with two fingers on a trackpad (or a touch-screen MacBook Pro, or with Sidecar on an iPad) and pan across it with swipe gestures rather than using the small zoom control. Standard zooming controls still work of course, and once zoomed in, you can also use the mouse to move around by clicking and dragging. On a Magic Mouse, swiping will also move you around, but scrolling on third-party mice probably won’t.
Cinematic mode updates
This feature was included in 12.4, but it flew under the radar because most people can’t make use of it yet. However, if you have an iPhone 18 Pro, 18 Pro Max or even a new iPhone Duo, most clips will now show a new Cinematic option in the Inspector. The major advantage here is that it can work with any clip, while the older cinematic mode had to be recorded in a particular mode. This means it works with Log clips shot in Final Cut Camera, for example.

Note that you won’t always see this option; if a person can’t be detected then it may not be present. It’s also still not perfect, blurring out the edges of people’s hair that should have been kept sharp. If you want this look, you’ll still get best results from a camera that can capture a shallow depth-of-field natively, but it’s good to see this feature improve.
You’ll still have to use an iPhone 18 Pro or Pro Max to take advantage of this feature, but being able to use it with Log is a big step up. This feature is also supported by…
Compressor 6.0
Cinematic mode can be rendered into clips if you’re running macOS 27 (Golden Gate). This could be helpful for batch processing, though I suspect most users will prefer to do this in the edit.
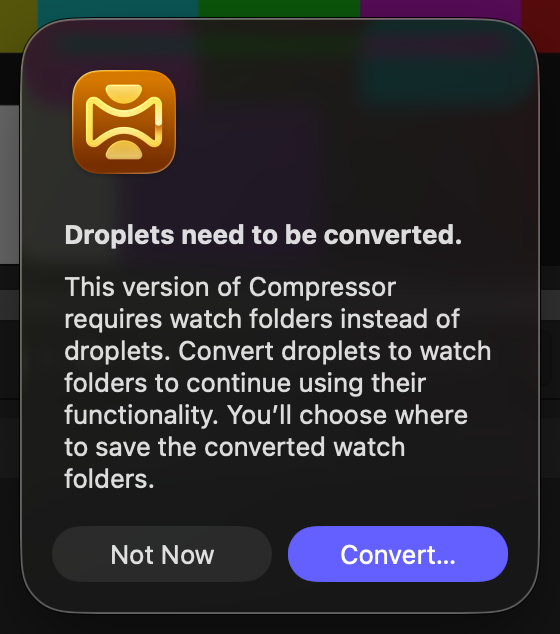
A more consequential change is that droplets are no longer supported, and existing droplets on your system will be replaced by Watch Folders on first launch. Droplets have been around for a long time, and I can only imagine there are potential security issues with modern systems.
Motion 7.0
This time around, Motion gets a few tricks from FCP, plus some new ones of its own. Like FCP, you can edit a still image directly in Pixelmator Pro (handy) and you can control Cinematic mode effects on iPhone 18 Pro or iPhone Duo clips — if you’re running macOS 27. If you’re a MotionVFX subscriber, you’ll also be able to access the tools (like mSurface) here.

There’s also a handy new filter, Displacement, in the Distortion category, with some nice tricks. It’s got a few modes (Waves, Magnify, Heat, Custom) each with their own settings, but the Magnify is great if you want to zoom in on a circular part of the screen with refraction and other liquid glass–style distortion effects. I can see this becoming a popular way to focus on part of the screen, and while we’ve had a few different ways to do this (yes, I made one of those too!) this is the prettiest.
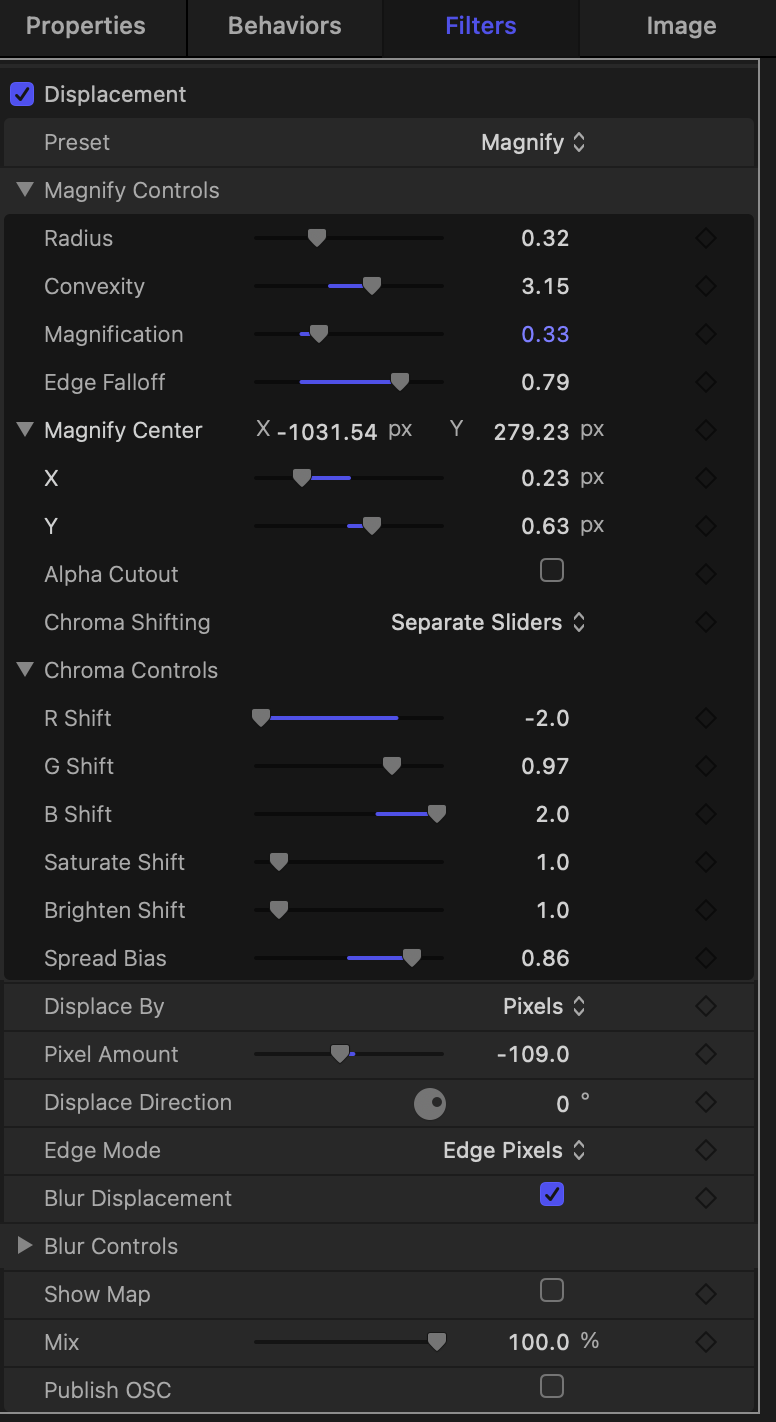
I would have liked to see some other shapes included — you can only magnify a circle — but the included Custom displacement option is more flexible.
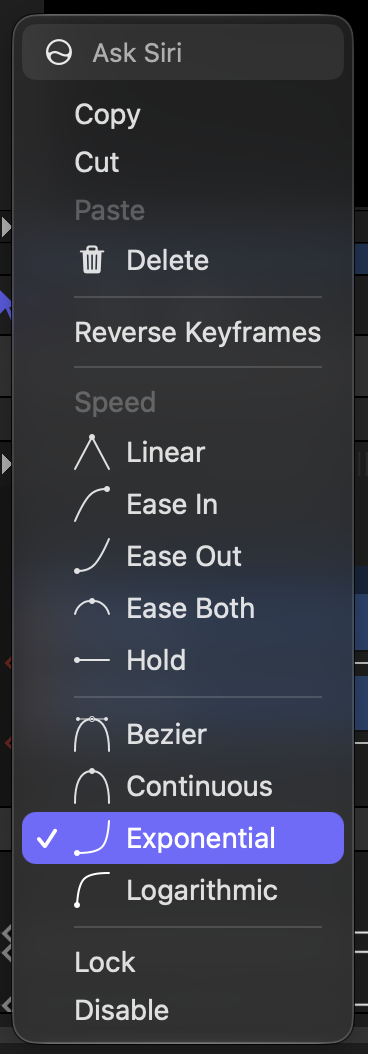
Finally, if you right-click on a keyframe in the keyframe editor, you’ll also find some FCP’s new easing presets, including Exponential and Logarithmic that aren’t in FCP. Handy!
Conclusion
This update is very welcome, and I think most editors will find something helpful here. We’ve needed keyframe easing for a while, and though the support here is basic, it’s a useful step in the right direction. Additional transcription languages are vital for large parts of the planet, natural motion blur is a helpful fix to a problem that’s existed for a while, but it’s the ability to disconnect clips that I think will make some people really happy.
Perversely, I think it’s the people who use FCP the least who will be most excited by this addition, but most long-time FCP fans will have been stymied at some point by a clip that just needed to stay put, and this is a great solution.
If the magnetic timeline has caused you frustration in the past, give FCP another shot; you can turn it off almost entirely if you want. Final Cut Pro doesn’t reinvent its core features very often, and they haven’t done that in this release, either, but the ability to disconnect clips is a useful, optional new feature. In a time when change feels inevitable, it’s nice to have new features that don’t mess with my workflow.
The bigger question, though — should you subscribe to Apple Creator Studio, even if you hate subscriptions? Probably, yes. If you can make use of the MotionVFX templates or tools on a regular basis, it’s a great deal. And because FCP is also available as a one-time purchase, you don’t have to lose access to your past editing work if you choose to cancel your subscription.
If you dismissed Final Cut Pro many years ago, or you use another NLE and are curious what FCP offers, this update is a big reason to take another look.
Apple Creator Studio, US$12.99/month or $129/year, pricing varies slightly in other countries.