For commercial 3D animation, having a render farm is almost a basic necessity – but After Effects render farms are much less common. I’ve been fortunate enough to work at a number of studios that have an After Effects render farm, something I’ve always considered a bit of a luxury.
Recently on Twitter, Mike Tosetto, founder of the Never Sit Still design studio (they created the After Effects 2022 splash screen), asked for any advice on using Deadline as a render farm for After Effects. Because I’m familiar with Deadline and have used it at several different studios, this was something I could offer some insight on. But I quickly realized that I couldn’t summarise everything in a tweet.
So instead of trying to reply in 280 characters, here are some of my broader thoughts on render farms, Deadline, and After Effects.
How is this even possible?
The first time I heard a reference to rendering using “Deadline”, I was a bit confused. How do you render After Effects projects without using After Effects? The answer is that you don’t. Render Farm software, such as Deadline, isn’t doing the actual rendering – it’s just managing the overall process. In the case of After Effects, rendering is usually done using Adobe’s command line renderer, more commonly referred to as aerender.
AErender was the focus of part 7 in my series on After Effects and Performance, and if you’re serious about putting together a render farm then it’s worth your time to read. But for the moment, I’m going to copy & paste some of the opening paragraphs:
From After Effects & Performance Part 7: Introducing aerender
Getting more than you paid for
When you buy After Effects and install it, you’re actually getting two different versions. You get the “normal” version of After Effects with the interface we all stare at every day. It’s important to note that you’re paying for a license that allows you to run the full version of After Effects on two separate computers. But in addition to the main app with a user interface, you also get a separate, stripped down version that just contains the rendering engine.
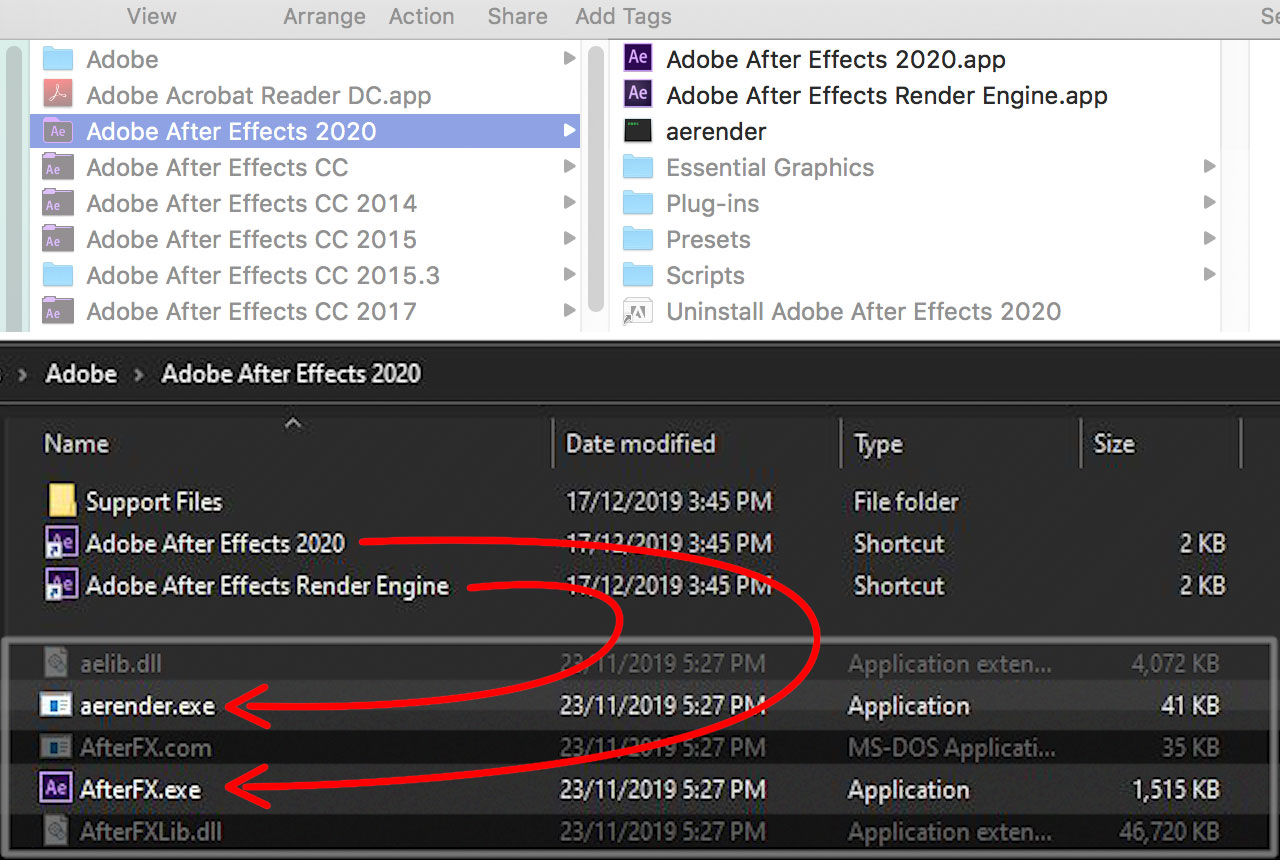
You already have it. It’s there on your hard drive, right next to the main After Effects program. Even if you already know about it, there’s a good chance you’re not using it. It’s a standalone After Effects rendering engine, usually called aerender, and if we think of it as part of After Effects then I don’t know of any other feature with more potential to improve productivity.
Here it is, right on the Adobe website. You can install After Effects on as many render-only nodes as you want…
One of the most significant aspects of the render engine is that it does not need a serial number. You can install as many copies on as many computers as you like. Don’t take my word for it, it’s right there on the Adobe website.
What does this mean for you? You can build an After Effects render farm without having to buy additional copies of After Effects from Adobe.
Middle Management
The aerender app runs from the command line, and in order to use it you’ll need some sort of additional software to streamline the process. Perhaps the best-known example is Lloyd Alvarez’s BGRenderer script, which has been around in various forms for over 15 years. This invaluable tool uses aerender to render After Effects projects in the background (on the same machine), so you can continue to work in the main app.
Render farm software such as Deadline is a step up from simple background rendering. Projects are distributed to different machines over a network, multiple jobs can be queued up and prioritized, and much much more.
Once everything is set up and working, it’s not difficult to use a render farm. You queue up renders in the After Effects render queue, just like you normally would. But instead of hitting the “render” button, you run a script instead, which submits the job to the farm.
Deadline is not just for After Effects. It’s more commonly used for 3D apps, and can work with most animation software on the market. Large, Hollywood level studios use Deadline to manage rendering on blockbuster feature films. Deadline itself is so powerful that once studios get to a certain size, they’ll have a staff member dedicated to running the render farm. In really large studios there might be a whole team that just manages Deadline for rendering.
But even though Deadline can look daunting, it’s also possible to set it up for a simple home studio. Once you understand what you’re looking at, it’s pretty easy to use.
Hard to compete with free
Deadline was developed by Thinkbox, and it’s not the only render farm software out there. It is, however, the only one I have used. Other options include Smedge and Tractor, while After Effects users also have options such as Render Garden and Render Boss.
More recently, Thinkbox was acquired by Amazon, and in mid-2022 Amazon announced that all Thinkbox products are now free. This includes Deadline. This might seem unusually altruistic for such a corporate behemoth, and I’m not sure if anyone is 100% certain about why they cut the price. Long term, the underlying motivation is probably to get customers to cloud-render using Amazon’s AWS platform, and to make money back by offering rendering on demand. Maybe this will become known as RaaS – rendering as a service?
But regardless of why Amazon made Deadline free, at first glance the “free” bit makes it more attractive than other render farm options. For studios with large numbers of machines and render nodes, the savings are significant.
So what’s the catch?
Setting up a functional, reliable and productive render farm isn’t that simple. Just because Deadline is free doesn’t mean you can download it, install it and hit a button to go in just a few minutes.
At the very least, you’ll need multiple computers that are connected to central networked storage (a NAS). The storage – and network – will need to be fast enough to cope with all of the computers connected to it. All assets being used in a project must be stored on the NAS, and be accessible to all machines on the farm. No more importing files from your desktop!
One of the most common mistakes made when setting up a render farm is overlooking / underestimating network bandwidth. The whole point of a render farm is to use several machines to render simultaneously. Almost by definition, this means you’ll have several machines connected together on a local network.
Regular gigabit Ethernet is the most common type of office network, and the next step up – 10 gig Ethernet – is still an expensive upgrade. But regular Ethernet has a maximum transfer speed of 125 megabytes per second, and consumer level network switches don’t always cope well with sustained, high traffic. Editing software especially – as well as After Effects – can easily process data at a higher rate than 125 meg per second, and so having several machines fighting over the same limited bandwidth will result in serious bottlenecks.
3D animation doesn’t usually have the same bandwidth demands that editing and 2D compositing does. In general, 3D rendering involves loading all of the scene assets (such as textures) into memory first, and then rendering frames using the assets already loaded. In contrast, 2D compositing usually involves loading new data for each individual frame being rendered. 3D rendering can take minutes, if not hours for a single frame to render, and during the rendering time there’s no demand on the network. But 2D compositing might only take seconds per frame, and each frame involves reading and then writing data. This means that 2D rendering generates constant network traffic. All of this has very real implications for network bandwidth – your render farm might be working just fine with 3D apps, but adding After Effects to the mix might bring everything down.
Don’t bottle it
You can buy a regular gigabit network switch with 16 ports for close to $100, and you can buy a 4-bay NAS with drives for not much more than $1,000. Assuming you have 16 spare computers lying around, does this mean that for less than $1,500 you can set up Deadline as an After Effects render farm? I wouldn’t. I’m not saying it won’t work at all, but even if the NAS can handle 16 computers constantly reading & writing files at the same time, it’s unlikely that a budget 16-port switch will. All 16 computers are still sharing / fighting over the same 125 megabytes per second connection to the NAS, and it’s not a pretty fight. In fact some basic maths can reveal how awful this would be. 125 divided by 16 is less than 8. So assuming the switch and NAS hold up, each machine is only reading & writing data at less than 8 megabytes per second. This is woefully, unworkably slow – the SSD in my current computer can transfer data at around 1500 megabytes per second, and newer ones are more than twice as fast as that.
At the very least, you’ll want your NAS to have a 10-gig connection to your network switch, even if the computers themselves are only connected using standard gigabit Ethernet. Assuming your NAS can handle the demands of multiple computers reading and writing simultaneously, which is another topic altogether, a 10-gig connection to the switch would mean that 10 computers would be able to use their maximum 125 meg/second bandwidth before the network becomes a bottleneck.
This diagram from the Deadline manual illustrates how workstations and render nodes connect to the Deadline repository and the Database, over a network. The more machines, the more network congestion.
Just setting up a render farm involves careful consideration of all these things – not just how many computers you have, but how fast your storage is, how fast your network is, and whether your network switch can handle the sustained, high data rates that come when many machines are rendering the same project. You might even have to consider power and heating – no point rushing out and buying render nodes only to discover that the circuit breaker is tripped when you plug them all in.
There’s a reason that “Enterprise” level network and storage solutions cost so much.
Hard and soft
Deadline isn’t a single app in the way we think of After Effects as an app. It’s more comparable to the internet, with a collection of front-end, back-end and client software.
Deadline is built around a Mongo database. The database holds all of the details about each job that’s been submitted. A separate repository stores all of the global settings and files that are needed for the render farm to function. Then you have your render nodes, which run client software that checks to see if there are any jobs to be rendered. Finally, each app that you’re using to render – such as After Effects, C4D, Maya etc – needs to have a Deadline submission script installed, used to submit jobs to the farm.
Once the render farm is up and running, you can use the Deadline Monitor to check in and see how everything is going. Deadline Monitor is brilliant because it looks really complex. If you see a producer headed your way you can just open it and stare intently at the screen and they’ll usually leave you alone.
The Deadline monitor can look intimidating, but it’s pretty easy to understand. It’s really just a fancy version of the render queue, showing you what jobs are queued up and which render machines are rendering them.
As I mentioned above, Deadline is not a simple app. It has many complex features and just like any production-level software, it can take years to master.
But let’s assume you’ve got Deadline up and running. It might already be set up for 3D apps and you’re wondering if it can render After Effects projects as well. This is exactly the situation that Mike Tosetto asked about on Twitter- they already use Deadline for Cinema 4D, but how does it work with After Effects?
Delegation
Working with a render farm is a bit like being given an assistant. Learning how to utilize their help most efficiently can take a while, and you might need to adapt and change the way you’ve worked before. Some tasks are better suited to delegation than others. Using the assistant analogy, you might utilize your assistant differently depending on the specific demands of each job.
Learning to use a render farm – especially with After Effects – isn’t just a case of knowing how to run a script. It’s also learning how to adapt your workflow to utilize the potential of the render farm. Different artists may use a render farm in different ways, or for different purposes, and it might take some time to figure out what works best for you. You might find a render farm useful in one way when working on visual FX, but useful in a different way for motion graphics.
As I’ve written so many times, there’s no such thing as a typical After Effects user. And so there’s no best-way to use a render farm with After Effects.
Old dogs new tricks
For many After Effects users, the first thing to adapt to is the use of image sequences instead of Quicktime files. This will apply if we utilize the render farm in the same way that 3D artists do: to have multiple machines render individual frames of the same composition.
The typical way that Deadline works is to divide a timeline up into groups of frames, which are rendered simultaneously by different computers – render nodes. As an example, let’s assume you have an After Effects timeline that is 100 frames in duration. When you render locally, your machine will render all 100 frames, one after the other. Using Deadline, however, the project can be split up, and the rendering workload shared by multiple computers. If you have 10 render nodes, then each one can be allocated 10 frames to render. Or if you have 4 render nodes, each can render 25 frames. Or you might decide to have two render nodes render 50 frames each, leaving the other 2 render nodes free for a different project.
But the problem with having multiple machines rendering the same project is that they cannot all write to a single Quicktime file. If you’re used to rendering everything to Quicktime files, then this will take some adapting to. The solution is to render to image sequences, so each render node saves each frame as it’s completed. I’ve been using images sequences for many years, and I even wrote about them here.
But for the average After Effects user this can introduce another step. Once the render is completed, then you can’t just click on the images and watch them back. You can use an app like DJV, or even convert the image sequence to an MP4 using Adobe Media Encoder. But if you’re working with audio then you’ll need to import the sequence into After Effects or Premiere and add the audio there. Exactly why Adobe Media Encoder can’t add an audio track to an image sequence is one of life’s enduring mysteries, but currently it can’t.
Yes No, Maybe
If you’re working on long, slow timelines then having a render farm is a great asset. If you have 10 machines on your render farm, then something that takes 10 hours to render on a single machine can be ready in only 1 hour – 10 machines rendering for 1 hour instead of 1 machine for 10.
But that’s not the only scenario where a render farm is useful.
Render farms are also great for projects that have lots of outputs. One example is if you’re working on lower thirds or titles. Individually, they might only take a few minutes to render but if you have 20 versions to deliver then the total time can add up quickly. In this case, the render farm can be used to have each different machine rendering a different composition, instead of having multiple machines rendering the same composition. It’s not that Deadline can’t be used to render Quicktimes, it’s that multiple machines can’t render to the same Quicktime file. You can easily queue up 20 separate Quicktime renders using Deadline – if you have 20 render nodes, they’ll render one each.
In the past I’ve worked on many large-scale video projections. Typically the animation is created in one large canvas, which may be many times larger than 4K. But for delivery, the high-resolution “master” animation needs to be split up into small sections for playback by individual projectors. This can be a long, slow & tedious rendering process – exactly the sort of thing a render farm is good for.
But not every After Effects user works with long, heavy comps. And if your average project renders in just a few minutes then a render farm may not be such a huge advantage.
Voice of experience
I’ve been lucky enough to have used Deadline in various studios for well over ten years, which has given me plenty of opportunities to see the pros and cons.
Here’s a basic summary of my experiences. Of course, they’re exactly that – my experiences. Depending on the types of jobs you do, then your experiences might be very different! If you’ve used Deadline before, feel free to share any insight in the comments below.
Overheads
Compared to regular local rendering, there’s a basic overhead in rendering using Deadline. Firstly, the project has to be saved and submitted to the farm. Then individual render nodes have to pick up the job, then they open After Effects, and then they open the project – assuming that there are render nodes available. After Effects loads up much faster than it used to, but depending on what plugins you own it can still take a noticeable amount of time just for the render node to open the aerender app and get started.
For small projects this might not take too long, but for larger projects it can add up. If you’re sharing the render farm with a studio full of other artists, then there might already be several other jobs queued up ahead of yours.
Learning to use Deadline isn’t just a case of learning the software, but learning how to best use it. For simple timelines that aren’t very heavy, it can be faster to render locally and not use Deadline at all.
Synchronicity
One of the biggest headaches with a render farm is keeping all the render nodes consistent with each other. This can be a real problem for 3D renderers, as different versions can produce different results. I’ve worked at studios where they’ve had to manage different versions of Redshift and Maya on different render nodes, to maintain consistency with existing renders. It’s not fun.
Thankfully, that type of headache is one thing that After Effects users don’t need to worry about. One of the fundamental priorities that the Adobe development team have always had for After Effects is consistent renders across OS, hardware and software versions. If you ever update your GPU drivers, or upgrade your 3D renderer and discover that new renders aren’t the same as previous renders, spare a moment to consider how much work it has taken the After Effects development team to avoid those sorts of issues.
But there are still other considerations for rendering across multiple machines. The same fonts and plugins need to be available on all render nodes. Fonts can be automatically synced using the Deadline repository (just another thing for artists to learn…) but plugins are a much more complex issue.
Some plugins can be run on render nodes for no additional cost, just like After Effects. But others can require additional licenses. Depending on what plugins you own and how you use them, you may have to pay additional fees for each render node. This can quickly make render farms less attractive – it’s one thing to pick up a few cheap Mac Minis, but your annual software costs may end up being more than the hardware.
I can’t go through every plugin vendor and list their policy for render nodes, but I will quickly mention Red Giant, as their plugins are so common but their pricing model has recently changed. In the past, Red Giant plugins were purchased as a perpetual licence – ie they were not a subscription service, you “owned” the software that you bought. With every purchase of a plugin, Red Giant would also allow 5 additional render-only licenses for use on a farm, you just had to email them and ask nicely.
Now that Red Giant has been bought by Maxon, that policy has changed. Hardly any plugins are still available to purchase on a “perpetual” basis, Maxon has now structured everything around a subscription model. Subsequently, the policy regarding render-only licenses has changed. Spencer Knuttila from Maxon was kind enough to update me:
With the Red Giant volume program, we would supply unlimited render nodes per request with an active Volume Subscription, but yes, that has changed under Maxon. We now offer 5 packs of Render nodes for $359 annually, but Teams subscriptions also come with some included render only nodes throughout the term. We don’t offer them with the non-Teams subscriptions or the perpetual licenses (the few that are still available).
The basic advice here is that before you start setting up an After Effects render farm, or using your budget to purchase machines, make sure you don’t overlook the additional cost of any plugins you need. Do a stocktake of the plugins you own and regularly use, work out which ones you would need on the farm (all of them, ideally), and then check in with the vendors to see what the cost will be.
Groups & Pools
Deadline is very sophisticated and allows you to designate render nodes together in groups and pools. Without going into too much detail, when you submit jobs for rendering these settings can be used to allocate the job to specific machines – you don’t automatically use every render node available.
Groups and Pools are a powerful feature that can be used if you don’t have all plugins installed on all render nodes. For example you might have 10 render machines, but only five of them have Red Giant plugins on them. You can create a Deadline pool called “Red Giant”, and if you’re using those plugins you submit the job to the “Red Giant” pool and only those 5 machines will be used to render the project.
Like any powerful feature, groups and pools are useful but they’re also one more thing for the artists to learn about and to deal with. Allocating render farm nodes to groups and pools can be used for a whole bunch of different reasons, including separating Macs from Windows machines, nVidia from AMD GPUs, the amount of installed RAM, as well as by the software installed – you might have a Redshift pool and an Octane pool.
Submission ends it all
One of the first default settings I change with Deadline is to do with where the project is saved when you submit a job to the farm.
The default setting is to have all render nodes open the same source project file – the original project that the artist is working on. But this can cause all sorts of issues. By the time the render nodes pick up the project, you might have changed something. Maybe you’ve reflexively hit “save” and something’s a bit different. Depending on what state the project was in when each render node opened it, the renders might not line up. The basic idea of having all the render nodes open the same project file that you’re working on seems risky.
Instead, you want to save a separate copy of the project just for the render farm. Each render node will copy the project locally and work from that. This guarantees that each render node is rendering exactly the same version of the project, and everything will match.
Unfortunately, this also increases submission time- and once again the artists need to decide if the overhead involved in saving the project as it’s submitted to Deadline is worth the time saved. For simple timelines that will render in just a few minutes, then no – it’s probably not worth submitting to the farm. But if you’re saving hours of rendering time then yes – the extra minute or two taken to save and submit the project will definitely be worth it.
Network errors – local rendering
As with many things, a lot of Deadline issues are learnt through experience. I mentioned earlier that the network needs to be able to cope with the demand of having multiple machines working constantly. One issue I have learned through experience is that using the “local” rendering setting helps to avoid network congestion and file corruption.
In short, when render nodes finish rendering a frame they can save it directly to the NAS, over the network. Alternatively, the “local” setting tells Deadline to render the frames locally, and then when all of the allocated frames have been rendered, they are batch copied from the render node hard drive to the NAS.
In my experience, using the “local” setting avoids network congestion and file corruption. If the local setting is off, then having all the render nodes constantly saving files directly to the NAS causes bandwidth problems that lead to file corruption.
It might seem counter-intuitive, but having the node’s OS copy a batch of files together is actually safer, and more reliable, than having the app save each frame directly to the NAS.
Troubleshooting
One of the biggest problems with Deadline rendering is trying to troubleshoot when things go wrong. Sometimes tasks just fail to render with no obvious reason why. Even if you dive into error logs, the messages can sometimes be cryptic at best, or non-existent.
Over the years I’ve figured out a few things that can easily trip up a Deadline After Effects render. One common cause is if you’ve imported something from your desktop, and so it’s not available on the network storage. When the render nodes open the project, the file will be missing as they can’t access your desktop directly.
If you have a render farm that’s a mix of Macs and PCs, then you’ll need to set up path mapping. For historical reasons that many other people have already written about, Windows machines use a \ in network addresses while Macs use a /. Also, Windows machines map network drives to a letter, such as C: while Macs use an IP address. All of this means that if you submit a job from a Mac for a Windows render node (and vice versa) all files paths need to be converted. Deadline can be set up to do this, and you only need to do it once, but it’s still something to keep in mind. The last time I did this it took a lot longer than I expected to get it right.
Another, more frustrating example is if you are trying to overwrite an item that’s used in the composition you’re trying to render. This sounds complex but for some users this can happen quite easily. Let’s say you’ve pre-rendered a composition, and then re-imported it and dropped it back into the same timeline. Some users do this as a sort of manual proxy, or you might just use it as a guide layer / reference to check against future changes.
If you try to render a new output over the existing render, After Effects won’t let you. You can’t re-render a file that’s being used in the render.
This might sound like an unusually specific example, but that’s not the point. The important bit is that if you try to do this within the After Effects app, you’ll get a suitable error message and at least you’ll know what the problem is. But if you submit the job to Deadline, it will simply fail without warning, and without explanation. There are a whole bunch of things that can cause a render to fail, but if you’re rendering in the main After Effects app you at least get an error message. With Deadline, accessing error logs is tedious and even then, they don’t often make sense.
One of the most obscure issues I had with Deadline was caused by the way Mac Minis behave if they’re not plugged into a monitor. Mac Minis are good value as After Effects render farm nodes, although the older Intel ones don’t have great GPU support. If a Mac Mini is not plugged into a monitor – which is pretty normal for a render node – then the GPU is automatically disabled. This changes the way that some GPU dependent plugins work. In my case I was having issues with the Trapcode Suite, with Mir and Tao giving very different results when rendered on the farm as opposed to locally. The fix was to buy a HDMI dongle that tricks the Mac Mini into thinking it’s plugged into a monitor, ensuring that GPU accelerated plugins work as expected. I don’t know if this is still an issue with current Mac Minis, but it was fun trying to figure that one out.
Troubleshooting Deadline problems can take time. It can be tedious and infuriating. And sometimes, if you just can’t get it to work, it would have been faster to render locally.
In theory, Deadline rendering will make things faster and improve productivity. But when things go wrong, it’s easy for troubleshooting to slow everything down even more.
Overwriting / Multi-machine rendering
I’m well aware that everyone has their own way of working, and different workflows work for different people.
In my case, I regularly overwrite the same image sequences in the same folder. For example, I might have one composition that’s simply called “Final”. I’ll use the render farm to render images sequences into that folder. From there, I can render out a versioned Quicktime or an mp4 for viewing and approval. But when the project is updated and changes made, I will use the render farm to overwrite the existing sequence. The “Final” image sequence will always be the “Final” one, and it’s the only one that there is.
If you have loads of storage space to burn, you can render out versioned image sequences (ie a new folder every time) but it’s not how I work, especially when I have pre-comps within pre-comps pre-rendered.
Also, one of the main advantages of working with image sequences is that when you’re making tweaks and revisions, you only need to re-render the section that has changed. Even as I write this, I’m working on a TVC that has a new layout for the end graphic. As I receive feedback and make revisions, I only have to re-render the last 75 frames, not the entire thing.
I’m mentioning this because there are two approaches to sending After Effects projects to a render farm, and the reason I use one and not the other is because I like to re-render over the same folders.
The “traditional” way of using a render farm is to allocate a range of frames to each render node. In the example earlier, a 100 frame timeline could be split up into 10 frame sections, with each render node taking care of 10 frames at a time.
In Deadline terms, render node 1 would render frames 0-9, render node 2 would render frames 10 – 19, render node would render frames 20 – 29 and so on.
But After Effects offers us an alternative. It has a native rendering feature called “skip existing frames”, where it checks the output folder for any frames that have already been rendered and just picks up the next one.
Deadline allows us to use this feature, by turning on multi-machine rendering. In this case, render nodes aren’t allocated a specific frame range. Instead, they all just look at the folder and render the next frame that needs to be done.
There are advantages to using this feature. Firstly, each machine will only load up After Effects and the project once, so that saves on overheads. If we compare it to the example where the timeline is sent to the farm in 10 frame sections, then each render node is opening the project when it starts a new batch of 10 frames. If you have 10 render nodes then fine – each node is only opening the project once. But if you only have 2 render nodes, then each render node will end up rendering 5 individual tasks (five jobs of 10 frames each). Each time a new task is begun, After Effects is loaded up and then the project is loaded up again – a process that can take minutes. Even if the render node just finished one task and begins another from the same project, it goes through the process of shutting down the first task, then loading up After Effects and the same project again. But the “skip existing frames” feature avoids this inefficiency because the project is only loaded once, and the render node just keeps rendering until there are no more frames to render.
The other advantage to using skip-existing-frames is when some sections of the timeline are much slower to render than others. This can often happen with 3rd party 3D and particle plugins, but there are many reasons why one section of a timeline might render much slower than the rest of it. Really, it’s pretty unusual to have an After Effects timeline where every frame takes the same amount of time to render.
Using our 100-frame example from before, let’s assume that frames 15 – 30 are much slower to render than the rest of the timeline. We send our timeline to the farm in 10 frame chunks. But some of the render nodes are flying through the render while those rendering frames 10 – 19 and 20 – 29 are really slow. We have to sit around waiting for those two render nodes to complete their tasks while the others sit idle. The point of having a render farm is not to wait…
But if we were using the skip-existing-frames feature, then all of the machines would have picked up some of the slower frames, rendering them sequentially until the task finished. All render nodes would start and finish at roughly the same time, doing roughly equal amounts of work.
It might sound like the skip-existing-frames approach is better. For many people, it might be. It’s certainly worth knowing the advantages. But the main disadvantage to rendering with this method is that you can’t just overwrite existing frames – you have to manually delete them first. Because I overwrite the same sequences again and again (it just suits the way I work) then always jumping to the finder / file explorer to find frames to delete becomes tedious.
The main disadvantage I’ve found with the skip-existing-frames approach is that you can’t stop a render once it’s started. The render nodes open the project, start rendering, and then don’t stop until the entire job is finished. Wanting to stop a rendering job early is not uncommon. Maybe you made a simple mistake, such as submitting the job for the full duration of the comp when you meant to only render the work area. Maybe you submitted with the wrong settings. Maybe you set off the render but then noticed something that still needed to be done. Or maybe another artist has a super-urgent job that needs to be rendered sooner than yours. Wanting to stop a render after it’s started is not unusual! But with skip-existing-frames, you can’t.
These two approaches to rendering with multiple machines are just two different solutions to the same problem. Preferring one over the other is not a big deal, it’s just a choice, and you can swap between them whenever one suits you better than the other.
Know your priorities
It’s something of a dream to have your own personal render farm all to yourself, but in most situations you’re sharing it with a studio full of other users. In this case, while sending your job to the farm might be faster in theory, in practice it might end up in a queue behind a whole load of other jobs that aren’t yours.
Deadline does allow you to set job priorities, but these can either not work as expected or just result in artists bumping their own jobs up the list and getting irritated with each other.
The way that Deadline deals with priorities is pretty simple. The priority of each task assigned to the farm is only checked when a render node is looking for a new task to render. Once a render has begun, the render nodes won’t stop that task until they’ve finished it.
Although I understand how this system works, it’s not the way some users expect the priority system to work. I’ve worked with users who think that if they submit a job to the render farm with a higher priority, then the render nodes will stop what they’re currently doing and immediately start work on the higher priority task. But they won’t – when a render node has finished one task and is looking for a new task, it will simply pick up the one with the highest priority.
Let’s say Bob in the corner has sent a job to the farm that will keep a render node busy for 3 hours. Bob shouldn’t do this, but he has, and now that render node is going to be unavailable for any other jobs until it’s done. Even if you set your job to the top priority of 100, that render node will keep rendering Bob’s job until it’s finished. The render node won’t stop Bob’s job just because you’ve submitted a job with a higher priority.
If you have lots of machines on your render farm then there’s more machines for everyone to share, but also more to fight over!
When you have lots of artists sharing a render farm, and different job priorities are important, then having artists submit jobs in smaller frame batches will help the priority system to work. Sending jobs to the farm in smaller batches of frames will mean the render nodes are finishing their tasks sooner, and checking job priorities more often.
Priority Override
Priorities are a manual setting that artists can use to determine which jobs get rendered first. If everyone submits their jobs with the default priority of 50, then they will simply be rendered in the order that they were submitted. Otherwise, higher priority jobs are rendered before lower priority jobs.
But something that’s often not understood is that if render nodes can render several different apps, for example Maya, Cinema4D and After Effects, then the apps themselves will have their own set of priorities – completely separate from the manual “priority” setting that artists can set when they submit a job. This is all to do with the groups and pools mentioned earlier.
Without going into too much detail, “groups” are generally used to define machines in terms of their hardware, such as a “windows” group and a “mac” group. Pools are used to define the software used for rendering. A Deadline render farm may have a Maya pool, a Cinema 4D pool and an After Effects pool. If pools are used, they will render in a certain order, usually determined by the system administrator. Unlike task priorities, this is not a setting that can be easily changed by an individual artist.
So if there’s a Cinema 4D task queued up with a priority of 50, and an After Effects job queued up with an urgent priority of 100, then the Cinema 4D task will still render first – if the global priority for the Cinema 4D pool is ahead of the After Effects pool. The After Effects task will only be picked up once all Cinema 4D tasks have finished rendering. Pool’s don’t have to be used, but if they are then this is worth knowing.
Sharing apps
For the everyday artists using After Effects and Deadline, the most common headaches are caused by keeping fonts and plugins consistent across all render nodes. But for more techy people, especially sys admins and IT staff, the biggest headaches can come from the basic way that After Effects works, and how it utilizes the available hardware.
The topic of After Effects & Performance is so deep and complex that I wrote an 18-part series explaining exactly what After Effects does and how it does it. It’s become even more complex because, thanks to a herculean effort by Adobe’s development team, After Effects has been completely overhauled over the past few years. What was true in 2021 is not necessarily true now.
In the past, After Effects has been a single-threaded app with little demand on the GPU, which has made it possible for render nodes to render 3D and After Effects projects at the same time – even if After Effects is something of a RAM hog.
In my opinion (and experience) the best thing to do was just to accept that After Effects was not going to fully utilize a powerful machine, and leave it alone to do its thing, however inefficient that might be.
But I’ve seen several studios attempt to get more power and efficiency out of their render nodes by setting up deadline to render multiple After Effects projects at the same time on the same node, or to have After Effects renders going simultaneously with 3D renders.
Before After Effects 2022, when it was still a single-threaded application, it was theoretically possible for one render node to have several instances of the After Effects render engine running simultaneously. After all, if you had paid a lot of money for an 8 core or even a 16 core machine, why should all those cores sit idle just because After Effects only used one of them?
Also – in theory – a render node should be able to render an After Effects project at the same time as rendering a 3D job using Redshift / Octane / VRay / Arnold etc.
But honestly – it never worked well. It was never reliable, and any productivity gained through faster renders was only lost through troubleshooting and reliability issues.
In my experience, running multiple instances of After Effects on the same render node just isn’t worth the hassle. And trying to render After Effects and 3D at the same time only ends in frustration. There’s not much more to add except to say – just don’t bother trying. Overall, the amount of problems you’ll have will outweigh any benefit.
Although I can share that advice with the benefit of years of experience, it’s even more significant now – ever since After Effects 2022 introduced multi processor rendering. I’m trying to work out if it’s ironic that making After Effects faster and more efficient has also made After Effects render farms less attractive, but even if that’s not really irony, it’s a complicated subject.
Think about the future
That brings us to the tricky bit.
For most of After Effects’ life, it’s been a single-threaded app that hardly used a GPU. There are different ways of looking at this – on one hand the power of an expensive workstation would not be fully utilized (frustrating!), but on the other a low cost solution such as a Mac Mini would be just as fast as something much more expensive (thrifty!).
The fact that After Effects didn’t fully utilize multi-core CPUs was a key motivation to write my long series on After Effects and Performance. It all started with my theory that – in 2013 – an iMac and 3 Mac Minis would be more productive than a single MacPro that cost the same amount. The secret ingredient would be using Deadline as a render farm.
But times have changed. As detailed in my interview with Adobe’s Sean Jenkin, After Effects has been quietly overhauled. When After Effects 2022 was released, it introduced multi processor rendering – After Effects can finally utilize the power of multi-core CPUs. And in addition to CPU efficiency, with each release, more and more effects are being optimized for GPUs as well. Other performance features such as speculative rendering have also increased productivity.
The release of After Effects 2022 was a massive deal, a real game-changer for After Effects users, and if you missed out on the details then you can catch up here.
While everyone is happy when After Effects gets faster and faster, it does make the topic of render farms more complex. For really, really intensive projects, such as long duration, high resolution timelines, then a render farm can still be an incredible help. But for simpler, everyday motion graphics projects then having a single beefy machine with lots of RAM may be the better solution. Even if the renders themselves aren’t faster, you might find yourself to be more productive by working on a single machine.
In 2013 I was confident that having 3 Mac Minis and a Deadline render farm would be better than having one expensive MacPro, but in 2023 I’d probably rather have the one, powerful machine. This is all due to the impressive work undertaken by the After Effects Performance team! But we also have to remember that the design landscape has changed a lot in the past ten years, and 3D animation is now heavily integrated into motion design. Compared to the state of the industry in 2013, a motion designer is now much more likely to have a very powerful machine with a decent GPU.
This is how my series on After Effects and Performance began. In 2013, I believed that using Deadline for an After Effects render farm would be more productive than a single MacPro.
After Effects has improved so much over the past few years, and will continue to do so, that it’s no longer a simple case to recommend a render farm. For the same cost, just investing in a “god box” might result in greater productivity overall. I really don’t know. We’re heading into unknown territory.
If you already have the resources, then setting up Deadline as an After Effects render farm is certainly something I’d recommend. But it’s a learning curve for everyone involved, as there’s a lot more to it than just hitting a button. Managing groups, pools, syncing fonts & plugins, juggling licenses and then getting everyone to share nicely is a whole new set of challenges.
It’s a nice set of challenges to have, but perhaps not for everyone.
Deadline – what you need to know
The Deadline submission script – this is what you see when you submit a project to the render farm
As mentioned above, once a Deadline render farm has been set up, submitting jobs is pretty easy. You still queue them up in the render queue, just as you normally would. The only difference is that instead of hitting the “render” button, you run a script instead – this submits the job to the farm.
When you run the Deadline Submission script, especially for the first time, you’ll see a whole bunch of settings and advanced options. It looks pretty complex. But once you’ve set it up once, the script remembers your settings and you usually don’t have to change anything again.
But to illustrate some of the advice given earlier, here’s the default settings of the script and what I would change.
Firstly, depending on how the Deadline farm has been configured, you’ll almost certainly need to choose a group, and probably a pool as well. As mentioned earlier, groups are usually used to designate hardware, while pools are used to designate software. As an example, there might be a “Mac” group and a “Windows” group, or an “nVidia” group. In my experience, you will only need to set the Group once and not change it again.
Pools are used to designate the software, but in addition to broad categories such as “After Effects” and “Cinema 4D”, you can also use Pools to restrict rendering to machines with certain plugins. As mentioned before, you might have 10 render nodes but only 5 of them have Trapcode plugins installed. If you leave the pool as “none” then all machines will render, but if you’re using Trapcode plugins you can select a “Trapcode” pool and only those machines will render the job.
The Priority setting allows you to rank jobs so that some will render before others. The default value is 50, and all jobs with a priority of 50 will render in the order they were submitted. Manually changing this setting to a higher value will bump your jobs up in the queue, but it might not make you very popular.
The “machine limit” allows you to share the render farm nicely with your co-workers, and not hog the whole thing. There might be 10 render nodes on the farm, but you might be willing to only use 5 of them, and leave the other 5 free for another job. The default value here is 0, which will use all available machines.
The “Frames per task” setting is one of the most crucial settings to understand, especially for After Effects users. This setting determines how many frames are allocated to each render node. This was discussed earlier, but the key is to balance the amount of time taken for the job to load up on the render node, versus the actual rendering time. This will vary a lot between projects, and it’s something that artists should try to be flexible with.
As outlined earlier, if the frames per tasks is too high, then the render nodes may not share the workload evenly, or they may hog machines for so long that the priority system doesn’t work well. But if the frames per task is too low, then the render nodes spend more time opening the project than they do rendering.
As a real-life example of how you might adjust these figures, imagine that you’re working on a Stereoscopic 3D project. Your composition has lots of 3D layers and effects, and it renders relatively slowly. Because it’s stereoscopic, you need to render out a separate left and right render, but they need to be combined for previews.
When rendering out the main Left & Right compositions, you might find that setting the frames-per-task to 25 or 50 works well. You see that the render nodes are taking between 5 and 10 minutes to render each group of frames. This means most of this time is spent rendering and not loading the project, but at the same time it’s a short enough time that the render nodes are regularly checking for higher priority jobs.
But when it comes to combining the left and right renders into a single Stereoscopic 3D preview, then that’s different. This is a super fast render – After Effects is just loading two frames and either interlacing them or squashing them next to each other before rendering them back out. Because rendering is so fast, the frame-per-task can be much higher, maybe even 500 frames per machine. Otherwise it will take longer for the render nodes to load the project than it will for them to render.
You will need to gauge whether it’s faster to utilize the render farm and render an image sequence first, and then convert to a quicktime or MP4 for playback. If your timeline is short then it will be faster just to render locally, directly to Quicktime.
The “Use Frame List From The Comp” should aways be on. This sends the settings from the After Effects render queue to the Deadline farm. You want to be able to define work areas as you normally would, or set the render queue to render the entire composition.
As outlined earlier, you cannot have multiple machines rendering to a single Quicktime file. If you have a Quicktime file queued up, then Deadline will automatically allocate all of the frames to a single render node.
Advancing along nicely
The “Advanced” tab reveals a whole load of more settings to play with, some of which are really quite important. Again, some of these settings should be changed the first time you use the script, and you may not have to change them again.
But the “Advanced” tab contains some of the most crucial settings that I think should be changed immediately.
Most importantly, you should check “Enable Local Rendering” and “Submit Project File With Job”. This will ensure that when you submit a job to the farm, each render node makes their own copy of the After Effects project and works from that – not the exact same project file that you still have open on your machine.
As discussed earlier, “Local” rendering means each frame is initially saved to the render nodes hard drive, and then when the node has rendered all of the frames that were allocated, they are copied together back to the server. The alternative, if this is not checked, is for each frame to be saved directly to the NAS on completion – but as I said before, in my experience this can lead to network issues and corrupt frames.
You also need to select “Include Output File Path” so that Deadline knows where to save the rendered frames. I don’t know why this is even an option.
The “Multi-Machine Rendering” option is again something I discussed earlier, this option means that render nodes are not allocated specific frame ranges. Instead, render nodes open the project and simply look for the next frames to be rendered. This option only works if you’ve selected “Skip existing frames” in the After Effects render settings – and it only works for image sequences.
But wait, there’s more
This is really only scratching the surface of Deadline. It’s incredibly powerful and can be set up to do so many things. In addition to the basic rendering outlined here, there are many other features which are also worth learning-
Job dependencies, so queued up renders will only begin when a specific render has fully completed
Ignoring missing fonts / plugins / other errors
Running scripts once jobs have completed, for example automatically having image sequences converted to MP4s
Blacklisting and whitelisting specific machines that you do or do not want to use
A render farm can be a powerful and productive tool, and now that Deadline is free the prospect of setting up a small home-based farm is even more attractive.
But Deadline is so powerful that’s it’s really difficult to cover all the fine details, even in an article this size. If you’ve used Deadline with After Effects before, please leave a comment below and let us know how it works for you.
I’ve been writing After Effects articles for over 20 years! You can check out some of my other articles right here…