

Filmtools
Filmmakers go-to destination for pre-production, production & post production equipment!
Shop NowTL;DR a quick setting change, and you can see your waveforms again

Welcome to Tool Tip Tuesday for Adobe Premiere Pro on ProVideo Coalition.
Every week, we will share a new tooltip to save time when working in Adobe Premiere Pro.

We’ve talked about markers and extended markers in a previous Tool Tip Tuesday here on ProVideo Coalition. I am a big fan of the extended markers, as I often use them on source clips to designate a sound bite, a thought, or just a section of a source clip that I want to quickly see while working in the timeline. Often, I will match a frame in the timeline and add an extended marker, as this updates right in the timeline as you extend it in the Source monitor.
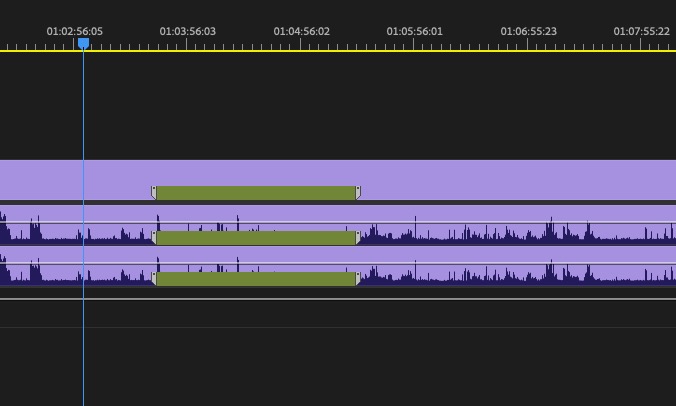
But you might end up with a situation like you see in the image above, where that extended marker covers the waveform, and you can’t see as much of the waveform as you would like to see. You can always extend the track height to help remedy this situation. However, if your screen real estate is limited or you’ve set your track heights to your liking, turning off “rectified waveforms” can be helpful. Do do this, head to the timeline panel menu, or the hamburger menu, as many call it.

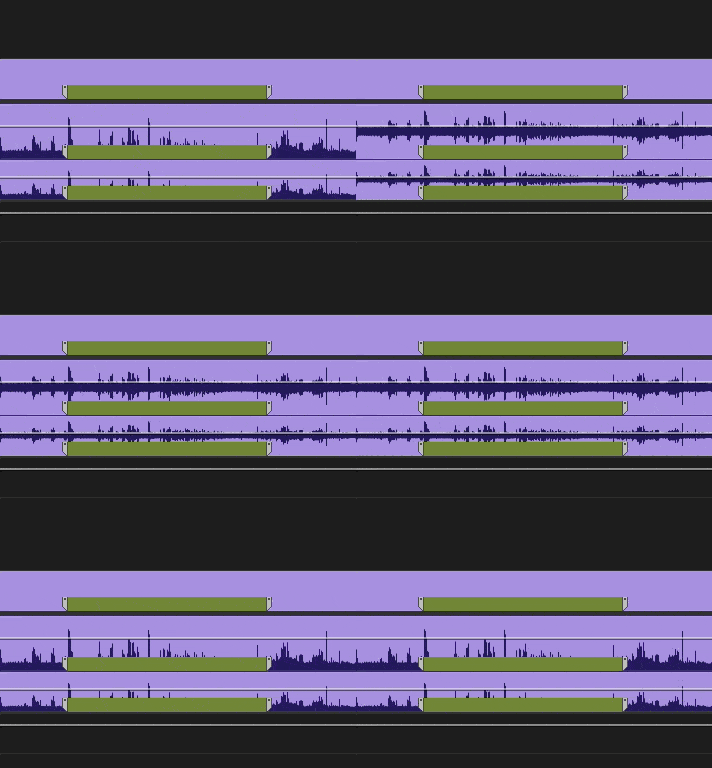
From that menu, uncheck Rectified Audio Waveforms.

With that unchecked, waveforms display in the middle of an audio clip rather than from the bottom up. This will make it much easier to see spikes, dips, and general waveform data when you might have an extended marker in the timeline. There is even a keyboard shortcut that can be mapped to this setting, but I have never mapped it, as I don’t use it enough to warrant mapping a dedicated keyboard shortcut.
And here it is in action ⬇️
This series is courtesy of Adobe.