

Filmtools
Filmmakers go-to destination for pre-production, production & post production equipment!
Shop NowTL;DR: Adobe Media Encoder can run transcription and visual analysis in the background on your footage. Set it up on your editing machine or a separate system on your NAS, and every clip is searchable before you even open a project.

I’ll just say it. I hate editing without a transcription.
Visual search, too. Even when the results are imperfect, if I have access to a visual search, I’m using it. Being able to type a word and find the shot is changing how I work.
There’s a very valid criticism here: it means I’m not watching every single frame of footage before I start cutting. Viewing all your footage is one of the core ethics of editing, and I’m not going to pretend I’m not bending that rule.
The Setup
Starting in 2026, Adobe Media Encoder now has an analysis option. You’ll find it in the Preset Browser.
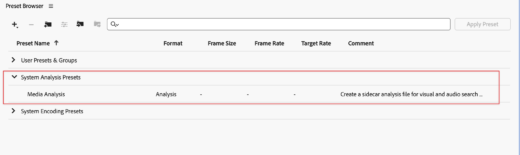
You can now set up Media Encoder to run background analysis on your media.
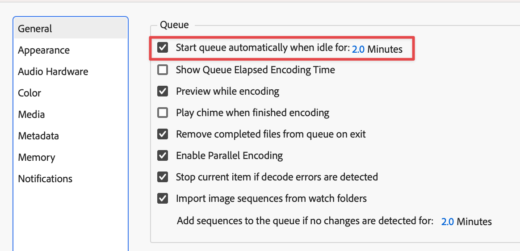
In Media Encoder’s preferences, there’s a setting to start encoding after 2 minutes of system inactivity. Turn this on. It means Media Encoder sits quietly while you’re working and only starts crunching when you step away.
The default includes both transcription and visual analysis and will live next to your media on your system. It’s putting a sidecar file there, providing access to any project that touches that media.
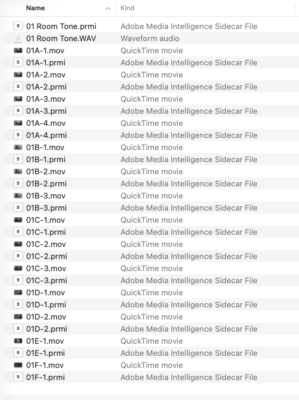
Every project now has access to that analysis.
For me, this is huge. I mount a SAN volume and have Media Encoder on a different system scan that SAN, targeted for transcription and visual analysis. My editing workstation doesn’t touch it.
You can also set up watch folders in Media Encoder pointed at your media directories. Drop footage in, and Media Encoder picks it up and runs the analysis automatically. This is how I handle it on the SAN with a dedicated machine.
Locally? Running it locally on your own machine works great. Just make sure you have Premiere set to tell Adobe Media Encoder to pause if you hit play.

Final thoughts
Walk away from your computer, let Media Encoder do its thing in the background, and when you come back, your footage is analyzed and searchable.
This is my new default.