

Filmtools
Filmmakers go-to destination for pre-production, production & post production equipment!
Shop NowUnderstanding the transition in Adobe Premiere (beta)


For years, Lumetri defined what color inside Adobe Premiere felt like. It was immediate, accessible, and—most importantly—fit for its intended purpose. You could drop it onto a clip, push a few sliders, and arrive at something that looked intentional. For many editors, that was exactly what was needed. Color wasn’t the destination. It was part of finishing, integrated directly into the edit.
Because Lumetri succeeded on its own terms, it brought color into reach for a broad range of editors—filmmakers, social creators, in-house teams—without requiring them to leave their workflow or adopt an entirely new discipline.
Lumetri was not designed to be a complete color system. It was designed to make color grading possible inside an editing environment. It prioritized speed and approachability. And for a long time, that alignment between design and use case held together.
How Lumetri Works and Why the Context Needed to Change
As workflows evolved, so did the kinds of images editors were working with. Log footage became standard. RAW and HDR entered everyday pipelines. Deliverables expanded across platforms, formats, and viewing conditions. Editors weren’t just finishing—they were shaping the image more deliberately. The same design decisions that made Lumetri effective began to define its boundaries. Not as flaws, but as the natural edges of a system built for a different set of priorities.
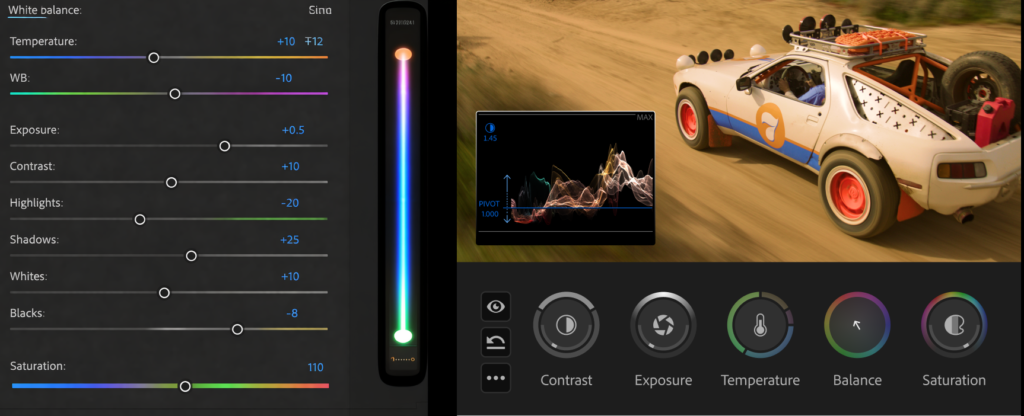
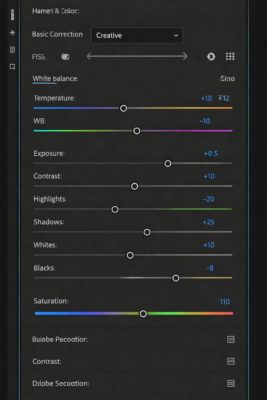 At its core, Lumetri treats color as a sequence of operations. Each adjustment builds on the one before it. This makes it intuitive: you move step by step, shaping the image as you go. That model is easy to learn and fast to execute, which is why it became so widely adopted.
But that same structure also means that earlier decisions influence everything that follows. As changes add up, the link between controls and results gets weaker. Experienced users learn how to navigate this—developing instincts, workflows, and habits that produce consistent outcomes.
Color Mode Starts from a Different Premise
Rather than organizing color as a sequence of steps, Color Mode in Premiere treats it as a system. The question shifts from “what adjustment comes next?” to “how should the image behave as a whole?”
This shift is not about replacing what Lumetri did well. It is about extending what is possible when color is treated as a foundational part of the pipeline rather than a layer on top of it. In practice, Color Mode behaves more like an application within the application—a dedicated environment for shaping color with its own internal logic, rather than a panel of effects applied onto the timeline.
The rebuild, led by Alexis Van Hurkman—who has worked extensively as a professional colorist, trained generations of artists, and wrote The Color Correction Handbook: Professional Techniques for Video and Cinema, widely considered an essential, textbook-level reference for colorists—reflects that shift in thinking. Instead of iterating on Lumetri’s interface, the work focused on rethinking the underlying model so that adjustments relate to each other in a more coherent way.
What emerges is a unified color pipeline. Adjustments exist within a defined color space and are evaluated in relation to one another. The image is not repeatedly rewritten at each step; it is interpreted through a consistent framework. In practice, this changes how the image responds.
Adjustments feel more connected. Pushing contrast doesn’t unexpectedly shift color balance. Skin tones hold their character even as other elements are shaped. Matching shots becomes more about aligning intent than compensating for previous moves. The system supports exploration because it maintains coherence as you move.
Color Mode Opens Up Creative Possibilities
Color Mode in Premiere invites a different kind of interaction with the image. Instead of carefully managing the order of operations, you can focus more directly on the result you’re trying to achieve. That makes it easier to experiment—pushing further, trying variations, exploring looks—without the same need to constantly correct along the way.
For editors coming from Lumetri, the instinct is often to recreate familiar workflows. To move step by step and to build the image in the same sequence. That instinct is understandable, but it can limit what Color Mode is actually enabling.
Color Mode gives you the opportunity to approach the image more fluidly. You can make adjustments based on what you see, not just on what you expect from color control. You are able to explore without assuming that each move needs to be carefully staged to avoid side effects.
Using Lumetri and Color Mode
Lumetri remains available, and it continues to serve the workflows it was designed for. It is reliable, fast, and well understood. Existing projects depend on it, and many editing scenarios still benefit from its directness. For many editors, that familiarity is not a limitation—it is a strength, and there is no requirement to abandon it.
What changes with Color Mode is not preference, but architecture. Lumetri and Color Mode are built on fundamentally different underlying models. Lumetri applies adjustments as a sequence of effects. Color Mode evaluates adjustments within a unified system. Those two approaches can arrive at similar results, but they behave differently as you push the image further.
Color Mode extends what becomes possible when you move beyond a sequential model into a systemic one. That difference is most visible when you begin experimenting—when you push contrast and color together, explore more aggressive looks, or iterate quickly across variations. The system is designed to support that kind of exploration without requiring you to constantly manage how each step affects the next.
Using both systems together is possible, but it introduces multiple ways of interpreting the same image. For most forward-looking workflows, choosing one approach and staying within it leads to clearer, more predictable results.
For editors across contexts—whether shaping a film, producing for social, or delivering work inside a larger organization—the shift is less about adopting a new tool and more about adopting a different mindset.
Color Mode creates space to push further. To try things that might have felt fragile before. To explore looks, refine intent, and iterate without the same constraints on how adjustments interact.
Embracing the Shift
That is the real difference.
Lumetri made color accessible. It gave editors a way in—a way to move quickly, to get to an image that works, to integrate color into the edit without friction.
Color Mode builds on that foundation, but it changes what happens after you get there. It gives you room to keep going, to refine further, and to push an idea instead of protecting it. You can explore variations without feeling like each move needs to be managed or undone.
The shift is not about replacing one mindset with another. It is about expanding it. Lumetri lets you move quickly on an individual clip—get in, make a decision, move on. Color Mode extends that speed across the entire sequence. With group and sequence-level operations, a single adjustment can ripple through every relevant shot instantly. Instead of repeating the same work clip by clip, you’re shaping the image at the level it actually exists—across scenes, across sequences, across the whole piece. You can still work quickly. But now that speed scales, letting you arrive at a finished set of images more efficiently.
In practice, that means approaching the image with more curiosity and pushing contrast and color at the same time. You can test looks you might have avoided and let the image evolve instead of locking it down too early. The system is designed to support that kind of exploration, not resist it.
The transition, then, is not about leaving Lumetri behind. It is about recognizing what it made possible—and using Color Mode to go further when you choose to.
For more information on Color Mode in Premiere (beta), visit Adobe’s website for more information and download the beta through the Creative Cloud application.
Premiere Color Mode Article Series
This article is article number two in a series of articles on Color Mode in Premiere. If you missed the first article, check out Why Adobe built Color Mode. In the next article, we’ll shift to Color Management First—setting up your pipeline for success before you begin grading, and why those decisions shape everything that follows.