https://www.youtube.com/watch?v=Bq9p3rCJXhQ&t=3s
This week on MacBreak Studio, I show Ripple Training’s Steve Martin how to create the “Pleasantville” or “Sin City” look using the new color tools in Final Cut Pro X.
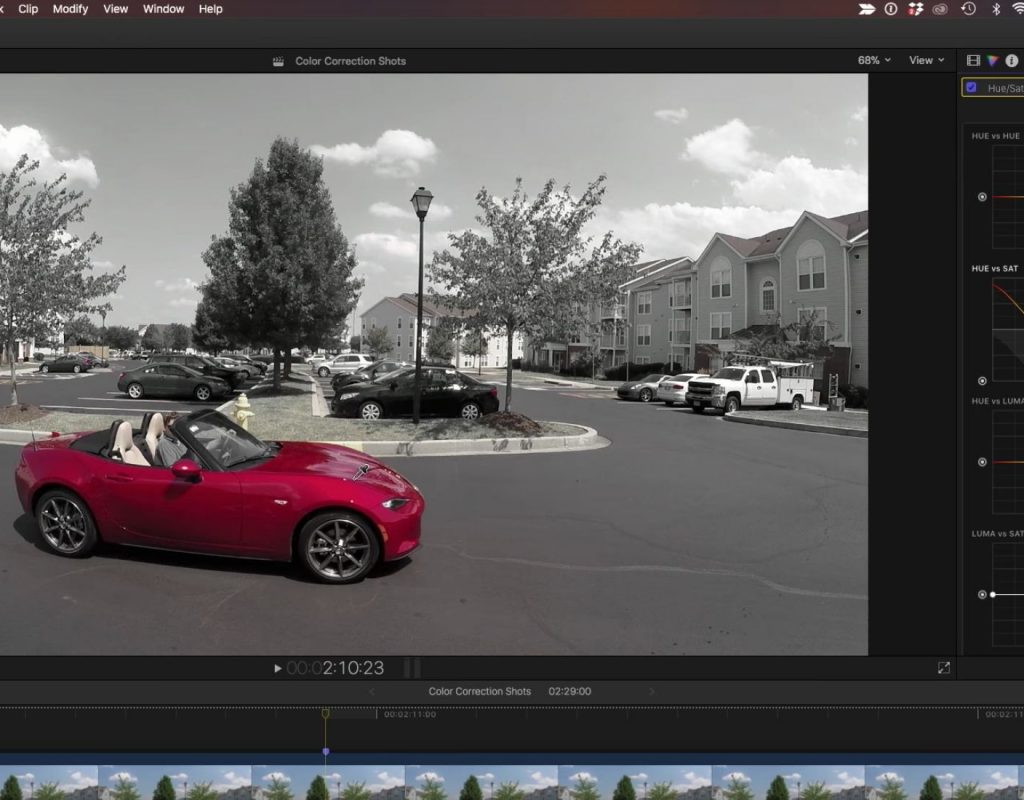
The essence of the look involves isolating a single color on a single object in a shot, leaving everything else completely desaturated. In our example, we have a clip of a red car driving into a scene. We want to keep the color of the car while removing color from everything else in the shot.
In previous versions of Final Cut Pro X, you would apply the Color Board effect, use a Color Mask to sample the car color, and then remove all saturation outside the mask.
However, for some objects, it can be very difficult to create a good selection with the color mask tool. That’s the case with this shot: the red of the car includes many brightness and saturation values of the same hue, and when you try to include them all, many other colors in the shot get included as well, making it almost impossible to get a good selection of the car only.
This is because the color mask sampler, as it increases the sample range, works something akin to a balloon inside a cube of color ranges: as it expands to pick up more of a specific hue, it expands in all directions, picking up additional hues as well.
The solution is to use one of the new corrections introduced in version 10.4 – specifically, the Hue/Sat Curves correction. This correction includes 6 different curves for adjusting Hue and Saturation; here, we are interested in the Hue vs. Sat curve. Instead of sampling a hue right away, we start by dragging the offset puck on the left side all the way down, thereby desaturating the entire shot. Then we sample the car and raise that sample up to return color to just the sampled range.
The hue sampler works quite differently from the color mask sampler in that it samples all brightness and saturation values for the sampled hue – so it makes a slice in the 3d color space rather than a balloon, allowing for much more precise hue selection. For more information on how these samples differ, check out this MacBreak Studio episode.
Once sampled, a dot appears on the curve for the sampled hue, plus “lock points” on either side of that dot that represent the range of hues that will be affected. Dragging up on the dot brings saturation back for just the car; if other hues are included, it’s easy to adjust them by dragging the lock points closer to the sampled hue.
Once the basic look is in place, we can then use the Hue vs. Hue curve to change the color of the car without having any impact on the black and white parts all around it! Check it all out above. If you want to learn how to use all the new color tools in Final Cut Pro X, check out our Advanced Color Grading tutorial.

