

Welcome to Tool Tip Tuesday for Adobe Premiere Pro on ProVideo Coalition


I was reviewing a long-form doc for a client last week (fresh eyes!) when my friend paused on a beautiful shot and said, “Uh…I think…I’ve used this feel like I’ve used this, but I’m not sure if it was in this cut.”
Adobe Premiere Pro has a bucket of tools for this.
Duplicate frame markers.
Under the wrench of the Timeline panel, make sure Duplicate Frame Markers are enabled.

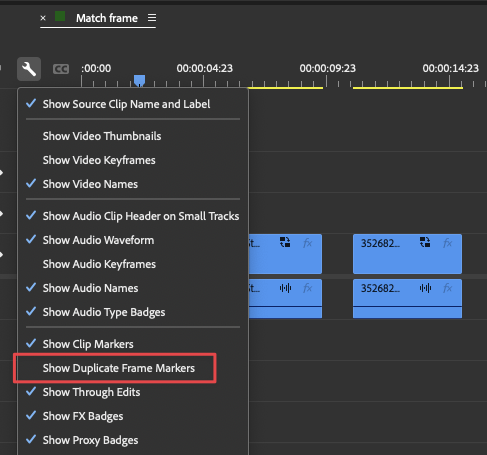
Lines now appear automatically when you’ve used the exact same frame from a clip elsewhere in your sequence. This is off by default.
While there, turn on Show Through Edits too – that’s where you’ve sliced a clip accidentally. (If you select the edit and hit delete, it will heal it)

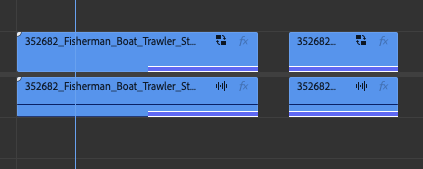
The Match Frame Workflow
Another quick way to see what part of a clip has been used is to hit the letter F. Premiere will find the source clip and put it into the source monitor, and parking the playhead on that frame.

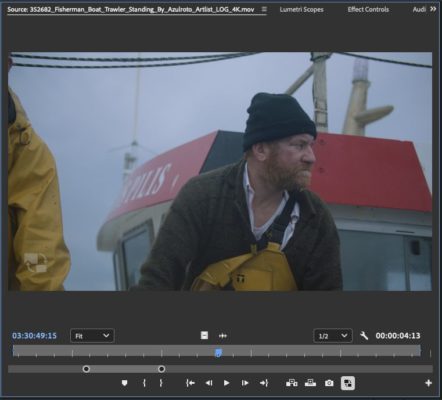
Make sure to double-click the zoom bar in the source monitor (between the circles). This instantly shows the full length of the clip.
This gives you the opportunity, especially with spoken footage, to see what’s before/after the moments in the timeline.
My Favorite: Reverse Match frame.
But this is what we’ve come for: The opposite issue. Did I use this frame? Press Shift+R.

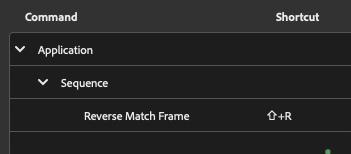
Park your playhead on any frame in the source monitor and hit Shift+R. If that exact frame exists anywhere in your timeline, Premiere jumps directly to it.
Final thoughts
These three live with me as a group, because they’re all related to my ability to see what I’ve used. These three features: Show Duplicate Frame marks, Match Frame, and Reverse Match Frame, allow me to quickly see if I’m safe, especially when it comes to my favorite visual moments.
This series is courtesy of Adobe.