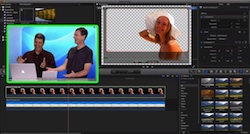
This week on MacBreak Studio, Steve Martin from Ripple Training shows us a cool trick for animating layered Photoshop files in Final Cut Pro X.
While you may know how to use the Ken Burns effect on an image, did you know it also can be applied to individual layers of a multi-layered Photoshop file? This ability, combined with a few other techniques, opens up all kinds of creative possibilities right inside Final Cut Pro X.
By first building a composite image in Photoshop (or separating a single flat image into multiple layers using selection tools and filling in the empty areas with cloning techniques), you can then import the file in Final Cut Pro X, where it appears as a “layered graphic file.”
You can open this file into its own timeline, where you have access to each individual layer (note that you'll need to rasterize vector layers such as ones with certain effects applied, or convert them to Smart Objects for them to appear correctly). From here, you can disable, transform, and animate individual layers with keyframes. And as Steve shows us this week, you can even animate those layers using the Ken Burns effect to create a pseudo-3D camera dolly effect.


