With more and more cameras supporting ProRes RAW recording to the Atomos Ninja V, this week I take a deep dive into the full workflow: setting up your camera and the Ninja V for recording ProRes RAW; on-set considerations; and how to then work with these RAW files in Final Cut Pro.
I recently returned from several video shoots in Belize and Guatemala where I had a chance to really put ProRes RAW to the test using my Sony A7SIII and the Ninja V. I enabled dual recording so that for every ProRes RAW clip, I had a corresponding XAVC clip recording to the in-camera SD card so I could demonstrate how each holds up under heavy grading in post.
Setting up the A7SIII to output ProRes RAW is straightforward but you need to make sure to get all the settings correct. And you need to understand that once RAW output is enabled, your internal frame rate will be determined by that RAW output frame rate, even if you aren’t recording to the Ninja. I learned this the hard way when I needed a series of slow-motion shots so I turned off the Ninja, switched to my custom preset to record at 120p, which was indicated on my camera LCD, but I discovered later that all those clips were recorded at the ProRes RAW output setting of 24p, so I had to reshoot all those scenes. Never again!
The Ninja V is also easy to set up for recording ProRes RAW: you first need to activate it by going to the Atomos website; then choose it as your codec; then choose either “regular” or the HQ version. For monitoring, I prefer to load the same custom LUT that I’m using in Final Cut Pro so that my monitor looks very close to what my clip will look like in Final Cut with that custom LUT applied.
On set I highly recommend you target a base ISO setting for your exposure, even if it means slightly over or under-exposing your image. And white balance carefully as well, as this setting is not adjustable for all cameras in Final Cut at this point.
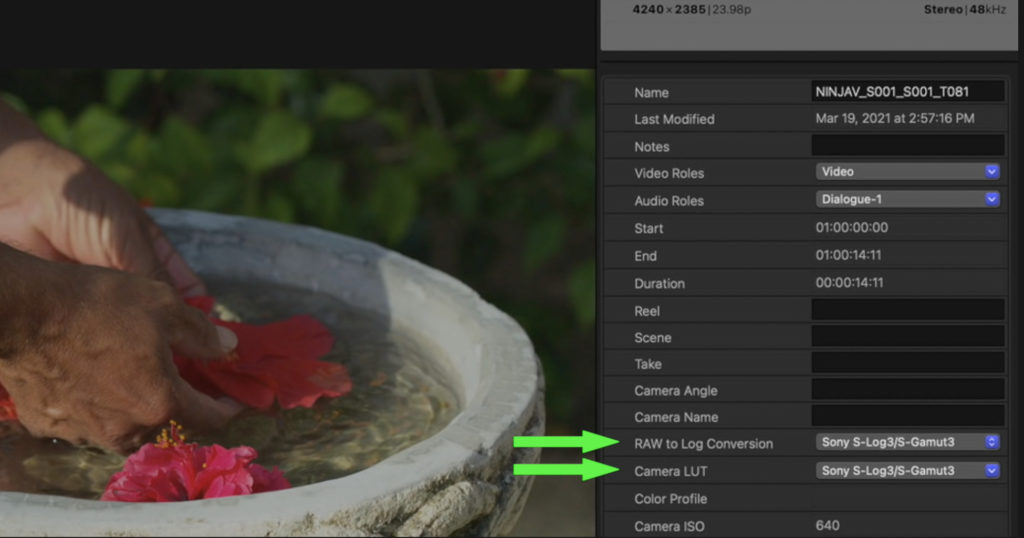
In Final Cut Pro, I walk you through how to set your RAW to Log conversion and apply a LUT if you choose to do so, and then demonstrate the difference between these ProRes RAW clips and XAVC clips when it comes to grading, banding, and noise. It’s quite fascinating, I hope you agree!


