


If you’ve been editing in Premiere for a while, you’re used to treating color as a set of sliders, scopes, and panels. You know where everything lives. You know how to push things around. That model works, but it confines the work to individual clips and forces you to manage consistency by hand.
The new Color Mode in Premiere (beta) is built differently. It is purpose-built for editors, fully integrated inside Premiere, and designed to remove the need for a separate grading application. The work stays in place, with a system built around how images relate to each other, how decisions ripple across shots, and how quickly you can move through an entire sequence.
This is not a feature layered onto the existing workflow. It is an application-sized system inside Premiere—with expanded logic for how color decisions are made and how they scale. Work inside that system and the behavior is consistent; results carry across the sequence without additional effort.
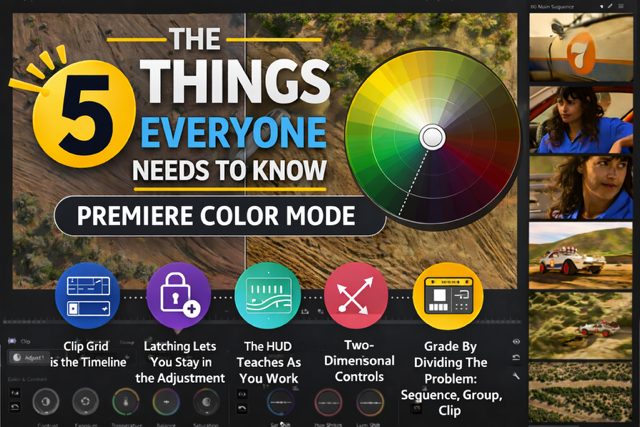
Here is how Color Mode actually works and how to quickly get into the Color Mode mindset. These are the five things that matter—and why it clicks once you experience it for yourself.
Before getting into that, it’s worth being precise about how the system is structured. Color controls are individual adjustments. Modules are individual effects. Styles combine two or more Modules. Operations determine how grades are applied at the clip, group, and sequence levels. These terms are not interchangeable; they define how the system—and your grades—are organized. Drift back into node or layer language and the model starts to break down.
1. The Clip Grid is the Timeline
The clip grid is not a secondary view of your sequence—it is another way of visualizing it. Each thumbnail in the grid is a color-managed representation of a shot at a specific point in time. When you make a correction, you are not working in isolation; you are working in context. You can see adjacent shots, compare them directly, and make decisions that hold across cuts.
This changes the unit of work. Instead of grading one clip, evaluating, moving on, and hoping it holds, you are constantly balancing relationships between shots. The grid removes the need to remember what came before or after—it is visible at all times.
Speed comes from removing uncertainty, not from moving faster through individual clips. You are not guessing whether a change will hold—you can see it hold, or not, immediately across surrounding shots.
2. Latching Lets You Stay in the Adjustment
Latching refers to how you interact with a control. Click once, and it stays active. The HUD appears, and you can make adjustments without needing to keep holding the mouse button down. This changes the feel of the work. You’re not dragging, releasing, and re-engaging. You stay inside the adjustment and refine it until it’s right. It removes friction at a very basic level, and does wonders to reduce wrist-ache at the end of the day. Small, repeated actions disappear, and the interaction becomes continuous instead of stop-and-start.
While these new color controls have been designed with comfort and nuance in mind, be aware that control surface compatibility is a work in progress and fully intended to be available for the controls in Color Mode in the near future.
3. The HUD Teaches as You Work
The heads-up display is not fixed. It changes based on what you are doing, showing you the most relevant analysis of the video frame and contextual overlays for the control you’re adjusting. Color Mode is designed to reduce the number of options for visual feedback you have to manage at once. Instead of presenting every scope and overlay at all times, it surfaces only what is relevant to the current operation. This helps keep you focused on the adjustment at hand, helps keep the image front and center, and better guides you through how you’re manipulating the image.
4. Controls Are Two-Dimensional
Most primary adjustments in Color Mode are not sliders. They are two-dimensional, driven vertically to align with how the video scopes transform in the HUD—improving hand/eye coordination. The horizontal adjustment is typically a related control that works in conjunction with the vertical to refine your result. You click to latch, then drag up or down to make the adjustment, which matches how the scopes respond as you work.
This changes how you think about corrections. Instead of adjusting one variable at a time, you are working across axes—balancing hue against hue, saturation against density, exposure against black level, contrast against pivot.
This lets you move faster toward a target look because you are not iterating through single-axis changes. You are making adjustments and expanding the range of adjustment at the same time. Precision comes from placement, not incremental nudging.
5. Grade by Dividing the Problem: Sequence, Group, Clip
Color Mode is built so that a single decision can affect many shots at once. That only works if you approach the grade in the right order.
Start at the sequence level. Set the overall look you want using straightforward Adjust controls or more creative Style presets and adjustments, then move on to groups of clips and make adjustments to differentiate each scene to fit your creative goals. Finally, go shot by shot and make any adjustments needed for consistency.
Each step reduces the work left to do. The sequence handles broad improvements. Groups resolve patterns. Clips handle true exceptions.
If you start at the clip level, you lose that advantage. You end up making the same decision repeatedly, small inconsistencies creep in, and work that should have been handled once at a higher level gets duplicated across the timeline.

What This Means in Practice
Color Mode isn’t a new panel layered on top of the old way of working. It changes where the work actually happens. Instead of treating each shot as an isolated task, it treats the sequence as a system where every decision affects everything around it.
That changes how you approach the job. You’re no longer asking, “What tool do I need?” You’re asking, “What am I affecting?” The answer might be a single clip, a group of related shots, or the entire sequence. The tools stay the same; the scope changes.
Once that clicks, the way you approach color correction shifts. You stop repeating the same fixes across dozens of clips. You make a decision once, apply it at the right level, and watch it carry through the sequence. The time savings don’t come from moving faster through a single shot—they come from not doing the same work over and over again.
Premiere Color Mode Article Series
This article is article number four in a series of articles on Color Mode in Premiere. View the rest of the articles in this series via the links below:
- Why Adobe Rebuilt Color From Scratch
- Color Mode vs. Lumetri — What’s Different and Why It Matters
- Color Mode in Premiere: Setting Up for Success
In the next article, we’ll talk about the Clip Grid in Color Mode and how it’s sure to be your new best friend.