With Apple’s release of the new iPhone 12 and 12 Pro a few weeks ago, you can now shoot Dolby Vision HDR video (in 10-bit 4K 60 on the Pro version) on a mobile device. But how do you edit and deliver it so that it can be properly viewed? That’s what we are talking about in this week’s episode of MacBreak Studio.
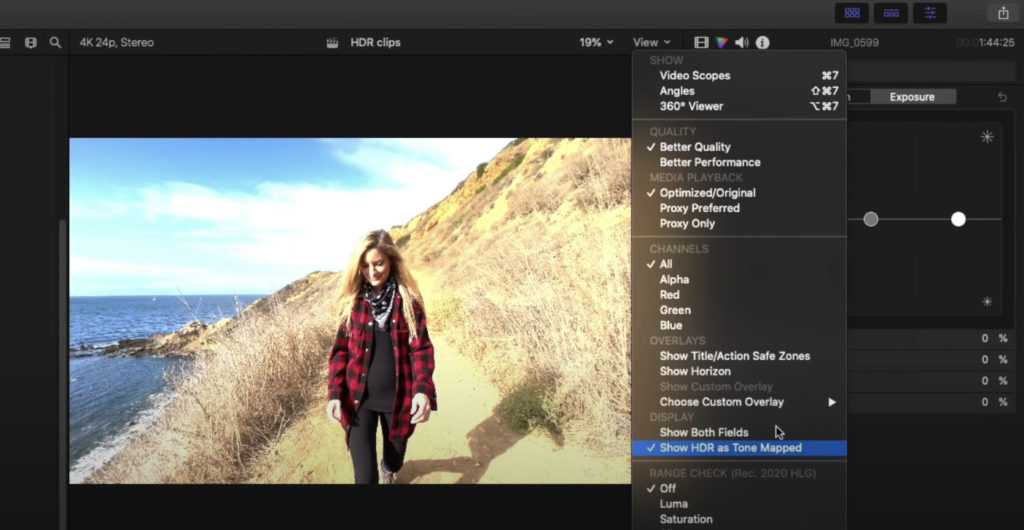
If you plan to deliver an HDR version, the first step in Final Cut Pro X is to create a Wide Gamut HDR library, and then create an HDR project within that library, in this case choosing the HLG version of HDR. When you import your HDR clips, when viewed on you Mac’s screen (unless you have a Pro Display XDR) they will appear blown out in the Browser and the Timeline since your Mac cannot display the full brightness range of these clips (modern Mac screens top out at about 500 nits and these clips range up to 2,000 nits). However, the clips will look correct in the Viewer because the Viewer automatically tone maps HLG to the SDR range of 100 nits (note that you can turn this setting off with an HDR PQ project).
That’s helpful for seeing how your HDR clips will look when delivered in SDR, but for grading the HDR clips, you really need to be connected to an HDR monitor through an AJAio4K Plus. Now, I would wager most folks who will have an iPhone 12 and who edit their videos with Final Cut Pro X won’t have these two devices as they are quite expensive. For them I’d advise to be very conservative in any grading you do for HDR delivery.
So about that HDR delivery: if you plan to distribute on YouTube, that platform can automatically display the HDR or the SDR version of your video depending on the viewing device – but only if you first export your video from Final Cut Pro X locally – in ProRes 422 wide gamut HLG – then upload manually. If you use this workflow, and then view the video on a Mac running Safari on Catalina, you’ll be presented with the SDR version with no option to view the HDR version – since it won’t appear correctly (note that on Big Sur you’ll get the HDR version). If you want to see how it looks on a Mac screen in HDR, try the Chrome browser since it doesn’t work correctly and forces you to see the blown out HDR version.
But if you watch the YouTube video using their app on a newer iOS device, you’ll get to view the full HDR version since these screens can display these higher brightness values.
Finally, if you want to mix your HDR clips with SDR content for SDR (Rec. 709) delivery, we’ll show you how to do that using the very handy HDR Tools effect.
Check it out above and let us know what you think.


