


Adobe has shipped Premiere version 27, which moves Color Mode out of beta and into the shipping version. This is one of the biggest changes Premiere has had since I’ve been using the application. This is one of the biggest changes to come along in Premiere since I’ve been using the application. Color Mode is more than just the Lumetri panel and working with clips directly in the edit timeline. It’s a whole new interface designed specifically for dedicated color grading. Color Mode isn’t new, and a lot of the burning questions I asked about Color Mode are still relevant today. There are a lot of people who won’t touch a beta, so this will be their first time to get their hands on the new Color Mode.
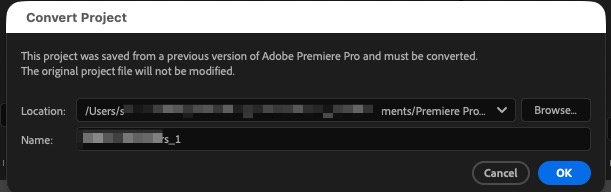
First things first. This is a brand new version of Premiere, so you will want to install it alongside other versions of Premiere. The release notes include a full list of new features, and they are long. Our latest Tool Tip Tuesday explains exactly how to install a brand-new version of Premiere. If you try to open an old project, you will be prompted to save it as a new version because projects opened in Premiere 27 will not open in Premiere 26. Aside from that, if you must update mid-project, do it the right way.

Why did Adobe abandon Lumetri and create Color Mode?
Lumetri was old technology built using old color science and color math. The only way for Adobe to move Premiere’s color engine and adjustment tools into a more modern era was to rebuild them from scratch with new color management and adjustment math to support those improvements. At the same time, Adobe recognized that color workflows in Premiere needed to expand to speed up the grading process. Instead of cramming all these new capabilities into a new panel, the dedicated Color Mode interface provides a focused workspace with tools designed to make color work as easy and efficient as possible. This includes a single viewer front and center, a clip grid you can sort and rearrange to support quick multi-clip selections and grouping for faster grading, and brand-new color controls designed to work with either a mouse or control surfaces. Color mode was designed to be powerful yet simple, using color operations at the clip or sequence level instead of layers, nodes or multiple instances of a single effect stacked into a small panel within the editing interface. Color Mode is powerful in its initial release, but designed to be expandable as more tools and features will be added as it improves and expands.
If you’re worried that this is more complicated than you need, you’ll probably find it’s easier to learn than you think. If you’re worried this is too simplistic for complete color workflows, you’ll discover plenty of capabilities waiting for you to unlock in the various menus throughout the interface.
How can I properly learn Color Mode?
Color mode is going to be a big change for editors who have spent years working in Lumetri panel. My challenge would be for those who take a look at Color Mode and decide it’s too different, too difficult, or just doesn’t do what Lumetri does, to give it a chance. Walk through the tutorial that you’re presented with when you open this update for the first time.

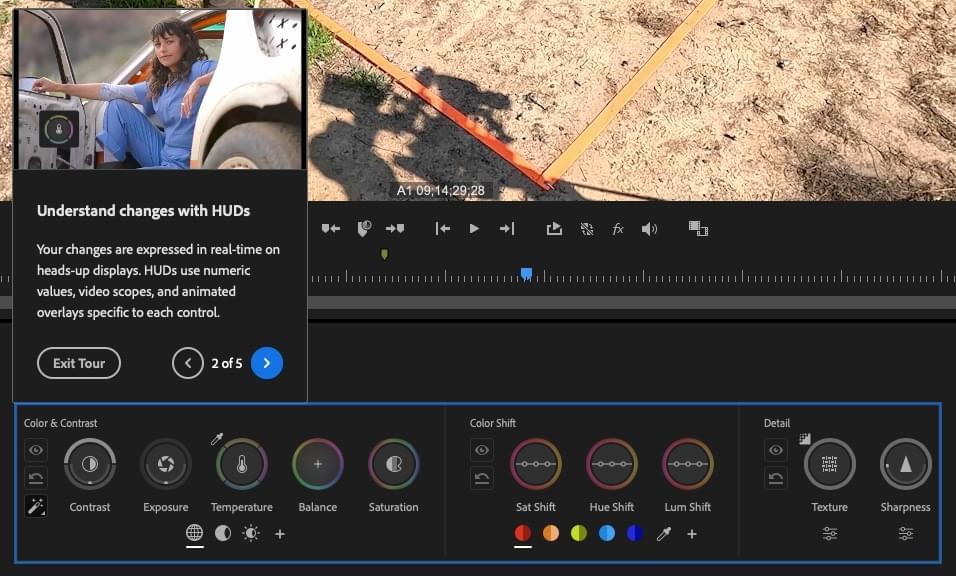
You’re not going to use Color Mode as it’s meant to be used from that Learn Color Mode in Five Minutes YouTube video. Instead, bookmark this YouTube playlist that walks you through many different aspects of Color Mode with much more targeted precision.

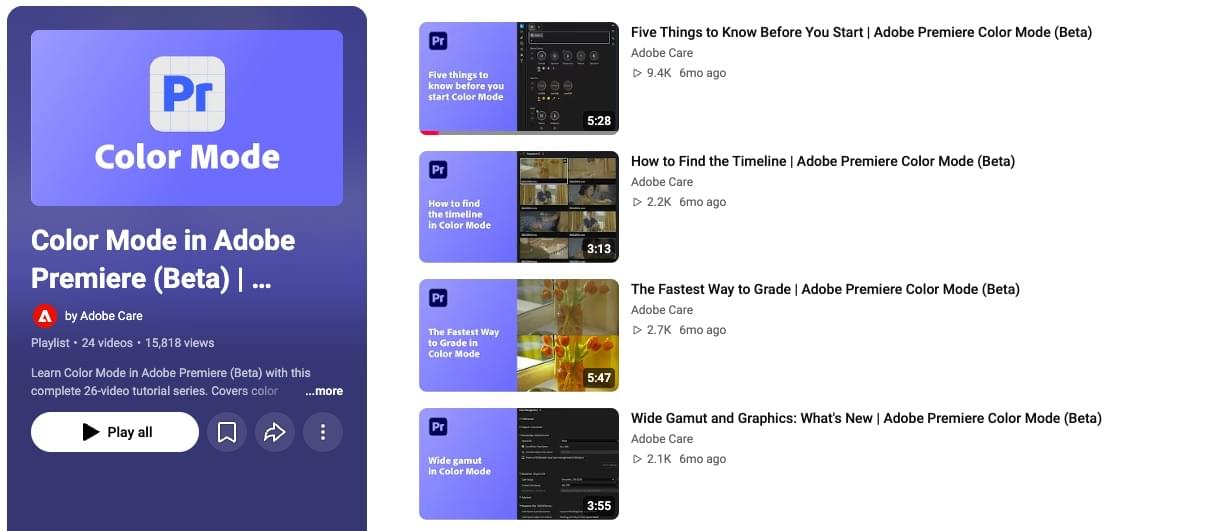
This series of videos by Adobe Care is currently the best place to understand what Color Mode is all about because it was made by the architect of Color Mode himself. Since it’s been in beta for a while, these videos were produced during the beta, so interface elements may have changed a bit, and some new features have been added. But they are by far the best place to get the details from the people who developed it.
These are three I think are important for those moving to Color Mode.
⬇️ The Fastest Way to Grade

⬇️ Where Curves Went and What Replaced Them

⬇️ How to Use the New Color Controls

Seriously, take time to watch all the videos in that playlist. That will help move to this entire new way of working with color in Adobe Premiere.
What are some things Color Mode can do that Lumetri can’t?
You can do a few specific things in a dedicated interface like Color Mode that aren’t possible in a panel that’s just part of the editing interface.
Sorting the clip grid by different parameters
The clip grid in and of itself is worth mentioning as it’s a new way to view your timeline for color grading but the real power comes in when you see how it can be sorted in a number of different ways.

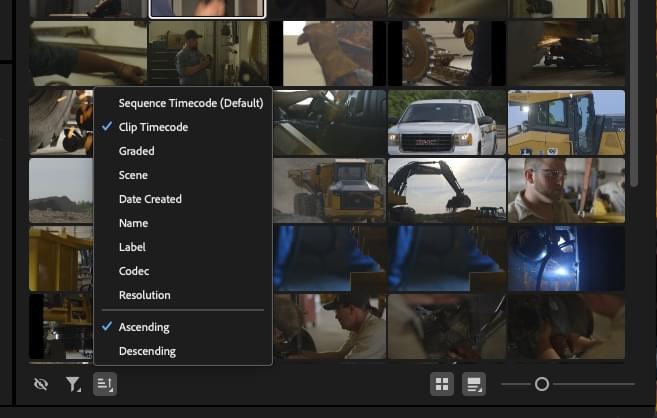
Resorting the clip grid speeds up grading because you can show all the shots from the same camera together, sorted together. Imagine a conversation with 50 back-and-forth shots between two people talking. It makes it easy to grade one clip for one camera and then quickly apply that to all the other instances of that out of that same camera.
You can apply a grade across the entire sequence
There’s an option to apply a sequence grade, which makes it fast to add a look, a vignette, or anything across the entire sequence. No nesting, no adjustment layer.
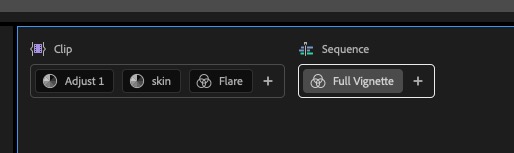

You can quickly rename any grade or adjustment to keep things clear and organized.
Color Reference Markers are easier for comparison
Part of color grading is matching shots, and Comparison View has been Premiere’s tool for helping do just that but it was often difficult to find that comparison frame with Lumetri.
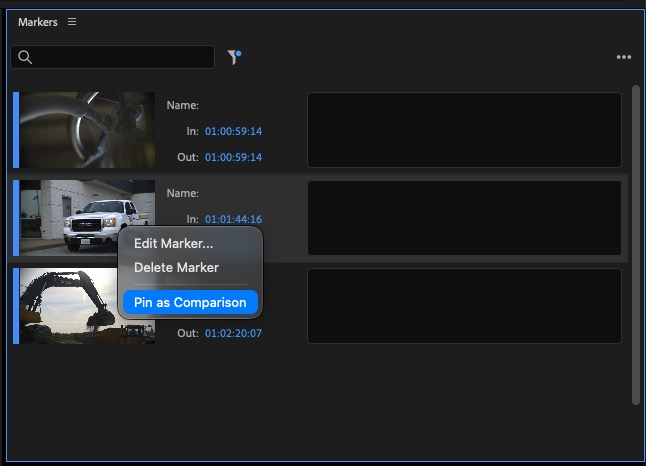

With the new color reference markers, you can pin the frame at a color reference marker as the frame for comparison view. So no more scrubbing up and down the timeline or entering the timecode to get your color reference.
You can switch between clip playback and sequence playback
When color grading, you often spend a lot of time on a single shot, so being able to keep the playhead focused within a single clip is important. And you can do just that by toggling between clip playback and sequence playback.
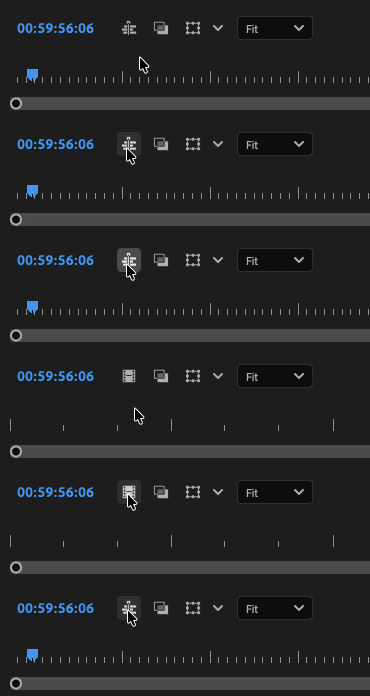

If you turn on loop playback and go into clip playback mode, then Premiere will loop the same clip over and over, and you can actually create in real time while the clip is playing back. I don’t think that’s something that colorists do very often, but it can be useful for a troublesome clip.
Color Mode has brand-new video scopes
While a lot of marketing muscle is focused on the new Heads-Up Display (HUD) and the interactive scopes that come with them, Color Mode has traditional scopes that have been rebuilt for the more modern color architecture.
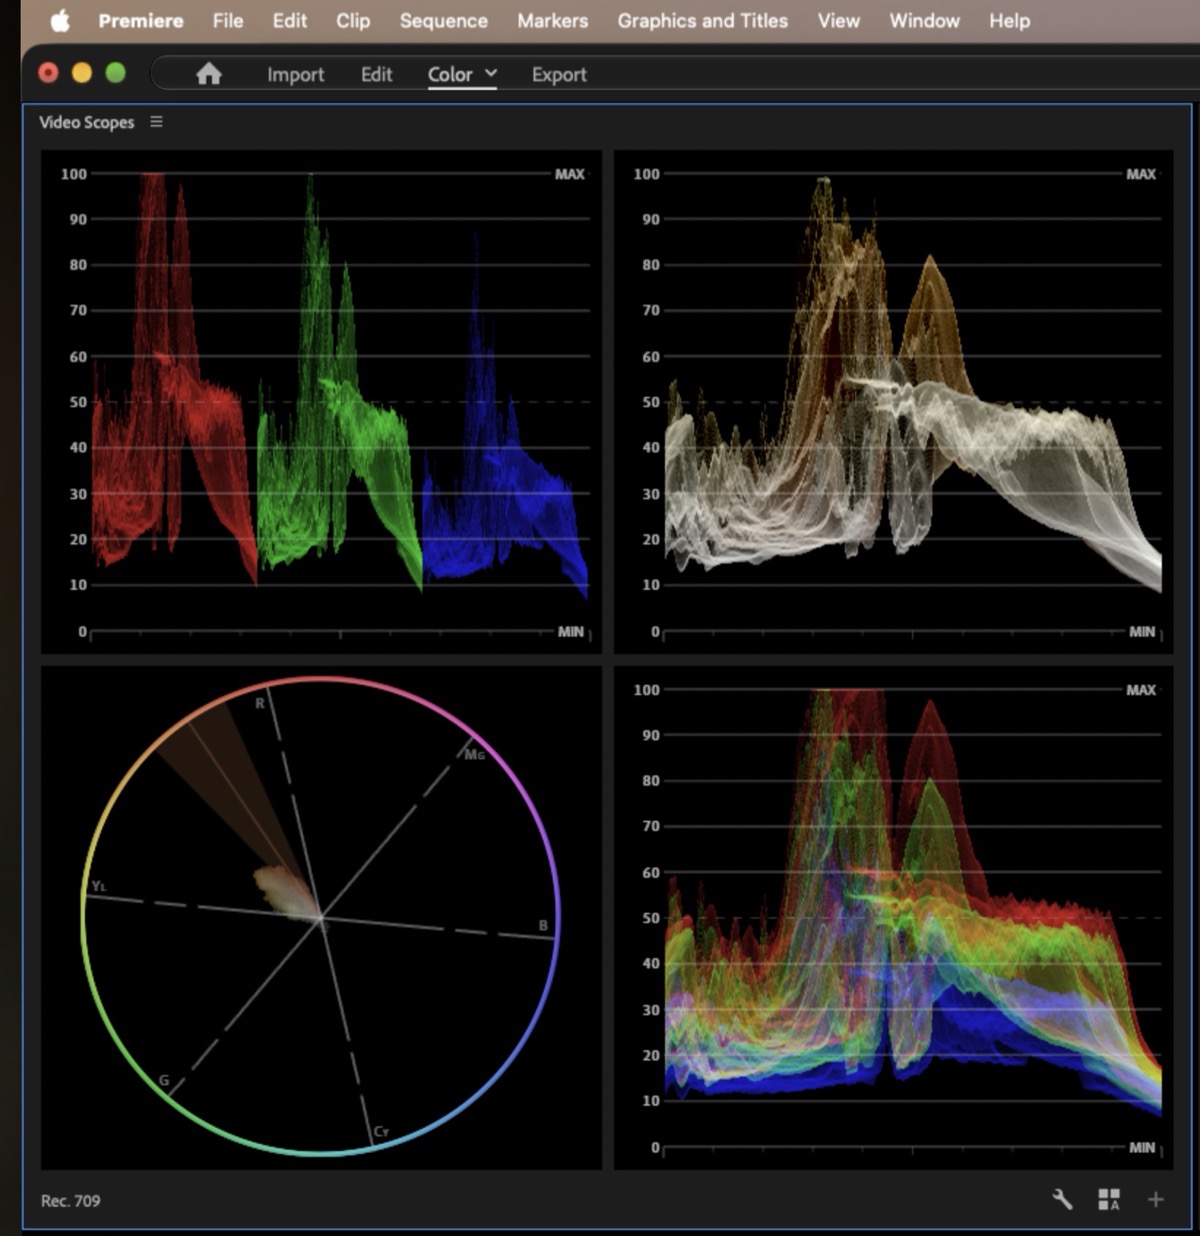

You can customize the video scopes to a single scope or multiple scopes in one panel, and then save the workspace for easy recall.
Color Mode has its own dedicated keyboard shortcuts
With Color Mode, there is a separate set of keyboard shortcuts just for this new mode. While we’ve always been able to have multiple keyboard layouts saved, the same key can perform different tasks depending on whether you’re in Edit Mode or Color Mode.
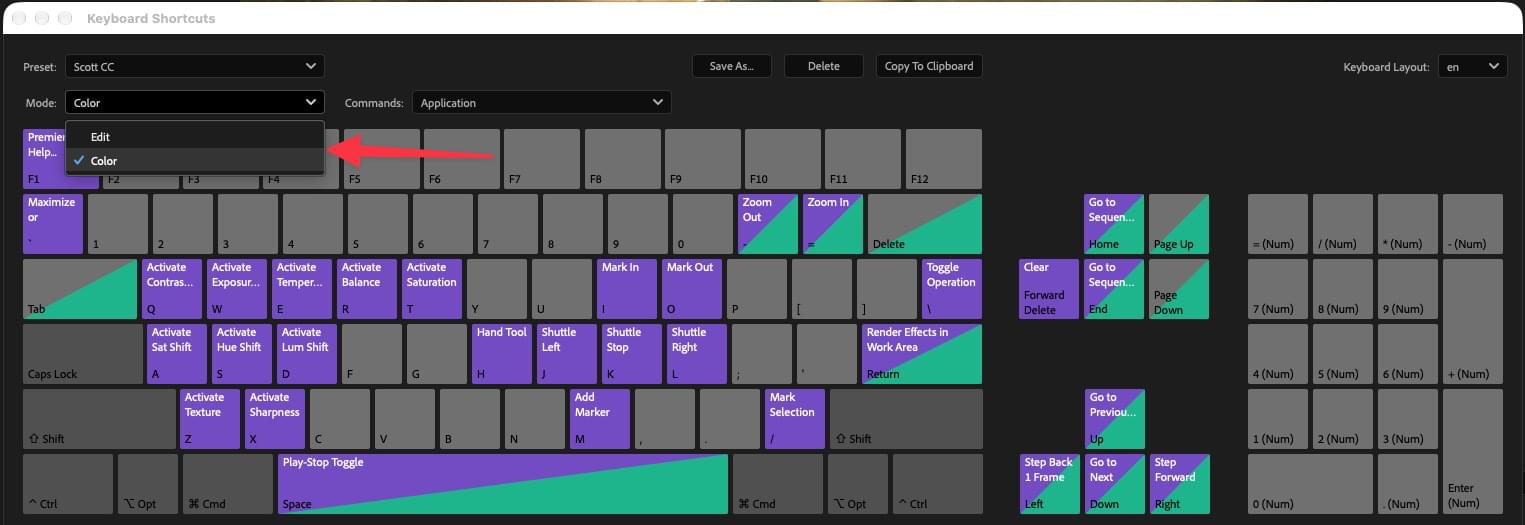

The new Color Mode keyboard setup will take some work to learn and understand, and even map to your liking, but serious color graders will appreciate it, since Color Mode is a brand-new interface.
Is there more?
There is a lot more in the new Color Mode beyond what I’ve mentioned above, and we will discover more as we dig deeper now that it’s officially released. It’s important to look at Color Mode outside of both the Lumetri panel and the inevitable comparison to DaVinci Resolve. It works differently than both tools and offers a new way to interact with and do color grading in Premiere. I have done a lot of color grading in Premiere and can do it quite well and quite fast in Lumetri, but for a long time it’s been quite fiddly with sliders, wheels, curves, and just so much stuffed into that one little panel. While Color Mode is missing some specific things that Lumetri had (I’m looking squarely at your RGB curves), Color Mode has new things Lumetri didn’t have. It will keep evolving as Premiere advances into the future.
And is there a bullet-point feature list for everything that’s new in Premiere 27?
- Move from edit to color without breaking your flow. Color Mode is a new color grading workspace in Premiere, built for editors and right next to your edit.
- Get AI help with complex or repetitive tasks using the new AI Assistant panel, which understands your Premiere project and helps you complete them.
- Generate images from text prompts directly on the Premiere timeline using Generate Image in the Generative Media Tool.
- Sync generated sound effects to your video with the new Sync to Video button in the Generate Sound Effects panel, part of the Generative Media Tool.
- Create original, royalty-free music from a text prompt, right on the Premiere timeline, with Generate Music.
- Analyze your video and create matching ambiance and sound-effect layers on the timeline using Generate Soundscape.
- Get improved controls and an updated experience when using Enhance Audio to improve the clarity and quality of dialogue.
- Automatically detect and separate two overlapping speakers recorded on a single mixed audio track into individually routable timeline stems with Separate Crosstalk, powered by the Adobe Firefly audio service.
- Keep audio mixes balanced as you edit. Auto Ducking now updates keyframes automatically as you add, trim, or mute clips, so there’s no need to select Generate Keyframes after every edit.
- Find and preview the right effect faster. The Effects panel now has thumbnail images and preview videos for all the video effects and transitions, and improved search. Preview from source lets you see how a video effect will look on your footage.
- AI/ML features such as Enhance Audio, Enhance Speech, Scene Edit Detection, and Auto Reframe now run faster on Windows computers with NVIDIA RTX GPUs.
- Create more looks with eight new effects, including Bevel Alpha, Bevel & Emboss, Posterize, Radial Blur, and Zoom Blur, for enhanced compositing, texture, and motion design.
- Adjust effects faster. Video effects, audio effects, and masks now appear as easy-to-read cards in the Properties panel, a simpler alternative to the Effect Controls panel.
- Target colors precisely with HSL Masking, which isolates colors by hue, saturation, and luminance and works alongside other masks, so adjustments affect only the area you choose. It works well in Color mode.
- Create cleaner, more reliable Object Masks with improved tracking, smaller file sizes, and easier mask file management and recovery.
- Create the extra frames your transitions need. When a transition needs more frames than a clip has, Generative Extend can now create the missing frames for you.
- See audio waveforms drawn on the timeline in real time while you record with the Audio Track Mixer or Voice-Over.
- Show iXML metadata on audio clips in the timeline and in the Source Monitor. (This blog post if finally 100% wrong)
- Adjust clip speed and duration with a redesigned dialog featuring multiple audio stretching modes, high-quality processing, and pitch controls to preserve natural-sounding audio, without the need to round-trip to Audition.
- Get native support for Windows on ARM (ARM64) on PCs powered by the NVIDIA RTX Spark (N1X) chip. It also uses NVIDIA’s TensorRT, which accelerates on-device AI features such as Object Mask, Enhance Speech, and Scene Edit Detection.
- Turn off Live Ripple Edit with a new Timeline preference, so ripple trims update only after you release the mouse.
- Support for Sony FX5 X-OCN formats, including LT, C1, and C2.
- Premiere now requires a minimum amount of GPU memory. Computers that don’t meet it can no longer launch Premiere, and a System Compatibility Report explains why.
- Object Masking, Scene Edit Detection, Auto Reframe, and Enhance Audio now use NVIDIA RTX acceleration on Windows on ARM.
- NVIDIA hardware decoding is now supported for H.264 and HEVC files in MXF on Windows on ARM.
- Support for raw video formats on Windows on ARM has been updated. The following formats are supported, including hardware acceleration: ARRI ARRIRAW and ARRICORE, Canon Cinema RAW Light, RED R3D and R3D NE, and Nikon N-RAW.
- ARRIRAW and ARRICORE footage from the ARRI ALEXA 35 Xtreme is now supported natively on Windows on ARM.
- Support for importing Sony RAW and Sony 16-bit linear F65 RAW footage has been removed.