


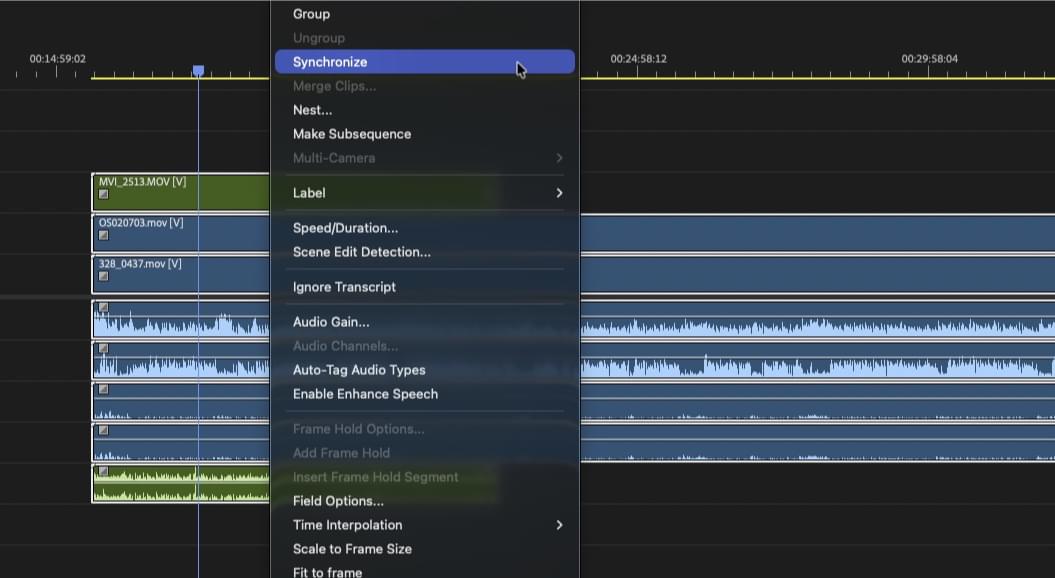
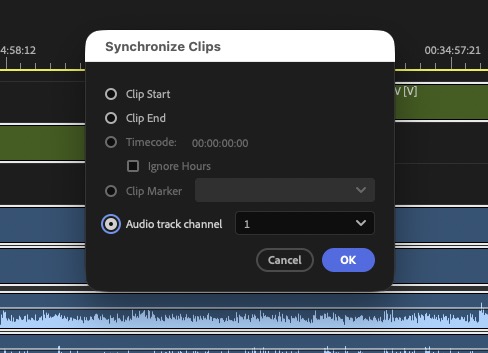
If you’re shooting with multiple cameras for an interview or any other typical multi-camera shoot, and you’re not using the traditional Create Multi-Camera Source Sequence workflow, you may just want to sync a few angles right in the Premiere timeline. And that’s easy enough: stack the angles in the timeline one on top of the other, select all the angles, right-click, and choose Synchronize.

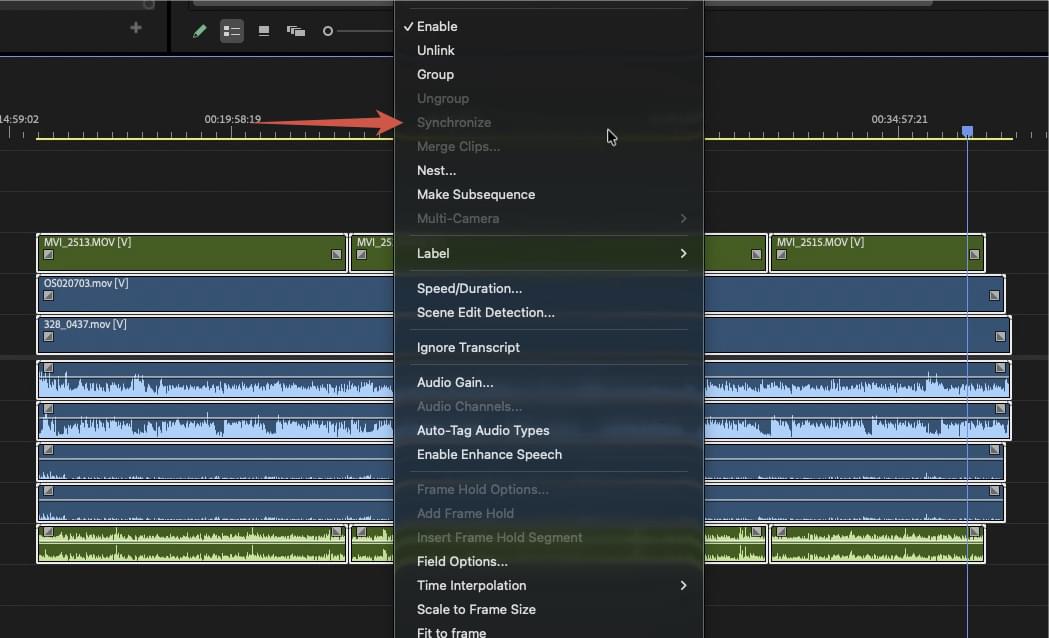
But this method gets tricky if you have multiple adjacent clips from the same camera on the same track. The in-timeline Synchronize doesn’t work.

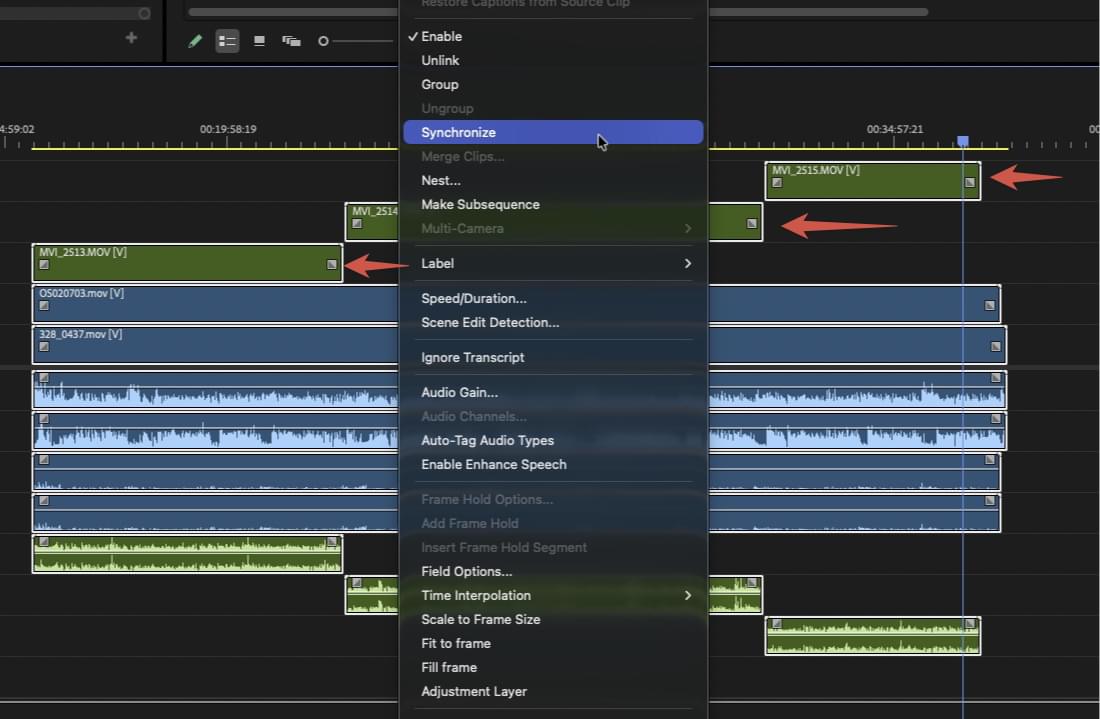
This is a rather strange quirk of Adobe Premiere. But the key to making this work is to place both the audio and the video of the adjacent clips onto their own track.

This technique might not be doable if you have an extensive multi-cam production where you’ve got many starts and stops on multiple angles over a long recording time. That’s a place where traditional multi-cam creation from a Premiere bin would be in order. But for the quick sync of smaller multi-cam shoots or a place where you have just one camera that has starts and stops, this is a quick option.

This series is courtesy of Adobe.