

Welcome to Tool Tip Tuesday for Adobe Premiere Pro on ProVideo Coalition.
Every week, we will share a new tooltip to save time when working in Adobe Premiere Pro.


How often have you gone to sync a batch of multicam clips by timecode, and you end up with a mess like this in your Multi-Camera Source Sequence? And this is just a simple 3 camera interview.


It’s worth noting here that as far as we’re concerned here, a Multi-Camera Source Sequence and a “Multicam clip” are the same thing.
If you are syncing for multicam using timecode, you can use a little-known Track Assignments feature buried deep within Premiere to automatically organize all camera angles onto the same track. You might have seen this option in the Make Multi-Camera Source Sequence dialog box, but it is only applicable if you are syncing with timecode. By assigning a Camera Angle or a Camera Label that when you tell Premiere to make a single multi-camera source sequence, it will place all of the same angles onto the same tracks if the proper metadata has been applied.
First, you have to turn on the Camera Angle and/or Camera Label metadata column for the clips you want to sync while in list view in a bin with. I prefer Camera Label as cameras are usually lettered A, B, C, D, etc. To get access to these metadata fields, while in this view, go under the bin “Hamburger Menu “- that’s the three little lines in the tab at the top of a bin, and choose Metadata Display…
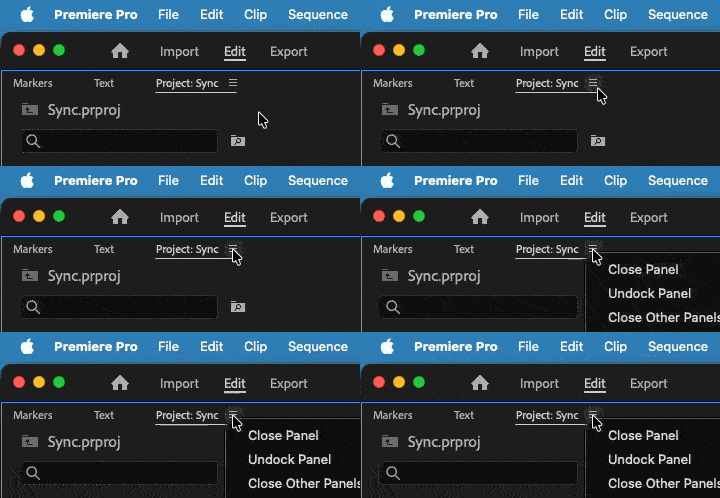

Metadata Display… is located near the bottom of this long menu. If you don’t use the different metadata displays then learn about how useful it can be and download my free project view metadata presets.
The Metadata Display dialogue box is a busy dialogue box full of many different metadata parameters. The ones we want are under the Dynamic Media set, and that is the Camera Angle and/or Camera Label fields.


You can search for these fields in the search box at the top, check the ones you want to display, and then save those as a preset for future easy recall when you’re in this dialog box.
Once those new metadata fields are displayed, you can assign a camera label for each clip that comes from the same camera angle.


With those camera labels assigned and syncing with timecode, you check an important option in the Create Multi-Camera Source Sequence dialog box to make all this work together.


Under Timecode, check the Create single mulitcam source sequence box and then under the Track Assignments pop-up, choose the parameter that you assigned to each individual angle. As mentioned above, I always use the Camera Label option. With those things set with this mulitcam syncing method you’ll only get one Multicam clip (instead of several individual ones) with each camera angle on it’s own unique track.


What’s really nice here is Premiere has assigned the syncing timecode as the master timecode on the new Mulitcam Source Sequence. When you open that multicam clip in the timeline you can see all the synced angles in a sync map, placed in sync with the master timecode.


You’re now ready to go to work editing with that new multicam clip.
you can batch assign these camera labels as well and that’s exactly what this tooltip is for: Tool Tip Tuesday for Adobe Premiere Pro: Batch Assign Camera Angle/ Camera Label Metadata.
Notice that I have italicized by timecode several times in this tip. That’s because this method only works when syncing with timecode. For some reason you can’t use this Camera Label/Angle metadata when syncing with waveform, markers or in points. Why? Only Adobe knows for sure.
This series is courtesy of Adobe.