


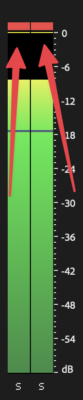
When your audio hits the red, the top of the audio mixer, it’s going to clip and going to distort.

If you’ve performed a decent mix, it shouldn’t happen. And hey, if you don’t know how to do a decent mix, I highly recommend you learn about Adobe’s Essential Sound Panel. It can at least get you into the ballpark.
The key thing is that it’s preventable.
Why the red is bad
0 dBFS (DeciBles Full Scale) is the ceiling. There’s no sound above it. Every time it shows you red, you’re seeing it peak. Once your audio slams into it, you get clipping, which is digital distortion.
Source Audio
On source materials, whatever level you see, was the measurement of its sound when it was recorded. You can add or remove decibels to that, but the meter itself represents the OUTPUT sound, with 0 being the ceiling.
Sound waves themselves can be additive.
Back in the day, when the tools were more limited, we would exploit this by putting in a quiet sound twice, and it would add a total of 6 dB per instance.
The thing is…you already know this. Every time you go to a football game, you hear one voice shouting during the kickoff. When the entire stadium does it, you get over 120 dB. The volume of an airplane.
When we talk measurements here, we’re talking about sound in the outside world.
Inside of Premiere (or any audio tool) we’re talking about the digital world, and 0 is the top.*
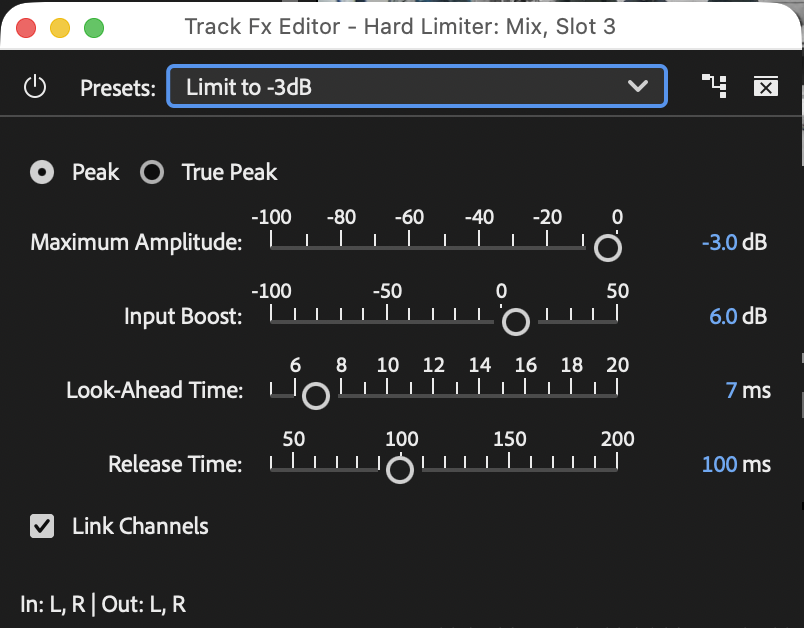


Set a Hard Limited on the Master Output
The basic idea here is we’re going to set a very specific type of compression and place it on the master output mix. Yes, you can put an effect on a track – or in this case, the full mix.
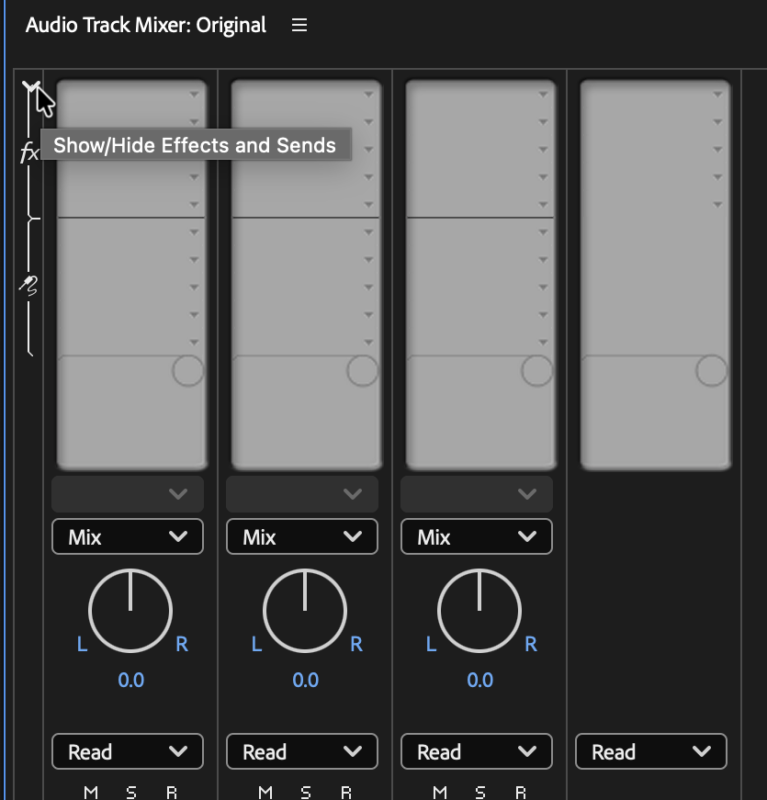
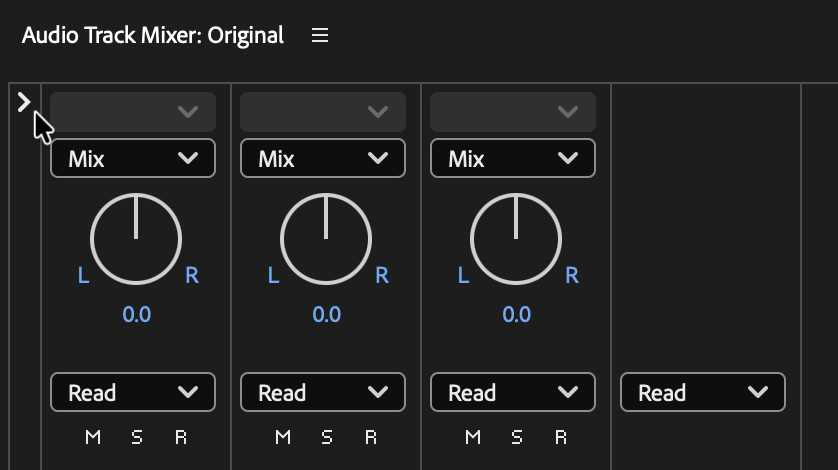
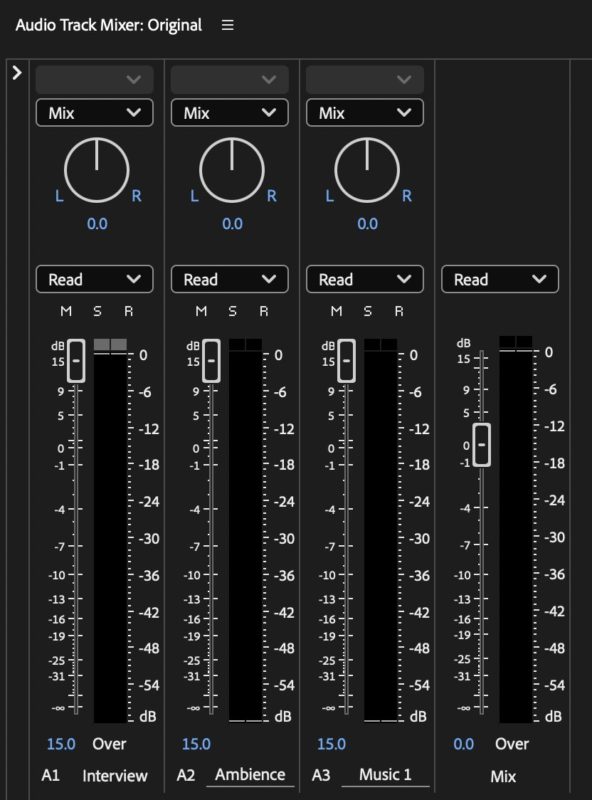
Open your timeline. Go into the Audio Track Mixer (not the Audio Clip Mixer, the Track one).
Roll open the Show/Hide Effects and Sends triangle on the left side.
Every strip has five effect slots at the top..
Find the Mix Strip. It’s on the far right.
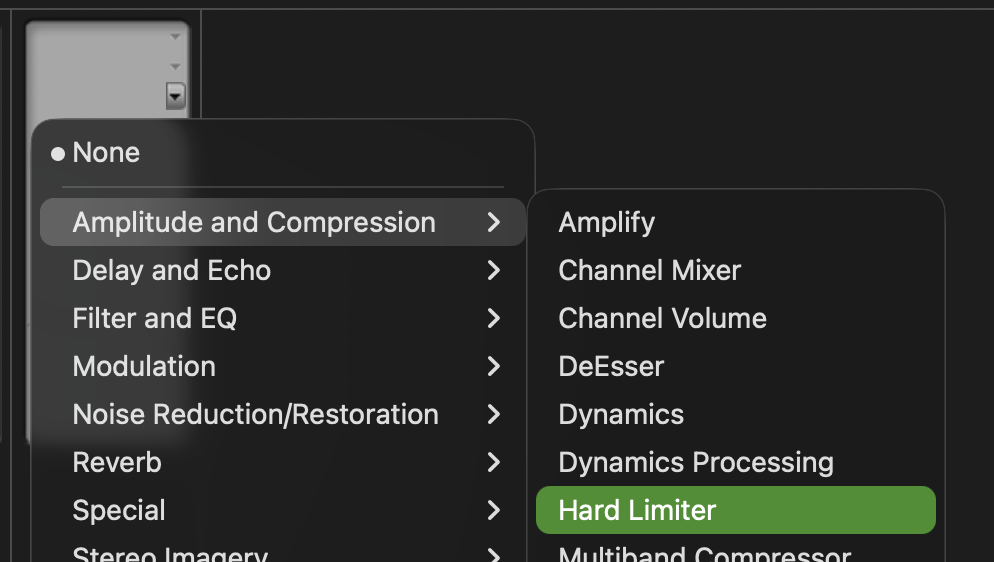
Click the little drop-down arrow in an effect slot, go to Amplitude and Compression, and choose Hard Limiter.
Double-click it to open the controls.
Look at the Maximum Amplitude. Default is -0.1 dB.
That’s it.
By putting this on the Master Output, you’ve guaranteed nothing leaves your timeline above -0.1 dB. Which means nothing reaches 0. Which means it is impossible to have anything in the red.



Where you set the ceiling depends on where it’s going
-0.1 dB is a solid everyday number. But the ceiling isn’t sacred.
Some broadcast environments want more headroom, so you’ll see -6 dB. If you’re delivering to a spec sheet, read the spec sheet and set it to match.
One note: this is a peak ceiling, not a loudness target. It stops overs. It does not set how loud the program feels.
What about YouTube?
Web delivery is its own animal. YouTube normalizes everything to around -14 LUFS integrated, and it recommends keeping your true peak at or below -1 dBTP. LUFS is perceived loudness over time. dBFS is the instantaneous peak. Two different measurements.
The Hard Limiter handles the peak side. It keeps you under that -1 true peak ceiling so nothing clips when YouTube re-encodes your file into its own format. The loudness side is a separate conversation for another Tuesday.
Final thoughts
I set this on the Master and forget it’s there. It’s part of my default Master Timeline. Every delivery leaves my system with a hard ceiling baked in.
-0.1 for the web, -6 when broadcast asks for it. Either way, the red stops being something you have to check for.