


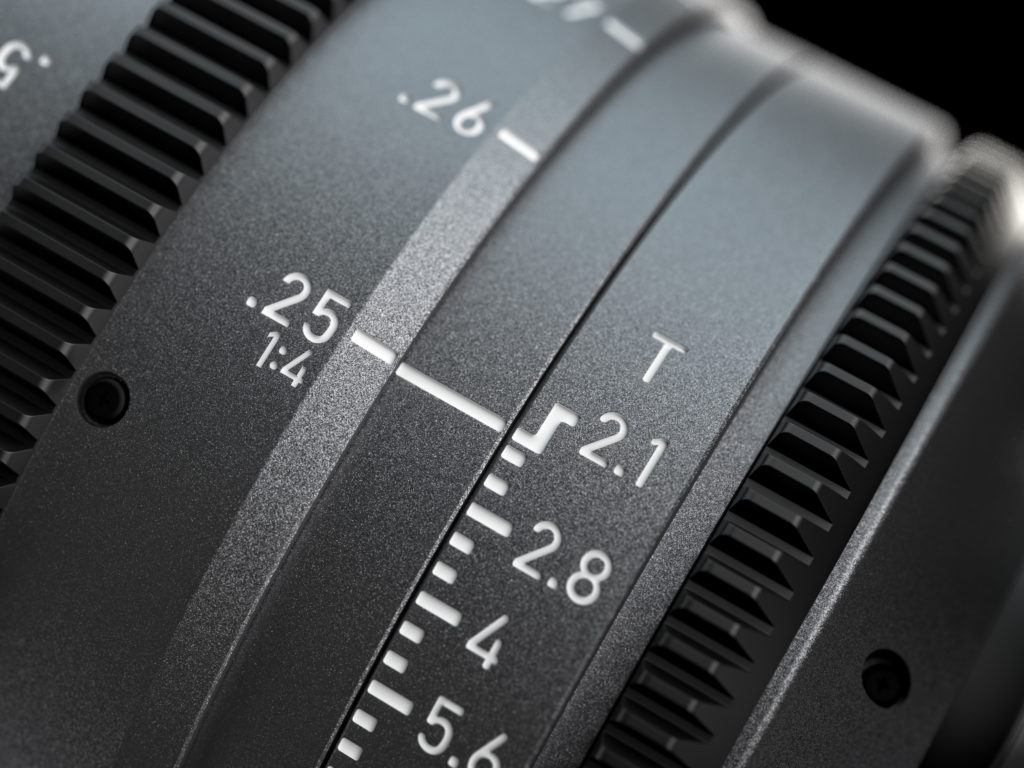
What does the close focus distance say about how large something will be in the frame? Zero. But there’s another way…
Whenever I show off a new lens, one of the first questions I hear is always: “What’s the close focus distance?”
That isn’t the right question to ask. It makes the assumption that all lenses will deliver the same frame at the same close focus distance.
One of the secrets of lens design is that this is almost never the case.
Your friend, the front entrance pupil
The close focus distance marked on a lens barrel doesn’t tell you anything about the actual frame size at that distance. It also doesn’t guarantee that two lenses, of the same focal length but from different manufacturers, will capture the same size image at the same focus distance. It’s very likely that they won’t.
This is due to an ethereal thing called “the front entrance pupil.” Close the aperture of any lens and look through the front element. Can you see where the aperture appears to sit, at some distance deep inside the lens? That image of the aperture is the front entrance pupil, and where it sits, along the length of the lens, determines the center of perspective of the lens.
(Actually, I should say, “Where it appears to sit,” because the image of the aperture and the actual aperture are likely not inhabiting the same position. Cue spooky music…)
You can think of this virtual image as the “viewer eye point.” Put your eye at this point and you would see the same perspective that the lens sees (barring any extreme wide angle or telephoto effects). The relationship of objects to each other (how far apart they are, how they overlap, etc.) will be exactly the same.
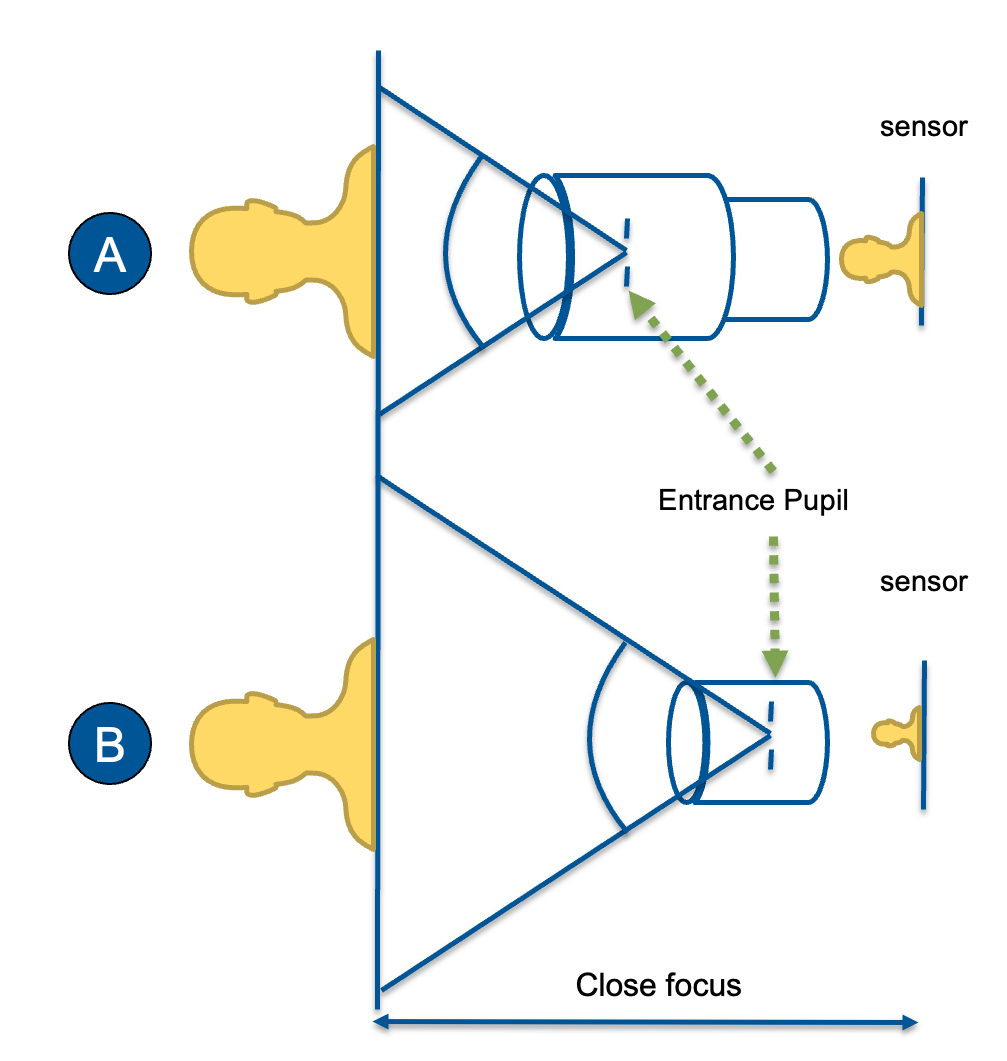
Two lenses of the same focal length, made by different manufacturers, will likely have different entrance pupil positions. That means the image magnification at close focus will be different, which in turn means that each lens will deliver a different image size at close focus.
For example, if you look at the lens at the top of this diagram, the “eye” of the lens is closer, so objects at close focus appear larger in the frame. That’s the secret: the distance markings on the lens say nothing about where the entrance pupil sits.
To take the guesswork out of close focus framing, ARRI designed ARRI Ensō Primes to show magnification ratios near close focus. At the magnification ratio marked on the lens, you’ll see the exact same frame size, regardless of the focal length used.
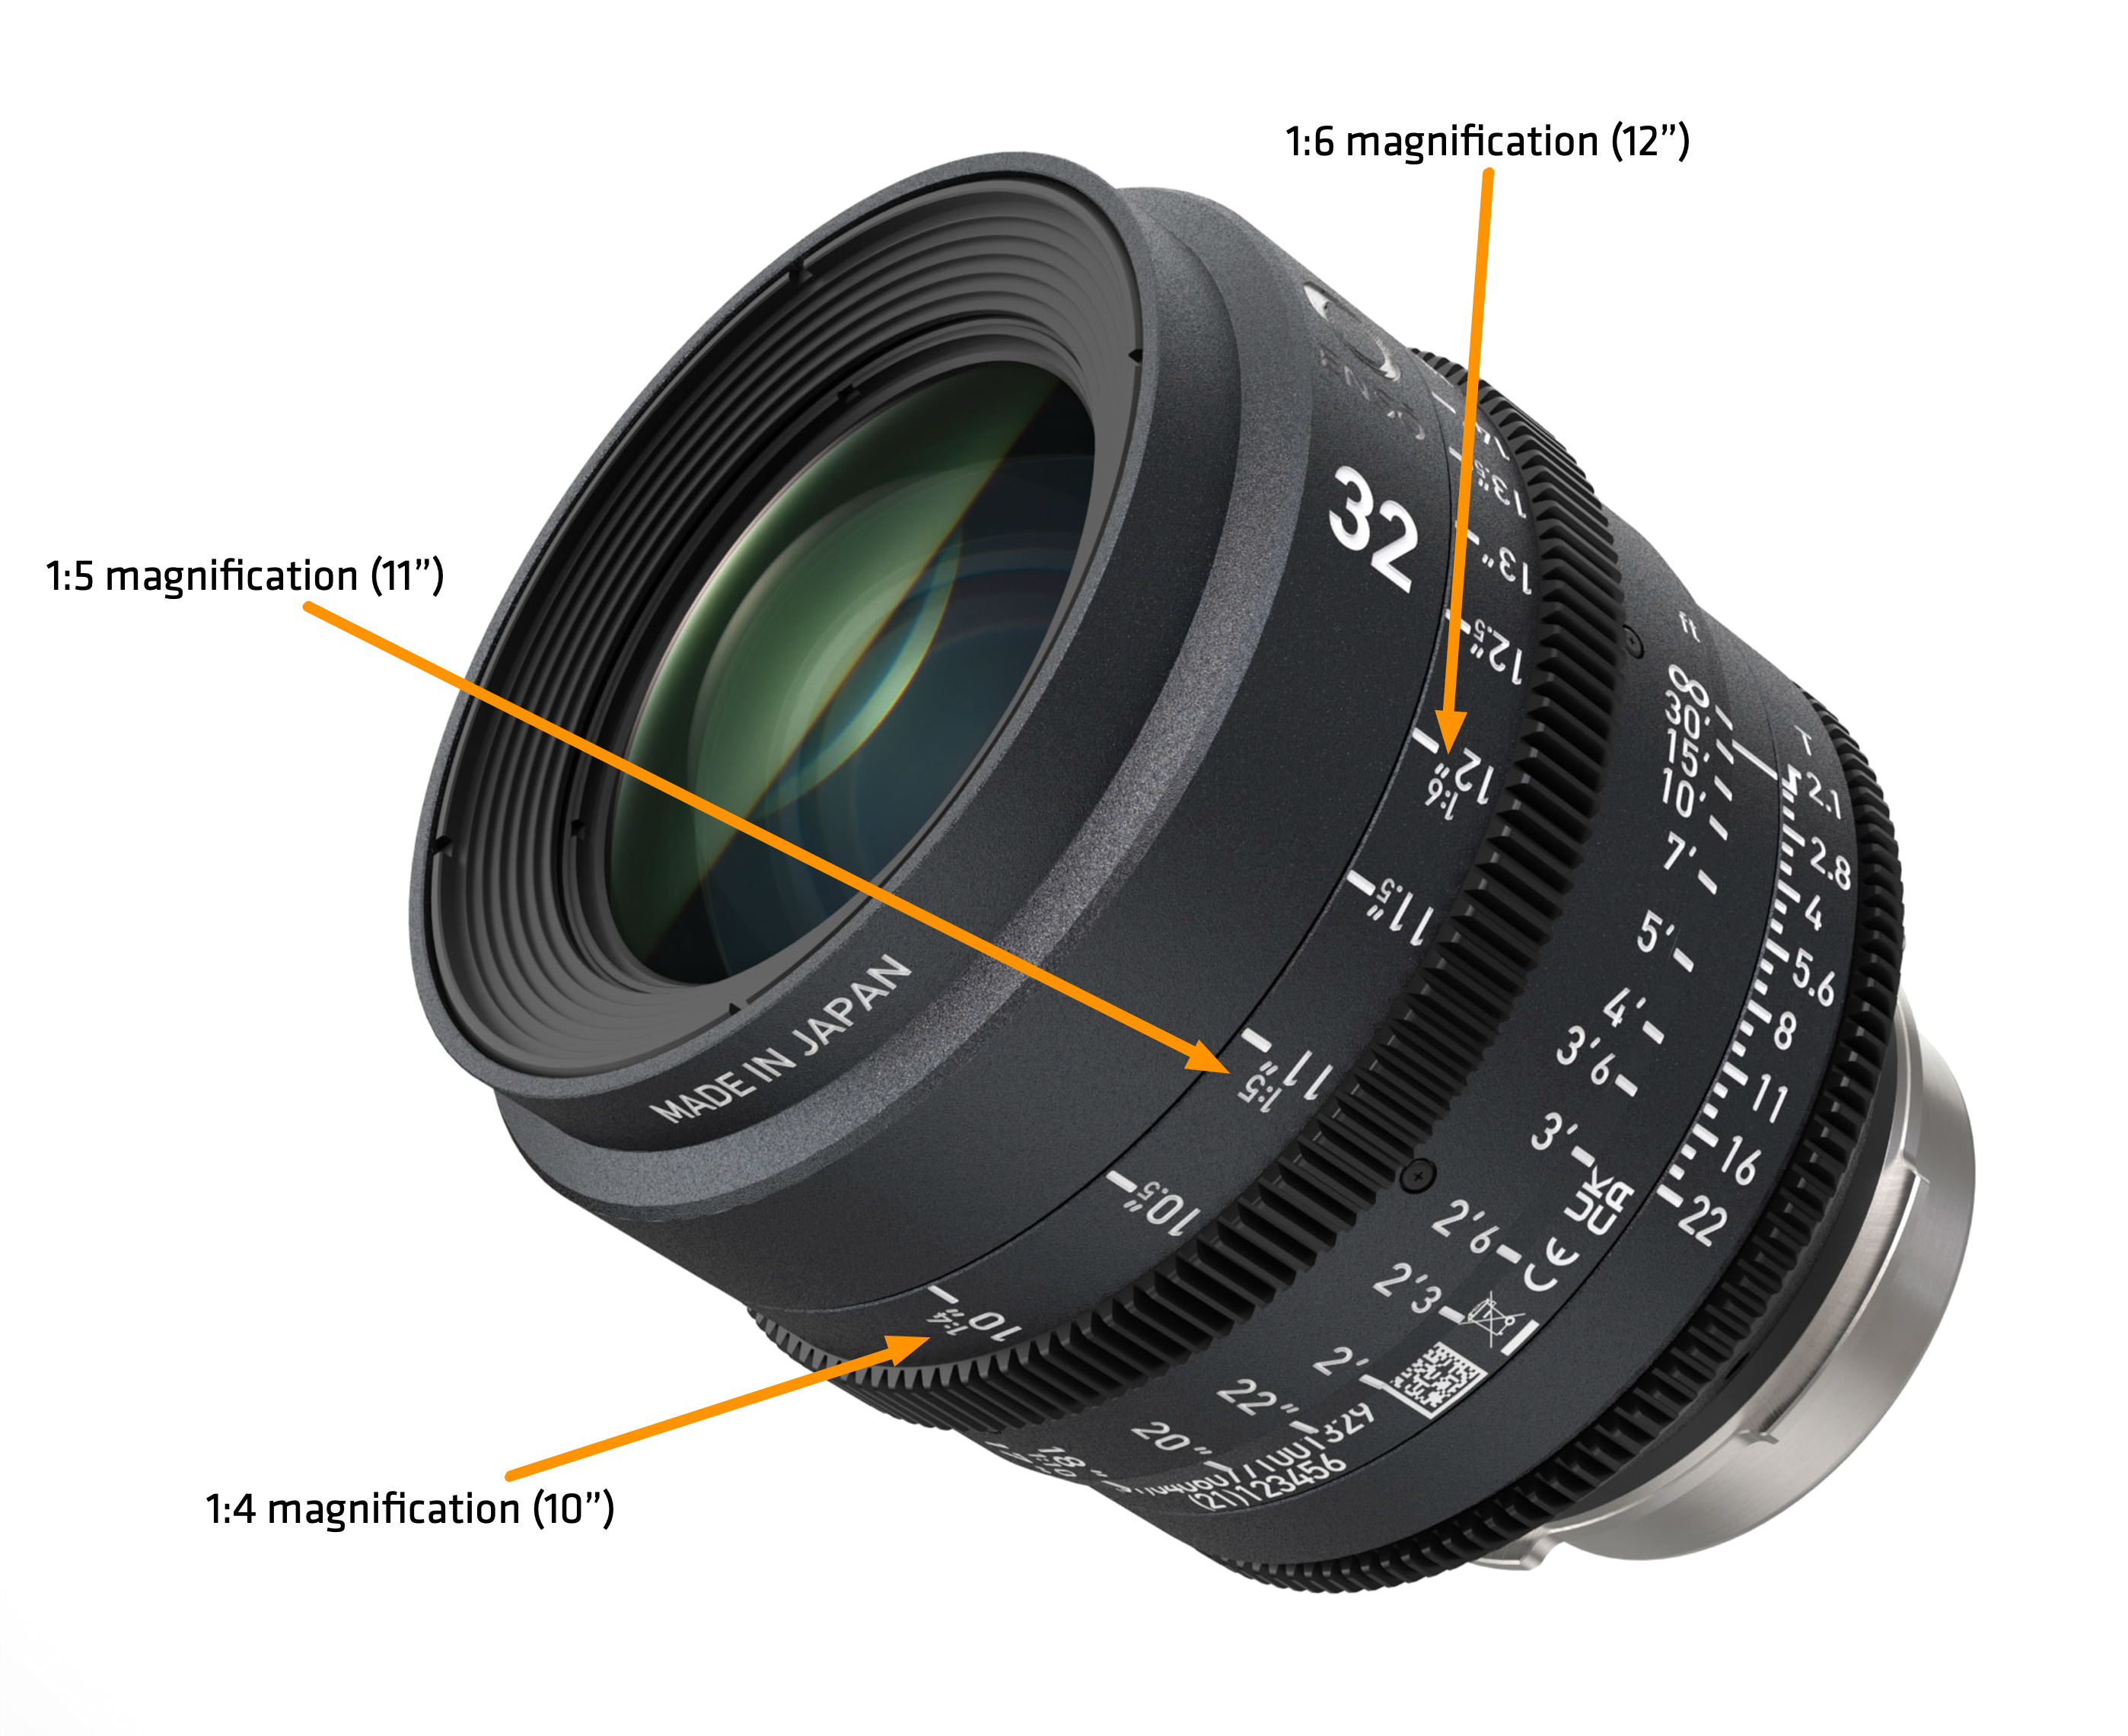
Twelve of fourteen ARRI Ensō Primes will reach 1:4 magnification, and that point is marked on every barrel. At 1:4 magnification, the close focus frame is about the size of a post card.
The Ensō 10.5 mm and 14 mm won’t focus at 1:4 as the subject would have to be inside the lens barrel, but they still focus a short distance from the front element (1:10 and 1:8 magnification).
And now… some useful math
If you can find your lens’s magnification at close focus, there’s a simple formula to calculate the resulting frame size.
Frame size = sensor width / magnification
First, convert the ratio to a number. In the case of 1:4, 1 / 4 = 0.25.
Then, let’s assume we’re shooting with an ARRI Mini LF. The Mini LF’s open gate sensor width is 36.7 mm wide.
Plug those numbers into the frame size formula:
Frame size = 36.7 mm / 0.25
The frame width for any Ensō lens at 1:4 magnification on a Mini LF is 146.8 mm, or about 5 3/4″.
If we’re shooting with an ARRI ALEXA 35, which has an open gate sensor width of 27.99 mm, the frame width changes:
Frame size = 27.99 mm / 0.25
The ALEXA 35 real world Ensō 1:4 frame size is 111.96 mm, or about 4 1/3″.
Note that the magnification hasn’t changed between the Mini LF and ALEXA 35. We’re just grabbing a smaller section of the circle of light projected by the lens (S35 vs LF).
More entrance pupil tricks
Long, long ago, visual effects elements were added to a scene by painting them on a glass plate positioned in front of the camera. The artist would leave a hole in the painting where the actors appeared. This worked well for static shots, but it didn’t work at all for shots where the camera panned or tilted. For the foreground and background to track correctly, the camera system’s center of rotation has to be oriented on the entrance pupil of the lens, not the camera.
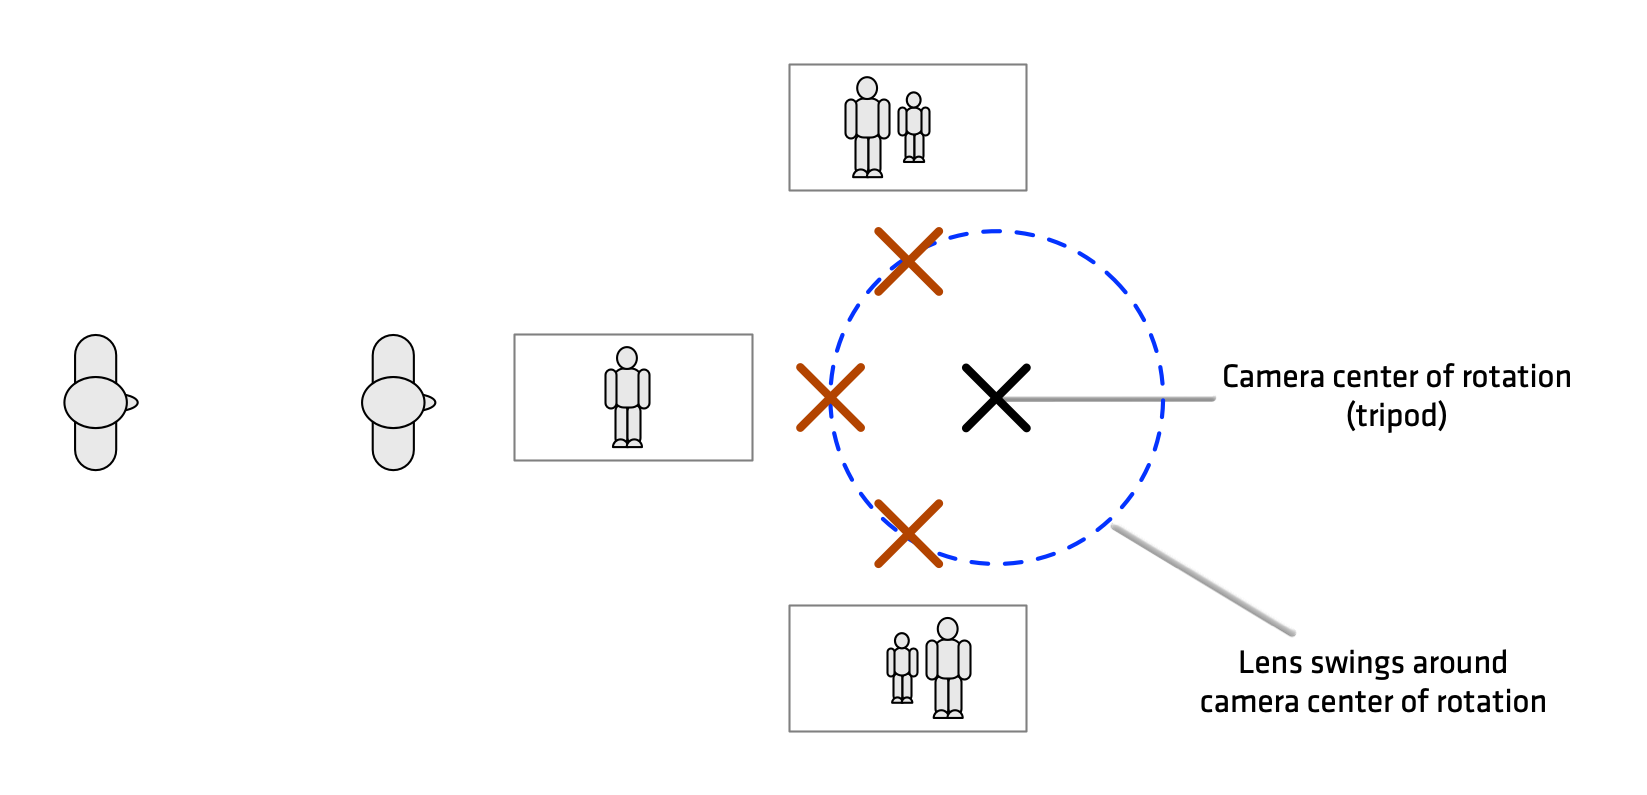
In a normal configuration, the camera head defines the center of rotation. The lens is at the front of the camera, so it swings through space instead of simply rotating when the camera pans. As the lens’s physical location changes, the perspective of the shot changes as well.
This is the same effect seen when panning with a wide angle lens: objects close to the camera move side-to-side very quickly while distant objects appear to not move at all.
Making the lens the center of rotation can be helpful in a number of VFX scenarios, where elements are composited into a shot while the camera is moving. And sometimes it just helps to block something in the background with something in the foreground, even when the camera pans or tilts.
To make foreground and background objects track together, make the lens the center of rotation. And that center of rotation can be found at… the entrance pupil.
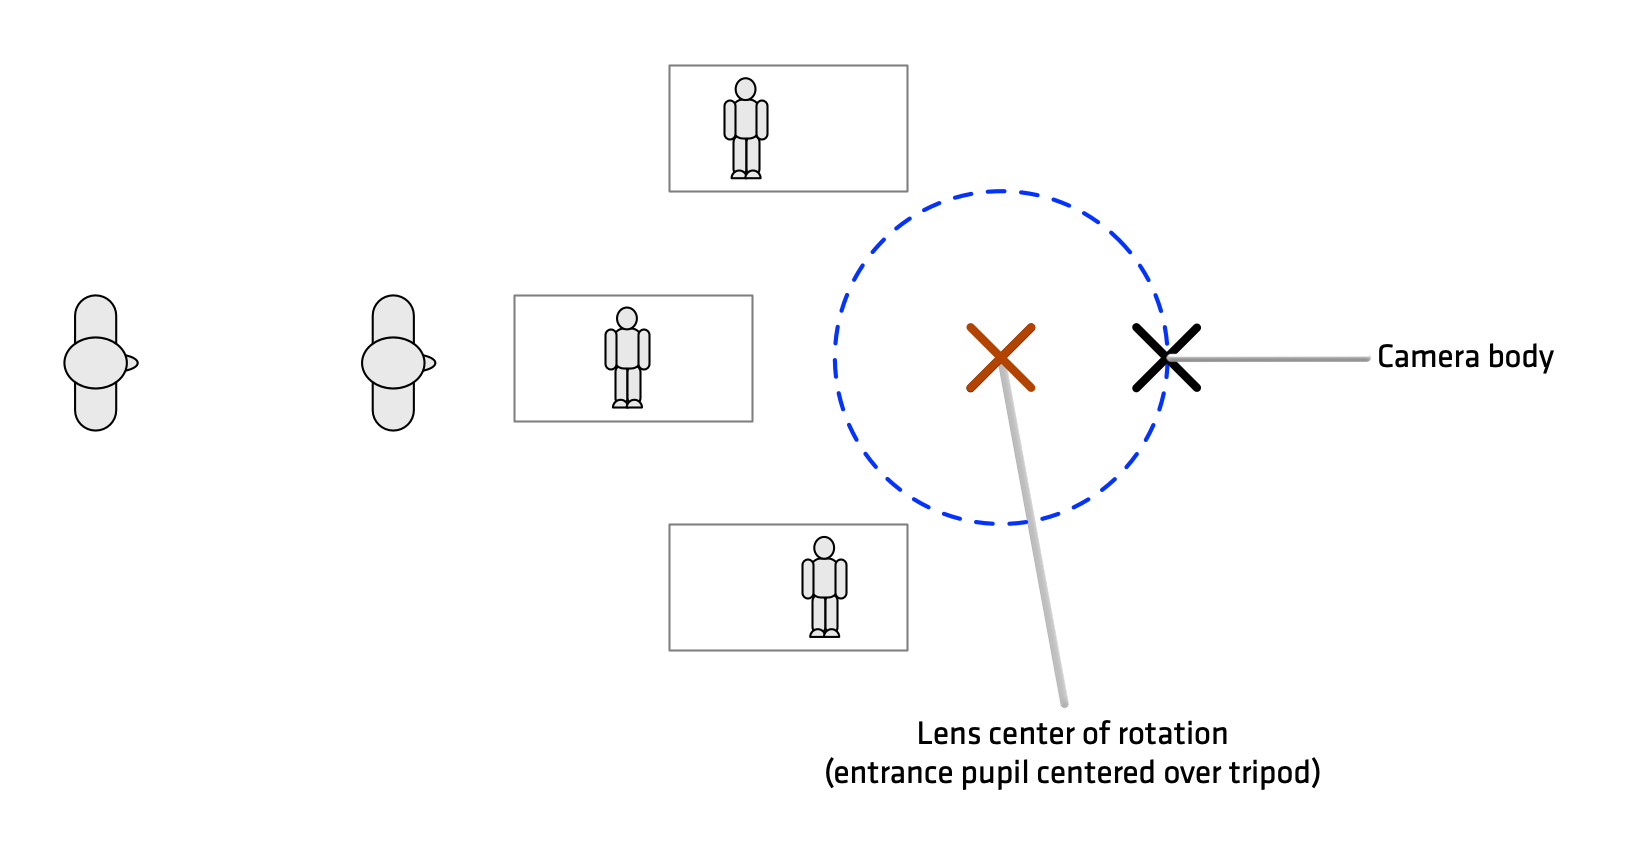
Panning results in objects moving across the frame, but they’ll line up the same way no matter how far the camera is panned because the “eye” of the lens stays in the same physical position.
Here’s how to set this up.
- Put a C-stand in front of the lens. The distance will vary based on the focal length, but for wider focal lengths, 6’/2m is fine. Then put another C-stand behind it, at a good distance away: once again, for wider focal lengths, 6’/2m will work well.
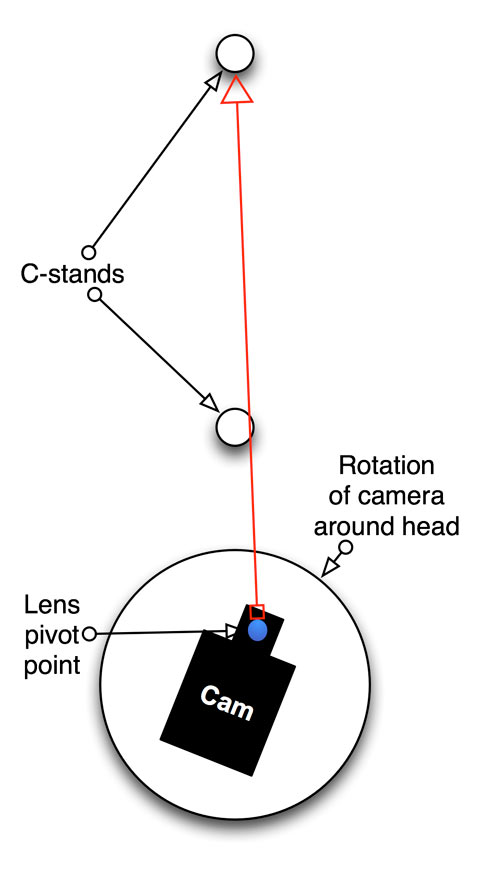
- Pan the camera. You’ll see the front C-stand move out of the way and reveal the rear C-stand as you pan left or right. Slide the camera back until the front C-stand blocks your view of the rear C-stand even when panning.
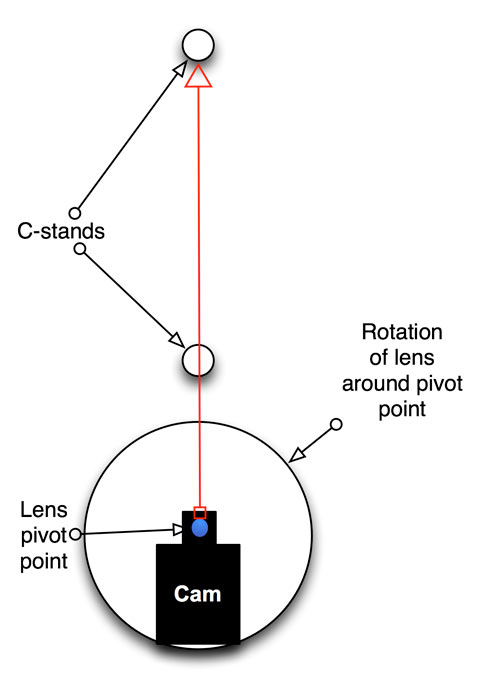
- You’ll need a long dovetail plate and possibly some counterweights, as the lens will end up directly over the head.
Note that this only solves the problem for panning. Most fluid heads are themselves the center of rotation for tilting, so you’ll need a special fluid head like those made by Cartoni or Ronford-Baker that lets you move the camera system vertically.
You can estimate the entrance pupil position by eyeballing the location of the aperture from the front of the lens. Look in the front element and put your finger on the outside of the lens next to where the aperture appears to be, and then put that point over the camera head’s center of rotation. That will get you close.
Some lens manufacturers provide the exact location in their documentation. Here are some examples from the ARRI website: Example 1 Example 2 Example 3
Lastly, there’s a gotcha when working with anamorphic lenses. As they are effectively two lenses working together (one in the vertical axis, and a wider one in the horizontal axis) they often have two entrance pupils at different distances. You’ll never be able to line up with both of them. Years ago I operated some VFX shots on anamorphic lenses and found I could line up one entrance pupil or the other (using the C-stand trick) but not both simultaneously. We had to limit moving shots to panning or tilting, but not both.
Art Adams freelanced on camera crews for nearly 32 years, and worked as a DP for 27 years. He is currently product manager for lenses at ARRI. Email him at lenses@arri.com.