For motion graphics artists, one of the most significant new features introduced in After Effects CS3 was Shape Layers. This feature brings important components of Adobe Illustrator into After Effects, and allows them to be animated.
Shapes are defined by vectors. You create their outlines (paths) plus define the fill and stroke you desire, and After Effects renders the required pixels. This means you can scale Shape Layers to any size and they will remain sharp.
Shape Effects
The real fun comes in adding Shape Effects. These include the utilitarian Offset and Trim Paths plus distortion effects such as Pucker & Bloat, Round Corners, Twist, Zig Zag, and the auto-animating Wiggle Paths. The results range from subtle to highly complex as you push, say, Pucker & Bloat or Zig Zag to their extremes. For example, the image to the right is a simple star that has been “puckered” a bit. You can re-arrange the order of the shape attributes (Shape Paths and Effects) inside a Shape Group or Layer to get different composite results.
Fill and Stroke are treated as effects in that you can add, delete, and re-order them while building a Shape Layer. If you have multiple Shape Groups, each can have their own Fill and Stroke. When you look at the components of Shape Layer in the Timeline panel, know that that shapes render from the top down, so the Fill and Stroke need to go after the paths. When you create a new Shape Layer from scratch, After Effects automatically adds Fill and Stroke for you.
Also of great interest is the Stroke > Dashes section in the Timeline: Here you can create dotted and dashes lines, including the ability to define the length and spacing of the segments. An unfortunate shortcoming of Stroke is the inability to vary the thickness along a path.
Merge and Repeat
There are also two special Shape Effects: Merge Paths, and Repeater. Merge Paths is akin to the Pathfinder in Illustrator. It defines how multiple Shape Paths interact – such as adding to, subtracting from, or intersecting with each other. The order of shape attributes is particularly important here; Merge Paths combines the two shapes above it in the attribute stack. Grouping Shape Paths and Effects gives you more control over how the paths interact.
Additionally, you can set the start and end opacity for the collection of repeated shapes. We wish there was more flexibility in defining opacity over a series of repeats. A workaround would be to follow Repeater with a Gradient Fill and Stroke, which will then treat the collection of repeated shapes as one complex shape. You can then create Opacity Stops for the gradients to fade the whole construct in and out as desired.
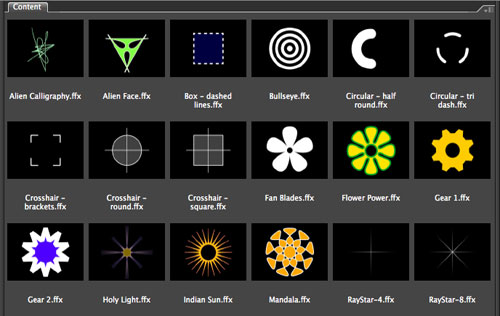
Hopefully that gives you a good primer to get started with Shape Layers. After Effects CS3 ships with over forty Animation Presets for Shape Layers, including both still “sprites” and a handful of animations. Some of these animations use the popular wiggle expression to auto-animate shapes by manipulating their internal parameters. Adobe also released numerous additional Shape Presets when After Effects CS3 shipped; be sure to check out Adobe Exchange.
The content contained in our books, videos, blogs, and articles for other sites are all copyright Crish Design, except where otherwise attributed.

