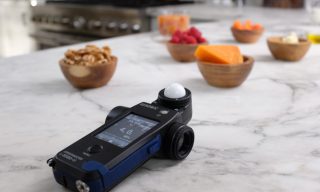
Firstly, I found the 858D a lot simpler to pick up and learn. The 758Cine was an excellent meter, but I personally never really found it to be very intuitive. Anyone who has used the 758 will recall the multi-button dance it takes to modify settings…there was a fairly steep learning curve. Not so with this new model…the touchscreen interface and menus make it quick to discover the features you need.
You get all the standard stuff you got in the 758Cine…a retractable incident metering lumisphere which can be rotated 270-degrees, a 1-degree spot meter for reflected metering, and a 1/4-20 mount point on the base. The screen is bright and readable in full sun, and you have options for setting screen brightness in the custom settings menu. While metering, the screen automatically dims to avoid impacting your readings with screen brightness. Sekonic says this meter is three-stops more sensitive than prior models, offering sensitivity as low as 0.1 lux for those of you who may be shooting by candlelight on Kubrick’s old lenses.
The first question I get when people see the new 858D is “does the touchscreen work with gloves?” Happily, it does. The touch interface is not capacative-touch like a smartphone, the screen requires actual physical pressure. It’s not quite as accurate as a smartphone touchscreen, but the interface icons and dialogs are sized well to accommodate this, and I find it very simple and reliable to use. The touchscreen can be locked by holding down the physical menu button for a few seconds. This allows you to meter without worry that your settings will be bumped.
High-framerate shooters will be happy to know that framerates from 1-1000 are easily selectable on the touchscreen, and you can quickly jump into the Menu to add presets for any framerates beyond 1000fps. Shutter angles can be adjusted from 1 to 358 right on the main screen, and a 360-degree shutter angle can be added as a preset in the Menu. You can make up to 20 shutter angle presets, including decimal options like 172.8. These presets are then accessible from the main screen, so it’s fast to pop between your regularly-used settings. The ISO range on the meter can go as high as 13-million-and-something, so you’re future-proofed there. It also gives you that funky Canon 850 ISO as an option in between 800 and 1000.
By far my favorite feature on this new meter is the filter packs. You can define an exposure compensation offset manually, or build packs of filters which are summed together and applied as a single exposure compensation. For example, let’s say you’ve got 2 stops of ND in the mattebox in the form of a .6 filter, and there’s a polarizer in there as well. I know that this particular polarizer loses about 1 1/3 stops of light, so I’ve entered that as a custom filter with a -1.3 exposure correction, and added it to the filter pack.
Now when I select that filter pack, the meter displays a -3.3 indicator on the top right of the main screen. Any measurements I take with the meter automatically calculate that -3.3 stop light loss for me, and simply display the correct stop on the lens. The math of everything that is cutting light in the mattebox gets out of the way, and I can just work with stop readings that match my lens.
Another handy feature is AVE/EV…I find this very useful for maintaining consistent lighting ratios. So for instance, take a measurement on your key light. Then tap the AVE/EV icon, and take another reading on the fill side of the subject, holding the measurement button down. While holding the measurement button down, the meter will indicate the stop difference between your first measurement and your second measurement. Let’s say I want a 4:1 ratio to establish some contrast. I know that a 4:1 ratio is a two-stop difference between key and fill, so this feature does the math for me, reading out the stop difference very clearly. Simply toggle off AVE/EV to go back to standard metering.
One feature that I am looking forward to diving into is custom camera profiles. You can edit, save, and recall camera exposure profiles, which are midpoints and under/overexposure ranges tuned to specific cameras (it requires shooting a special chart and loading the data in through Sekonic’s software). And of course you have the ability to name the profile (unlike the 758’s arcane 1, 2, 3 options), so you can easily recall that odd camera you prepped on that project last year. I hope to explore that feature in a future writeup.
Finally, Sekonic wisely built the 858D to run on standard AA batteries. No more carrying around that weird special-order battery! That’s one less thing for me to worry about.
There are tons of other features in the meter which I have yet to explore, including some special sauce for flash photography users. Firmware upgrades and custom camera profiles can loaded via the USB port, and the meter is nicely weatherproofed with rubber boots to be splash-resistant. All in all, I am very pleased with this update and look forward to using the 858D for years to come.
The L-858D is available at your favorite gear shop, and retails for around $600.
