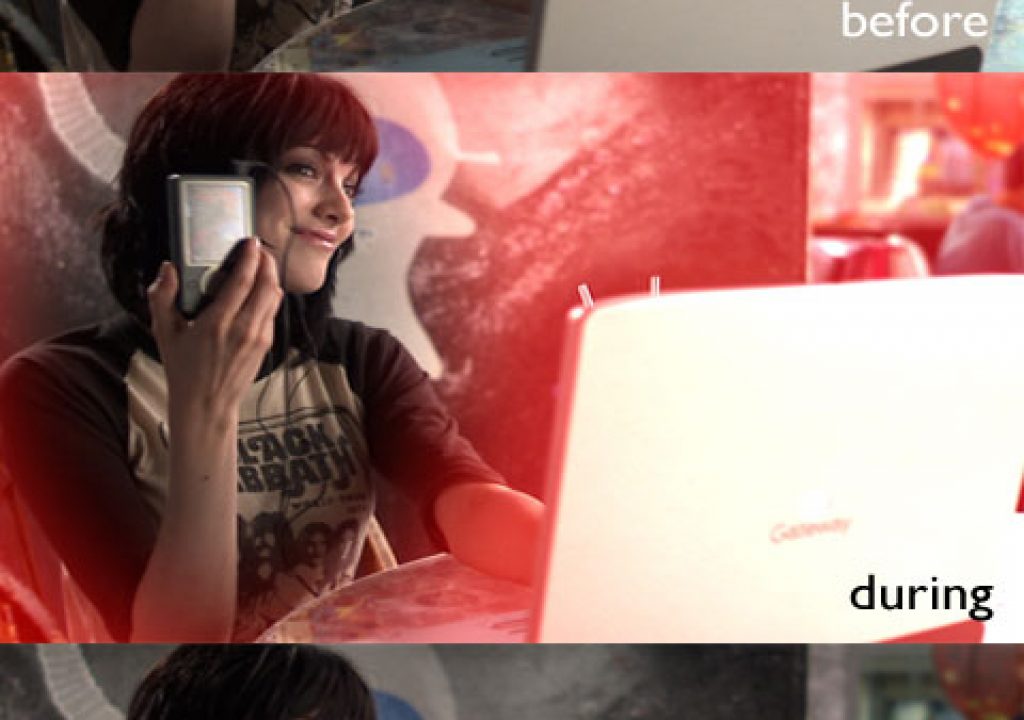
Like a lot of people with Final Cut Pro or After Effects, I’m trying to become a crack colorist in the privacy of my own home. It’s unlikely to happen anytime soon as I just don’t have the training or the time to take on a second full time career. But–that doesn’t mean I can’t do a little bit of damage to my own footage when I want to experiment. Or when I’m too cheap to hire someone else to do it.
There’s been much discussion on the Cinematography Mailing List about rookie colorists and why it’s a bad idea to try to do these things yourself on a wing and a prayer, but I figure the more I work on my footage the more I’ll learn about giving others the kinds of images that they can improve on my behalf in the future. I’ve done the same thing editing my own footage, and I’ve learned a hell of a lot not just about shooting for editors but also how to fix the kinds of mistakes that just happen on sets when we’re working against time and budget.
I don’t have a color critical monitor, and as much as I’ve tried to calibrate my Apple Cinema Displays to look something like what I might find on a badly tuned TV set in a third world nation, I can’t quite get close enough to feel comfortable. If I’m working with a piece of footage that’s been horribly screwed up in post by someone else (I once shot some jeans spots where the client decided the whole thing should have a blue cast because, well, jeans are blue, and isn’t that a good enough reason?) I can bring it back to normal, but creating rich sophisticated looks on a questionably-calibrated computer LCD is a little frustrating.
The one thing I can’t screw up too much is luminance, and the single most beneficial thing I can do to my 8-bit HD footage is to pop in a Power Window and reduce bright unclipped areas that I couldn’t control during shooting. This is super simple in a telecine suite on someone else’s dime, but where I live and work HD footage is made on the set and never touched again. That’s fine, we do good work anyway, but it’s nice to have the opportunity to take footage to the next level. And since I’m only affecting brightness, which I can judge reasonably well on a computer screen and via waveform, I’ve got a lot more confidence controlling luminance alone than if I decided to cool the shadows and warm the highlights with any degree of finesse.
I’ve got Digital Film Tools 55mm, Apple’s Color, and Magic Bullet’s Colorista, and all can do vignettes (frequently called Power Windows because that’s they’re designated on a high-end Da Vinci color corrector). So far, for ease of use, Colorista wins hands down. It’s incredibly simple to quickly create a Power Window.
In this shot, from a Microsoft Zune spot shot on a Varicam (with a Pro35, Zeiss Super Speeds, and while riding a Steadicam operated by Tim Bellen) I’ve always been bugged by not being able to cut the laptop brightness down a bit. We were shooting in a cafe in Santa Cruz, and our morning ritual saw the crew standing around on top of a train trestle for two hours waiting to shoot the first shot while the day’s creative was re-written. As a result we ended up in this cafe shooting day/interiors after the sun went down. It ended up being a 17 hour day, and at some point our mission became doing the best we could before the poor Steadicam operator went numb from the waist down. (Every single shot for two days was a Steadicam shot. Every. Single. Shot.)
In this case the ambient light was established by erecting a couple of 12×12 gryffs in front of the windows on one side of the restaurant and bouncing PARs off them to recreate the daylight look. After that it became fairly simple to wheel around some Kino Flo Image 80’s to quickly shape whatever area we were shooting in. In this case we propped an Image 80, with 216 on it, on a table in front of our actress and started rolling. She looked great; the laptop looked hot but it wasn’t horrible, and my hope was that the viewer would be more interested in her than the laptop.
These stills are a little deceptive because the laptop looks better here than it does on DVCProHD, but take my word for it–the brightness competes a bit with the actress’s face. Not a lot, but enough that I wanted to try to focus a little more attention on her.
Colorista’s controls are very simple: you pick a vignette shape (ellipse or rectangle), place a top point and bottom point, set a width using a slider, feather, and done. You can see the vignette as a shape alone or as a red mask on top of your footage. Tracking is done in the usual way in Final Cut Pro, by plotting key frames on a timeline. (I have After Effects but haven’t learned it yet. Who has time???)
I’m going to go through all of this Zune footage and look for opportunities to focus attention by darkening corners and edges. I used to have this done to film all the time but I’ve yet to get any of my HD footage in front of a professional colorist. I’ve got great DIT’s who paint my cameras phenomenally well, but being able to dodge-and-burn HD images after the fact is a wonderful, wonderful thing. It will only ever end up being seen on my reel… but that’s where it counts.
(I’m in the process of reading “The Art and Technique of Digital Color Correction,” by Steve Hullfish. It’s a great primer on the art and craft of coloring. Highly recommended.)

