

Most filmmakers are missing the biggest utility afforded to us by LED lighting: true replication of natural sources.
Prior to LEDs becoming mainstream, we had Tungsten light, HMIs, and Fluroescents. These fixtures provided real, natural forms of light in controllable ways: Tungsten is basically burning ember (Incandescence) similar to fire, HMIs are essentially a trapped bolt of lightning (Gas Discharge Arc), and Fluorescent lights contain an invisible UV ray making magic powder glow (Phosphor Luminescence). When we measure these lights with a spectrometer or color meter, we often get Correlated Color Temperature values like 3200K, 5600K, etc. CCT is a useful shorthand for white light, but it only describes where a source lands relative to the Planckian curve (explained below), and not the full spectral shape of the light. Two lights may share the same CCT while still having different spectral distributions.
For a while there LEDs were pretty sub-par, but now we’ve got incredibly powerful lighting engines in these lights that can basically make any color the human eye can see by adding more channels to increase tuning range and spectral control. While RGBW/RGBACL/BLAIR-CG/etc lights are often thought of as giving us the option to make Color or White light, it’s the blending of the multiple diodes that helps us create a fuller-spectrum white source that can mimic natural light in a way that has become much more practical in the past decade or so. Most people, however, aren’t using this ability to its full potential.
The Planckian Locus & Spectral Output
White balance is displayed on a Chromaticity Chart across a line known as the “Planckian Locus”. Essentially it’s a line representing the colors of light that a theoretical “black body illuminant” would have to be heated to to give off that color (hence color temperature), and while it’s representative of real light, it’s not really something we see exactly on a day-to-day basis. It’s idealized.

Light sources don’t tend to just put out one single color and nothing else, and they’re not measured in a vacuum; there’s a mix of the entire spectrum in there, favoring one side or the other (warm or cool), and interacting with the environment “polluting” the light falling on your subject. True tungsten sources, like fire or a Tungsten Filament lamp, have a smooth, continuous ramp from a little blue on one side up to a lot of red on the other. The entire color spectrum is represented, but there’s more warm wavelengths than cool ones.

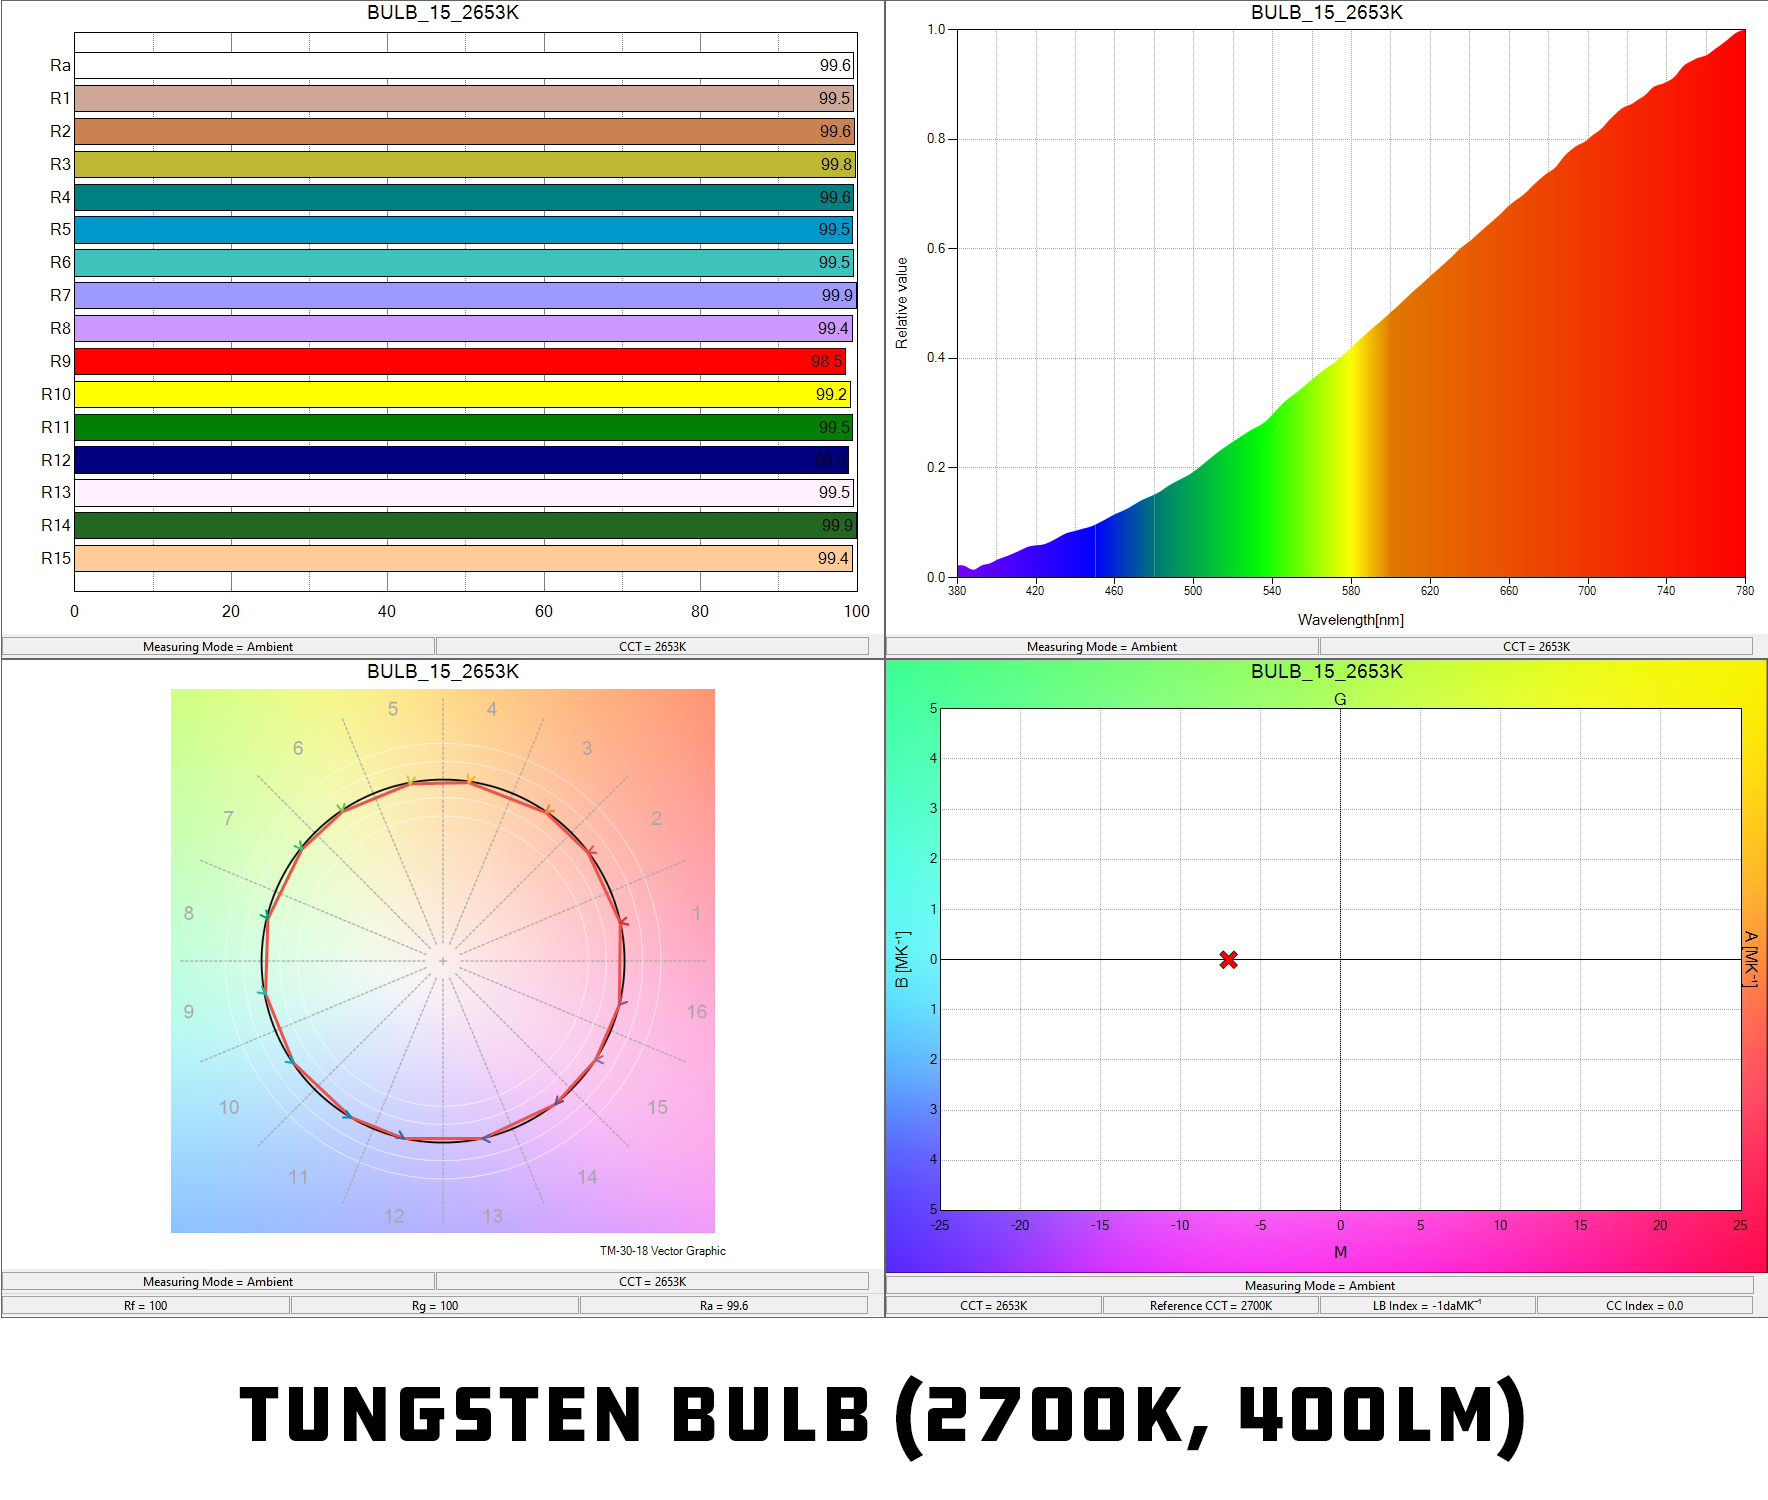

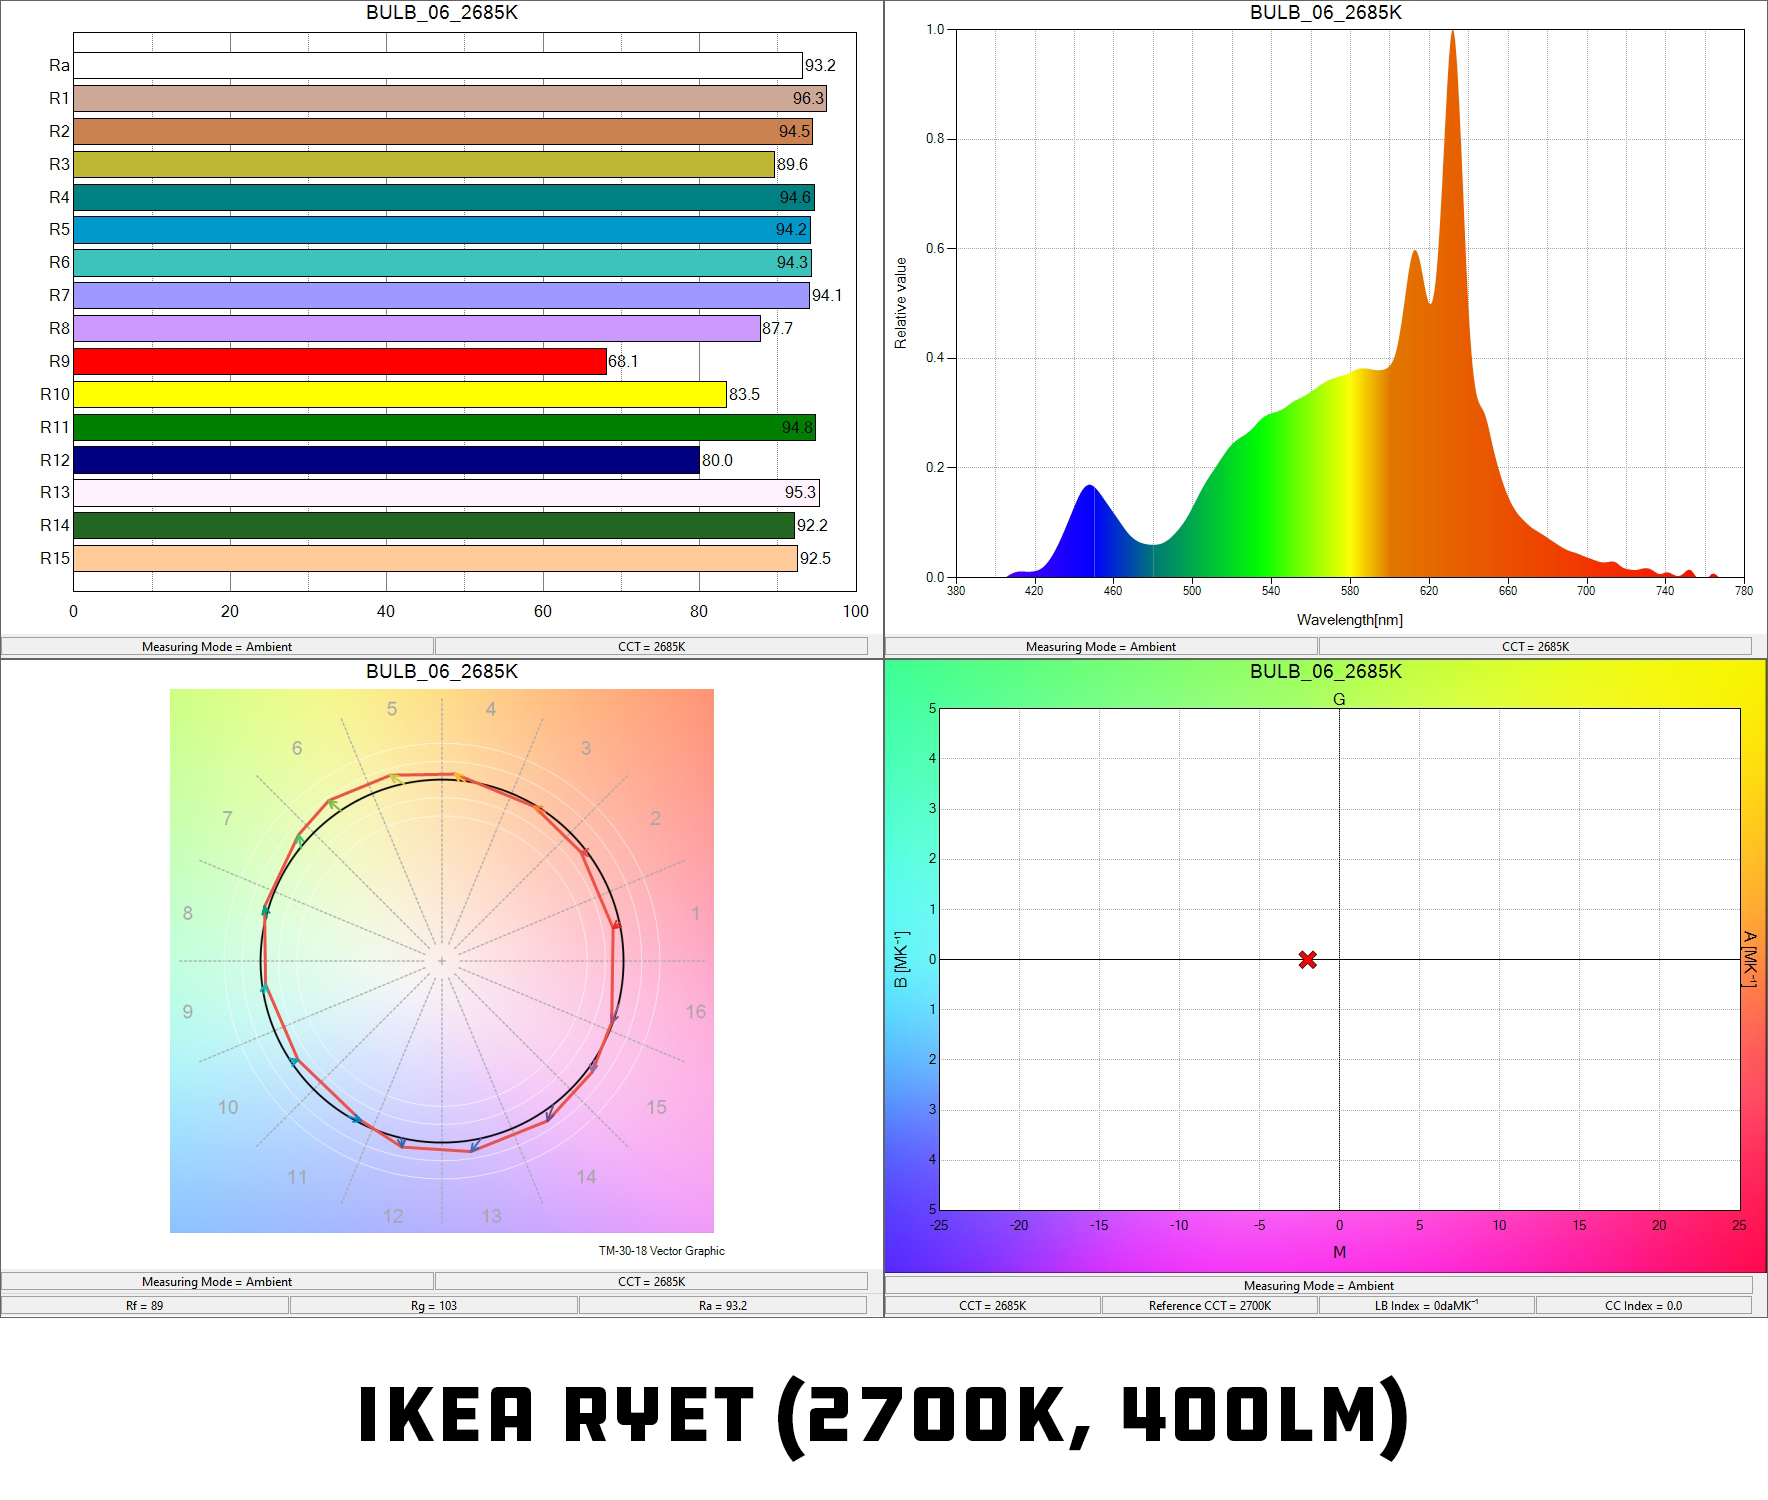
An LED, however, may read as the same color temperature as your true Tungsten source, but produce a narrower or less continuous spectrum than tungsten and may have spectral spikes or gaps that CCT won’t reveal. We don’t like this.
Delta-uv
When we think about white balance, whether on set or in the grade, we often think of Temp and Tint. There’s warm and cool, and then there’s green and magenta. This is Δuv, the deviation from the Planckian locus. IESNA LM 79 08 says a Δuv of 0.001 is considered excellent. However, when we measure a real-world light source, no matter what it is, there’s not just the single color temperature of the light, and it’s not just simply tinted one way or the other, there’s a whole spectrum of color that can be introduced that sits in between those values.
So let’s think about it: let’s say you’re filming in a room and the light coming through the window is your “reference source”. You want to replicate that source with your film lights, so you set your lights to 5600K. Simple right? Except the light you’ve now added seems to look off. Your scene now looks “lit” for some reason, and when you step back and evaluate it with your eyes, you notice it’s a little bluer than the window light. So you start ratcheting down the CCT on the light until it matches by eye and the light says “4500K”.
Well that’s weird, isn’t sunlight “5600K”? You borrow your Gaffer’s color meter and check the window and it’s coming in at 4700K. Confused, you meter your light and it ALSO reads at 4700K. But the back of the light says 4500K! Well, I guess they match anyway so let’s get shooting. Except now you’re in the grade and you notice your film light is actually a little greener than the window light and you didn’t catch it on set. I guess we have to eat up our precious time in the color suite to fix it.
This is not the best we can do.
CCT vs X/Y
What’s happened here is the light coming through the window isn’t direct sunlight in a vacuum, it’s real light! There’s a building out there you’re getting some bounce off of that’s painted tan, there’s trees kicking in some green bounce, there’s concrete, there’s a billboard throwing straight up red at you, there’s a lot of stuff going on out there! All you’ve done is measure (or visually approximate) that CCT value, which is only a fraction of the whole picture.
To really use your LEDs like an expert, and to really match them to your scene, you want to find the X/Y Coordinates of the reference light.
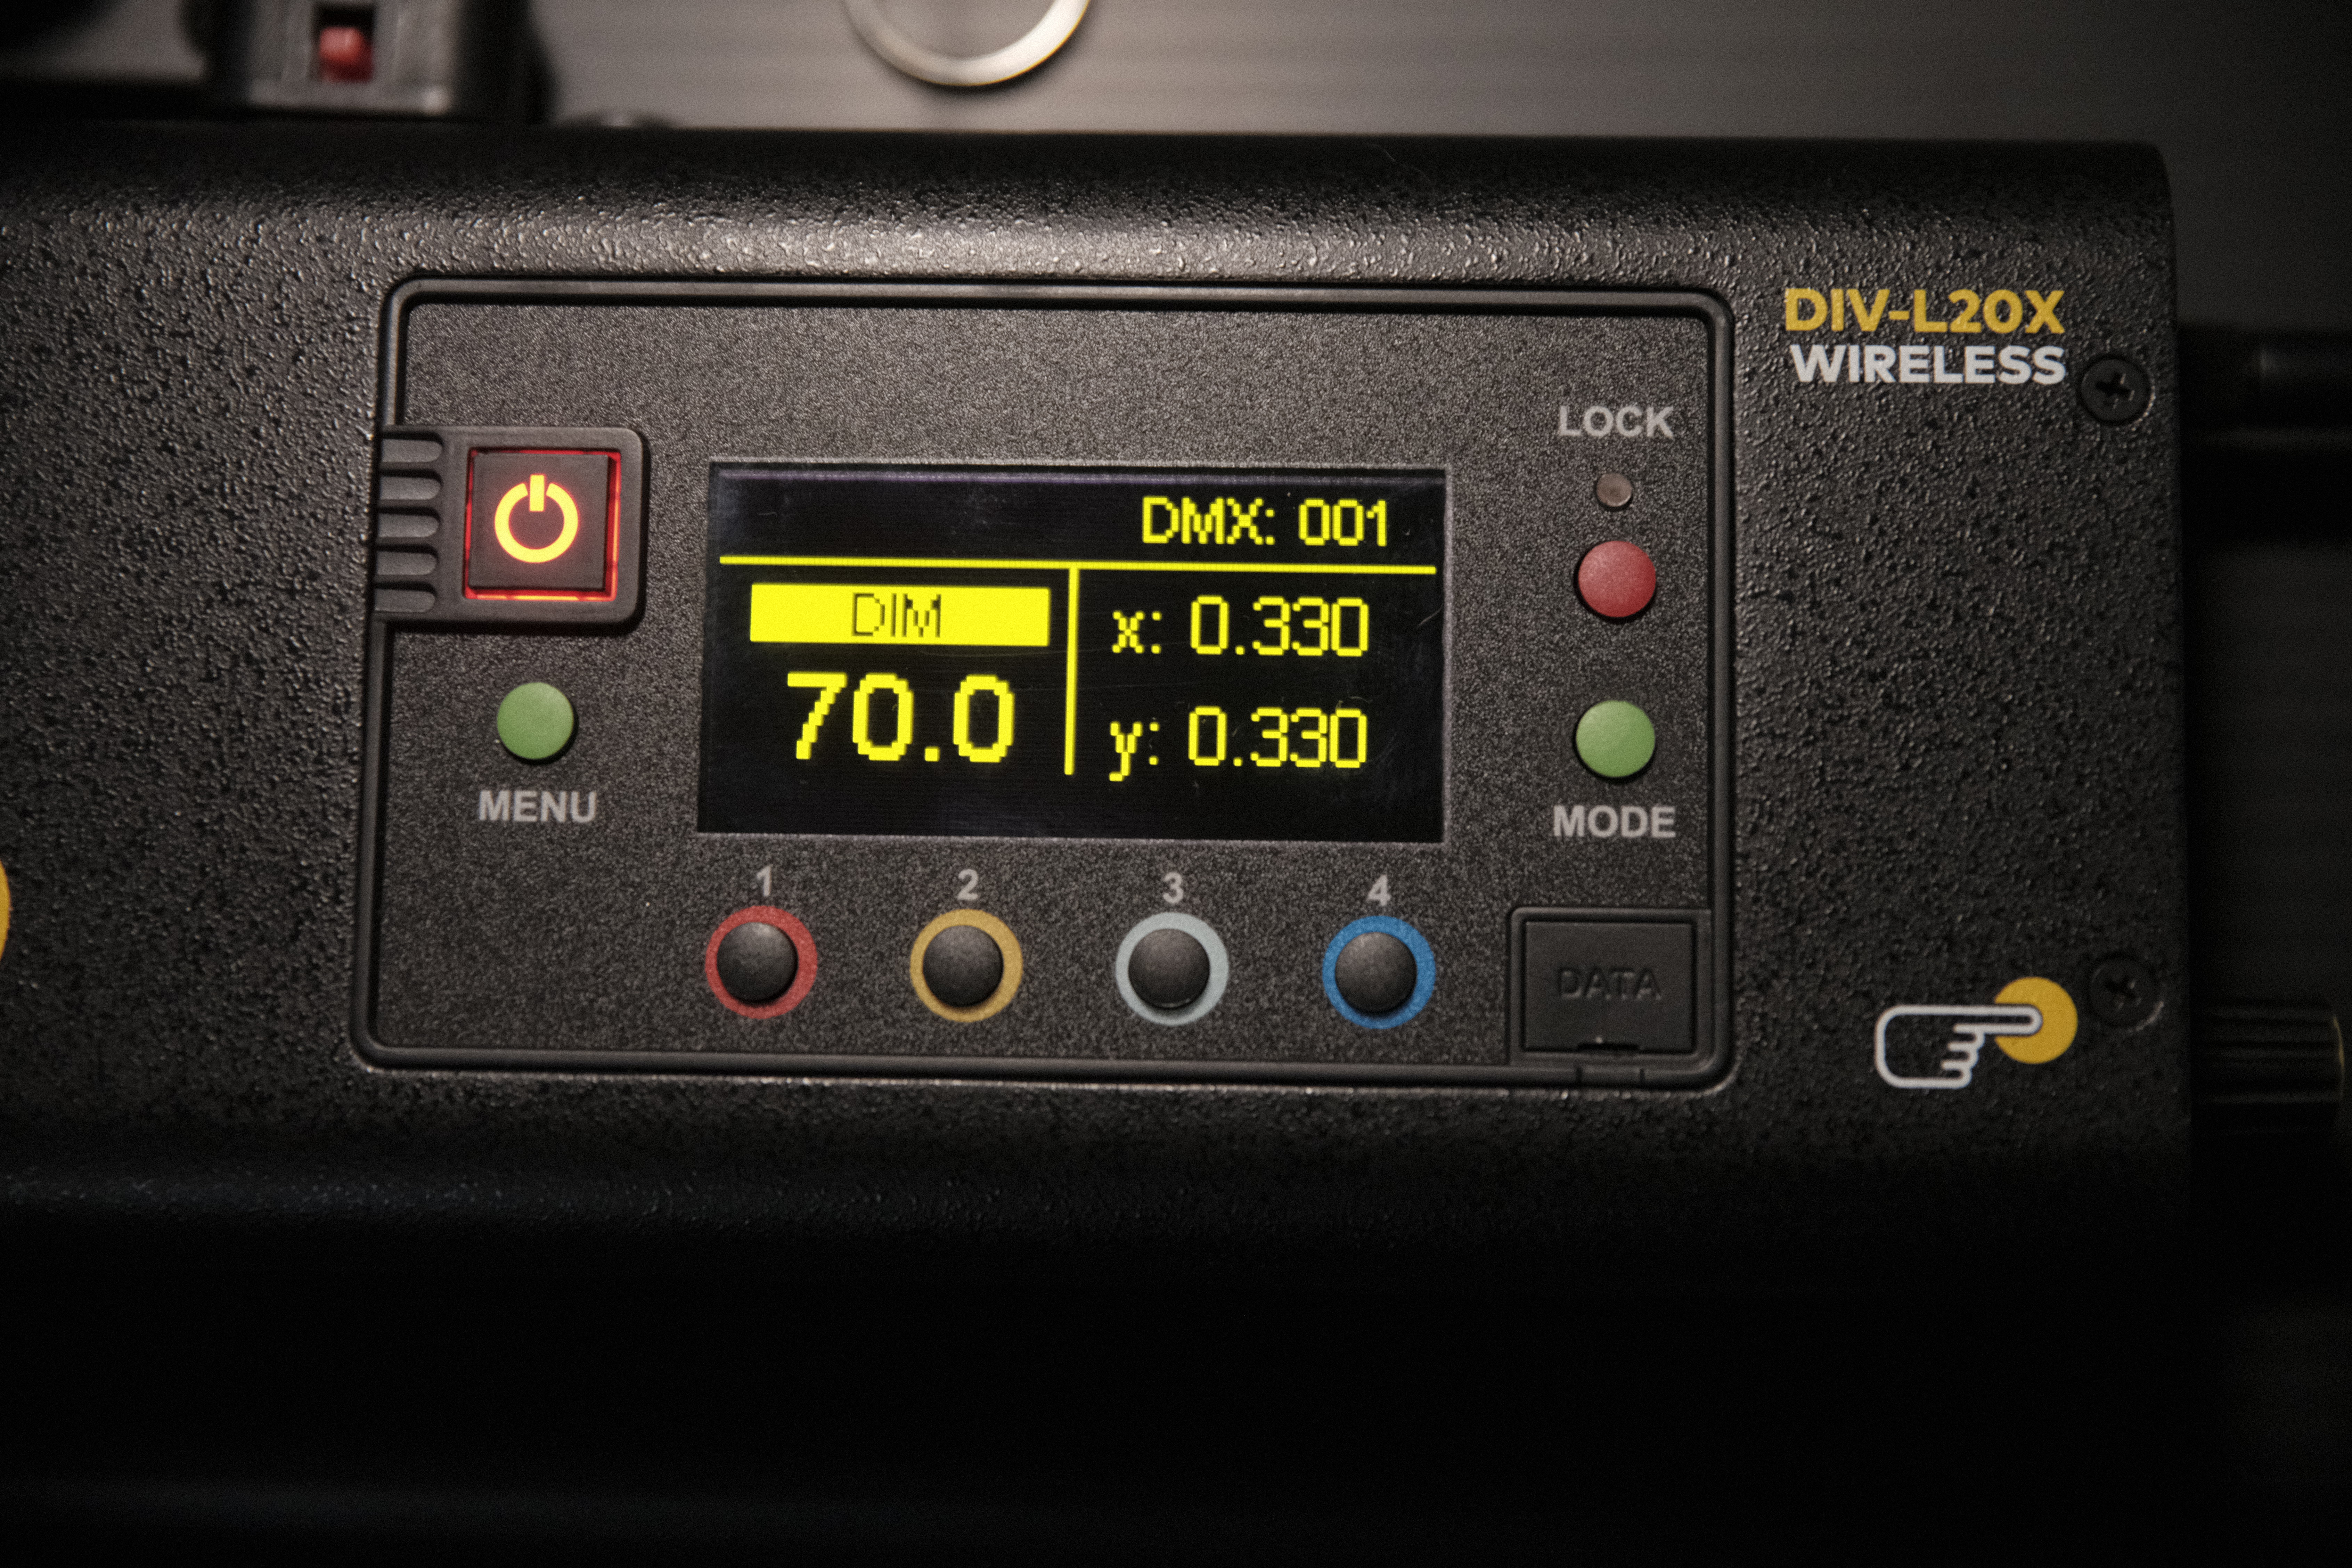
Instead of just getting that theoretical matching CCT and coarsely adjusting the tint (if your light can even do that), I want you to use a Spectrometer (I have the Sekonic C-800, personally) and get the X/Y values of that incoming light and set those in your cinema light.

Yes, that means you can only use lights with this capability, but we’re experts right? We’re not using cheap LEDs, someone’s paying us big money to make this project and we’re doing it right.
Basically, X/Y values give you an exact chromaticity location for the light you measured, including whatever bounce and contamination are already part of the scene. Instead of creating a “theoretical” light, we’ve more closely replicated a real one. In mere moments, you’ve been able to match your film light to the actual scene in front of you and everything looks natural and real. We’ve achieved Cinema. Now, while X/Y gives you a much more precise chromaticity match, the result still depends on the fixture’s spectral quality. We’re expecting that your LED fixture is high-quality enough to have a robust enough spectral output to where those values you’re putting in the light come out the other side accurately, but with the modern high-end lights on the market today I think that’s a fair assumption to make.
Before digital, film stocks were manufactured for specific lighting conditions, while production lighting had to adapt accordingly. As such, white balance as a strict “Kelvin Number” should mostly be thought of on the camera-side: set the white balance on the camera to whatever the environment is metering at (or adjust from there to your preference) so colors appear correct and white is white, and then think of your light sources as actual natural light with all its flaws and complications. Now, if you’re unable to set X/Y values on your light (maybe it’s just a bi-color fixture), at the very least you should use a spectrometer to figure out what’s actually coming out the front of the light as opposed to trusting what the LCD panel on the back says. It’s common for most lighting fixtures to be a few hundred Kelvin off from the setting you put there, so it’s not good enough to just meter the light you’re matching to, setting that value on the light, and moving on.
If you’re interested, I’ve created a page on my website where you can compare spectral outputs, CRI, TLCI, TM30 values, White Balance deviations, everything my C800 captures that’s relevant to you as a camera person. Obviously these are just measurements from single fixtures in one location (the Filmtools showroom floor 5 years ago, in this case) and should not be thought of as an objective truth, but it can help you evaluate which fixtures to potentially use on your next project. I’ll be updating the database as I’m able to meter more and more lights, but for now it has a modest collection. I wish I had the site up before I went to Cinegear!
Hope that helps, happy shooting.