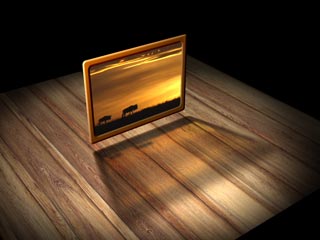
Finishing our tour of 3D lighting in After Effects, we’ll discuss gobos and gels. For those new to lighting, a gobo is an opaque object that blocks off some of the rays cast by a light, either to more carefully control where they fall, or to give the impression of light streaming through an object such as a window blind or the leaves of a tree. A gel is a translucent object placed in front of a light, which colorizes the rays cast by it. It is generally a solid color, but can be a graphic. Here are a few different approaches to replicating these inside After Effects.
The most straightforward way to create a gobo in After Effects is to place a 3D layer in front of a light. The alpha channel of the layer determines where the light passes through, and where the light is blocked. This effect is easiest to control when the Light Type of Spot – this type allows you to reduce the Angle of the light rays being cast so they don’t leak around the edges of the gobo layer which is supposed to be blocking them. To soften the pattern cast by a gobo, don’t use the light’s Cone Feather parameter; instead, soften the gobo pattern itself, or use the light’s Shadow Diffusion parameter.
Layers that already have alpha channels – such as stock footage of objects with their alphas already cut out, or geometric shapes created in a program such as Adobe Illustrator – will block light where the object or shape is present, resulting in a shadow the same shape as your object. To cast light in the same pattern as your object or shape, you will need to invert the layer’s alpha channel. To do this, go into the File > Interpret Footage > Main dialog for the layer’s Footage item, and enable the Invert Alpha option. If you want to soften edges of the gobo pattern, apply a blur to the gobo layer.
You can also create your own patterns inside After Effects by creating a Solid, and then using masks or paint strokes. To soften the edges of the resulting pattern, increase the Mask Feather or use a feathered brush (respectively). In all of these cases, the colors present in the layer don’t matter; only the alpha channel does.
If you have a grayscale image that you want to convert into a gobo, place the image into the file’s the alpha channel using a paint program such as Adobe Photoshop, or use a Track Matte in a precomp to luma matte the image onto a Solid. Other tricks such as using the Set Matte or Shift Channels effects are also possible, but keep in mind that the trickier you get, the harder it is to remember what you did and why when you come back to a project later.
We used an image of leaves (left) as a gobo. When used as a gobo to block one of the lights being projected onto another layer (below left), the result was the leaf pattern being cast across our footage (below). Leaves from Digital Vision’s Quiet Form CD; lion footage courtesy of Harry Marks.
Obviously, the gobo must be placed between the light and the layers receiving the shadows cast by it, as shown below. This means you have two objects to manage as you begin to move layers around. We find it easier to use Parenting to attach the gobo to the light – that way, moving the light will then move the gobo with it. Plan ahead by first setting the gobo layer, the light’s Position, and the light’s Point of Interest to the same X and Y Position values, and then Parent the gobo to the light. Once you have done this, you can edit just the gobo’s Z Position value to set how far away the gobo is from the light, no matter where you move the light to later. This distance in turn controls how large of a pattern is cast.
You may be surprised to learn that In After Effects (as well as most dedicated 3D programs), layers do not by default block light. To have them block some of your light’s rays, you must enable the Casts Shadows option for both the light and your gobo layer. If you run into a problem where the gobo layer becomes visible in the scene, as of version 5.5 you could set a layer’s Cast Shadows option to Only, which means you will only see the light pattern – not the layer.
next page: creating “gel” effects
Gels
There are several ways to approach recreating a gel effect inside After Effects. If all you need is a simple color to be cast by the light, use the light’s Color parameter. Note that you can animate this color to change over time.
A significant feature added back in After Effects 5.5 was a new Material Option for 3D layers called Light Transmission. It defaults to 0%, which means the layer will cast a black shadow (as long as you have enabled its Casts Shadows option – remember, this defaults to being Off!). Increase this value, and the shadow takes on more of the color of the layer. In other words, this feature casts colored shadows. Place a layer where it completely “blocks” the light, and those colored shadows become colored light…to a degree. Shadows always reduce the intensity of the light, just as a physical gel in front of a light does in real life. Be prepared to increase the Intensity parameter for your lights to compensate. You can also decrease the Opacity of the gel layer, which results in a more washed-out (or less intense) effect.
An image of a woman (above left) is used as a gel by increasing its Light Transmission parameter to 100%. When cast onto a simple set of white squares placed randomly in 3D space (above), the result is a fractured image as the squares catch pieces of the gel image at different distances and angles (left). Image from Digital Vision’s Beauty CD.
To recreate a simple gel, make the gel layer a colored Solid. If you want a multicolored gel, apply the Generate > Ramp or Generate > 4-Color Gradient effect to the gel layer. Or, for the maximum in fun, use an image or movie with an interesting colored pattern as your gel layer. This becomes the same as projecting a movie or slide onto your scene, and was shown back on the top of the first page of this post.
If you use a Light Type of Spot or Point, the light’s rays – and therefore, projected image – will spread out as they travel further away from the light, meaning the resulting image will appear different sizes on layers that are different distances from the camera. (The one exception to his is if the light and the camera are both the same distance from the layers.) Move the light closer to the layers than the camera to make the projected image appear larger on layers that are farther away; move the light back to make the projected image shrink with distance. If you use a Light Type of Parallel, the projected image will always appear to shrink with distance.
Managing the relative position of gels is the same as gobos: We suggest parenting the gel layer to the light, and moving them as a group. If the gel layer becomes visible in the scene, and you don’t want it to be, set its Casts Shadows option to Only. You can even use gels as if they were gobos: If a portion of a gel layer set to 100% opacity is black, its shadow (and therefore projected light) will be black, even if its Light Transmission value is cranked up to 100%. The black areas of gels therefore act the same was as opaque areas of gobos, with more control in that you can tint the gel layer to get colored “darkness” (such as inky blue or dark sepia shadows).
2D Trickery
3D lighting in After Effects is powerful. However, this power comes at a considerable cost when it comes time to render – especially if you are using shadows (which the gobo and gel tricks described here require). If render times become an issue, ask yourself if you need exactly the effect produced by accurate 3D space, or if an approximation that hints at 3D will do.
For example, many gel and gobo-like effects can be faked by placing a 2D layer on top of a composite, and applying it using different transfer modes. If you want to give the impression of this “light” being bent by the objects it is “illuminating,” bring your final comp and the lighting layer into a new comp, and use the Displacement Map effect to warp the lighting layer based on the image from the final comp. Similar looks, as well as other shadow casting tricks, can be created using third party effects such as Composite Suite from Digital Film Tools.
Remember: In motion graphics, quite often you aren’t trying to create reality; you’re trying to create something even cooler than reality – so go ahead and experiment with all of the tools at your disposal!
The first installment in this series – an overview, with helpful information on the Material Options – can be found here. The second installment – which focused on tips and tricks for conventional shadows – can be found here.
The content contained in our books, videos, blogs, and articles for other sites are all copyright Crish Design, except where otherwise attributed.

