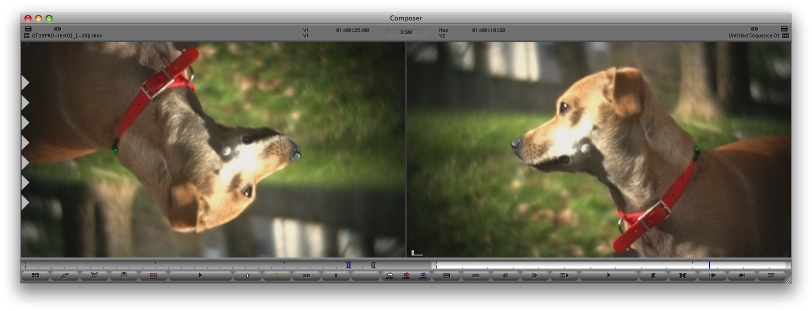
As nice as a 35mm depth of field adapter is one big disadvantage of such an adapter, at least the affordable ones, is they flip the image and that image is recorded upside down. It’s upside down on your tape or your file and it’s upside down on the camera’s LCD monitor. Options and hacks abound for dealing with the upside down image but probably the most common way to “right” your footage is to do it in post. I’ve been editing my footage shot with the GT35pro adapter in both Final Cut Pro and Avid so this is how I deal with the upside down footage.
There’s two easy ways to flip your footage over in Final Cut Pro, in the Motion parameters tab of each clip or by applying a Flop filter. If you bring a clip into FCP’s Viewer then all you have to do is change the rotation to 180 (or -180, both work) and the clip will then be right-side-up:
If you have a lot of clips in the timeline you can copy that clip, select all those clips in the timeline and Paste Attributes > Basic Motion to apply that rotation to multiple clips. Another way is to apply the Flop filter (Effects > Video Filters > Perspective > Flop) and then choose Both from the parameters pop-up menu:
One problem with these methods is that you have to apply the filter in the timeline or bring all the clips into the Viewer to change the rotation. You could make a timeline with all of your master clips, apply your flipping method, then drag these clips back to the Browser to create new master clips but no matter which method is used something has to be done unless you want to edit upside down.
The problem with the above methods is that it takes a bit of time. What would be better is a batch process. I’ve been using a handy little tool called rotateClips from spherico that uses Final Cut Pro’s XML export functionality to automatically add the 180?rotation or the Flop filter:
From the spherico website: “Just export bins, a sequence, clips or even a complete project as XML and drag the XML(s) onto the programs icon, after a few seconds the conversion is done and you can import the newly created XML into FCP. All clips are either rotated or flopped.” The tool works well and is a nice option for flipping an entire edit’s worth of master clips before you begin. According to the rotateClips developer, it’s an older tool and hasn’t been updated to run under Leopard but I have used it a number of times without any problems. There is a free demo on the site that is limited to 15 clips. If you work with a lot of 35mm adapter footage then rotateClips is a very useful tool to have in your editor’s toolkit.
The process is a bit different in Avid. While you can add the Flip-Flop effect to an individual clip in the timeline the easiest thing to do is add the effect to a black video track above your edit. Avid allows you to add effects to a blank video track and then all the media under that track will reflect the above effect:
This is perfect for something like a music video or multicam concert where most of your editing takes place in the Record monitor / Timeline since clips loaded into the Source monitor are still upside down. I’ve never found a way to apply an effect to an Avid master clip and have that reflected in the Source monitor. That would be a great addition to a future Avid release!
Since the HV20 shoots HDV my first step after capture is to always use Compressor to transcode the footage to 24p ProRes 422 for FCP or DNxHD for an Avid project. It would be perfect if Compressor allowed for the flipping of the image during that conversion process … but since Compressor does not it’s other options to the rescue!

