Part 5: Editing and Distributing your Video
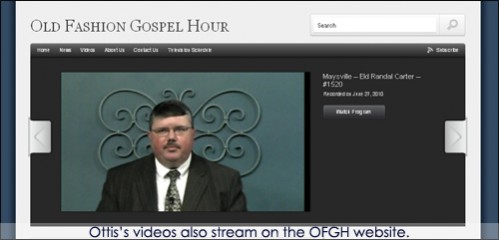
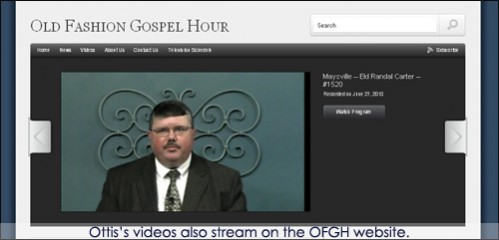
Now that you have recorded your HD footage, there are several ways to edit and distribute your finished work . In this case, Ottis needed to edit and distribute his finished product to a TV station for broadcast, but he also put an archive of videos up on the shows website, www.ofgh.org for people to be able to watch on the internet. With the popularity of internet videos and channels on the rise, knowing how to edit/optimize your videos for the web is definitely a plus. We’ll cover both methods here.
- Editing:
- Tip# 1:
Knowing video file formats will help you decide what editing software to buy if you don’t already have it, or help you decide what recorder or conversion software to get if your editing software only accepts certain video formats. This is also important if you plan on streaming to internet or creating videos for new media like the iPhone, iPad or other portable formats. Once you know what formats you want to work with, you can start your project knowing what size and format to output your video for the best looking result.
- Tip# 2: Make copies of your recorded files before you start to edit.
It’s tempting to just edit the file straight from your recorder or camera when you’re done filming. It’s especially tempting if your recorder comes with a removable hard drive that connects directly to your computer. Ottis had this option in the Datavideo HDR-40, but he still decided to make copies. If you edit the original file right away, you run the risk of saving over your original file.If your computer’s hard drive is not large enough to copy the files you are about to edit, archive the original files to DVD or get an external hard drive with a terabyte or more on it. Try and make a habit of backing up your original files before doing any editing. Ottis makes sure to always back up all his original files so that they are never edited over or altered by accident. He has quite a large library of these files now, but he is confident that whenever he needs his raw footage, its right here when he needs it.
- Tip# 3: Get file conversion software or at least know where you can get it. You may think that you don’t need to convert your files because the editing software you have and the files that you import easy work together, but the beauty of file conversion software is that you can get it for free and it comes in handy when you least expect it. For instance, if someone else is going to edit your footage and their software doesn’t read your file format, the conversion software will help greatly. Another reason you may need it is if you need to playback your footage on a portable playback hard drive (Western Digital makes these) or some other portable playback device. Conversion software is a valuable tool to have just in case your regular editing software doesn’t convert to all formats.
- Tip# 4: Research Editing Software: What software you buy usually comes down to two things: how much you know and how much you can afford. If you know very little about editing video, its best to see which products can give you the best bang for your buck. You also want to consider how quickly you want to produce something. It’s great to go out and buy the industry standard software, but if you don’t know how to use it, it’s completely useless.
Some programs that have a relatively easy learning curve are: Sony Vegas, Core Video Studio Pro and Adobe Premiere Elements. These programs are made with ease of use in mind, so they are a good place to learn the basics of editing with software, and getting professional looking results at the same time.
- Distributing formats: You’ve heard it several times in this article but I cannot stress enough the value of doing homework and knowing what you need and what will work best for you.
Burning to DVD’s:DVD’s are still the easiest way to showcase footage that is going to be played as is. Usually the software you are using has options that enable you to create settings on a DVD for it to play automatically in a player or in a computer.
DVD’s are a no- brainer for whoever you give it to, and you won’t have to wonder if they opened up the right file or used the right program to see your footage.
What type of DVD should you use? DVD+R is recommended widely because once you burn to this type of DVD, it can be read by a multitude of DVD players. Make several test DVD’s before sending them out if you can. If you’re using a program that can make DVD menus for your video, make sure that they menus and buttons work.
- Video for the Internet:
Prepping your video for internet will most likely mean you have to convert your file for streaming. Here are the most popular formats: Real Media, Windows Media, QuickTime, MPEG4 (MPEG4 generally loads rather quickly no matter what browser you are in). Converting files for the internet requires you to compress the file, so always start with a large, high quality file. Squeezing files down to a smaller high quality video is always better than trying to upload large quality files, especially if you don’t know much about uploading videos.
Uploading files to the internet:
If you’re uploading to YouTube or Vimeo or any one of the available video sites, they will tell you exactly what to upload to get the best quality video. Most of the time, those sites will automatically compress the video, and this is the easiest way to get your videos onto the internet. Remember however that these sites have file size limits, so adjust your files accordingly. If you have a 30 minute show/program, most likely you’re going to have to cut the show into segments, so take the time to find out how to get larger files on the internet if you do not have your own server.
Also, we recommend that your computer have a high bandwidth internet connection to avoid your files being cut off or interrupted during an upload.
We’ve covered from start to finish how to get started with your own HD video production; hopefully these tips will help you tackle your next video project!
Stay connected with Datavideo with more stories and latest updates!
http://www.facebook.com/home.php?#!/pages/Datavideo/126782464037816?ref=sgm
http://www.youtube.com/user/DataVideoUSA
http://twitter.com/DatavideoUSA

