As we mentioned earlier, we're creating a video training series based on our popular beginner's book After Effects Apprentice, which progresses from “I haven't used it before” through core skills including keyframing, masking, text animation, and 3D space to advanced techniques such as motion tracking, green screen, and expressions. Each new course has a selection of movies that are free for all to view; we're periodically presenting the YouTube versions of them here in case you missed them. {C}
The fourth Apprentice course focuses on ways to edit and enhance layers in After Effects – including looping, sequencing, and frame blending them; employing Blending Modes to create more interesting composites; and applying Effects, Presets, Behaviors, and Layer Styles. Through a series of Quizzler challenges and Idea Corner examples, we also share alternative ways to employ modes, sequencing, and Adjustment Layers, while special sidebar movies cover the subjects of creating seamless loops, animating effects points, understanding pixel aspect ratios, and employing Brainstorm to explore the variety of different looks that effects can create.
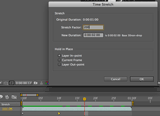
Not all footage you import has the native frame rate that might work best for your composition. There are two ways to change this: by using the Time Stretch parameter inside a composition, or by altering the footage item's master frame rate in its Interpret Footage dialog. This movie demonstrates the pros and cons of these two approaches, focusing on what happens to any keyframes that you might have already applied.
The content contained in After Effects Apprentice – as well as the CMG Blogs and CMG Keyframes posts on ProVideoCoalition – are copyright Crish Design, except where otherwise attributed.

