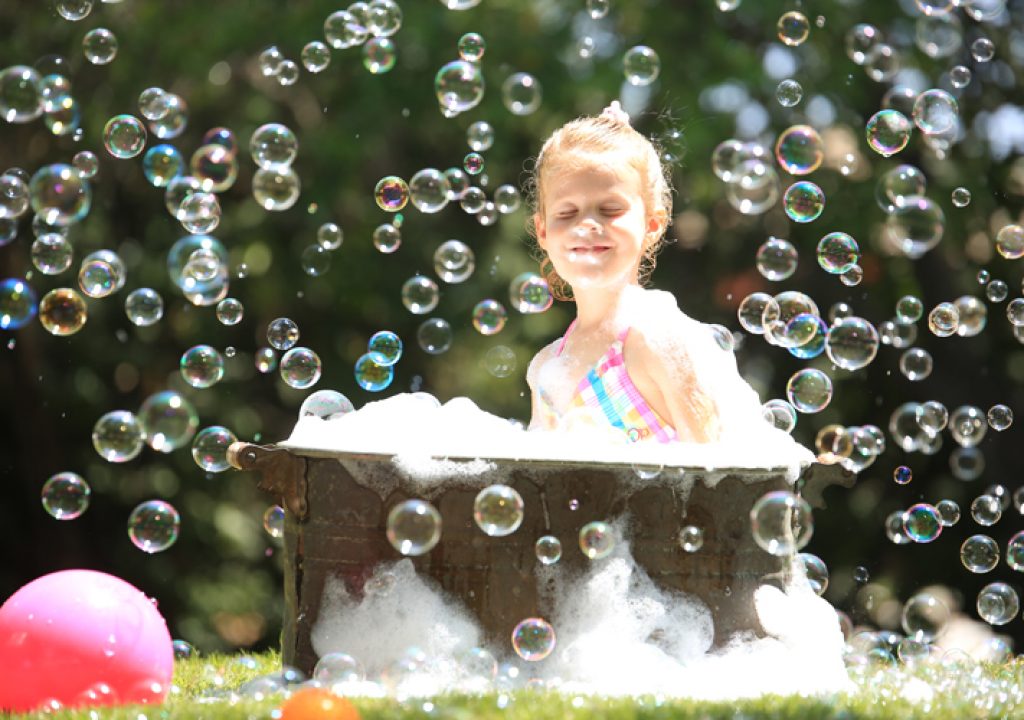
Our TSL set-up today is using natural sunlight with reflectors to add highlights and interest. Reflectors are a great source of light for both stills and video. Using a translucent reflector to soften hard sunlight and a gold white reflector to reflect into your set for pleasing highlights is a great place to start. When I am outside I like to get the sun into a backlight position. Not low back light but high enough in the sky to stay out of the lens. This backlight gives me a nice dark background and rims the talent or set. Now you can shape the light and not have to deal with hard light on people's faces. When you use the sun as a backlight you will control it with your exposure. Then you will add the highlights on the talent. For today's TSL lesson we are shooting bubbles and we want to see them clearly. With the sun backlighting the bubbles they show up really well. Usually the background will be darker when backlighting your subject. As you see the trees are dark and the bubbles stand out. We bought every bubble making device we could find on Amazon. The big bubble machines were so fun. We used 2 of the large machines and some small hand held bubble blowers as well.
1. This is our first shot. The sun is too bright. I am shooting at 400th of a second at f3.5. I want the background to go out of focus so I am using a very wide open aperture on the Tamron 70 to 200 mm lens. I could move my shutter speed faster by a stop or two to get a correct exposure on the sun rim light. The problem is that I will need to reflect in so much light to get a good exposure in her face that she will be blinded by the reflectors.
2. I need to soften the light that is riming her so I put up a 39 inch square Photoflex LitePanel with a translucent cover. Stewart is holding the LitePanel in place using the Photoflex LiteReach Plus. It's a long arm that allows you to get the reflector into tough overhead positions. Here is our image. The LitePanel has softened and reduced the exposure of the highlights. It's looking much better now.
3. We next set up a 39-inch reflector with a gold white cover over to the camera left side to reflect in a nice soft warm light on to our talent's face. It's important to not reflect in too much light. Feather the light source away from the talent until the light is soft and wraps. I have even put a piece of diffusion up between the talent and the reflector to soften it more. In this case simple turning worked.
4. We next added a white reflector from camera right to open up the shadow side of her face. It's very subtle, but it's there.
5. I switched to a wide lens and shot some at 30mm on a 16-35 mm lens. It's a cool change up. I am still keeping my aperture at 3.5 or 4 for a shallow depth of field. With a wide lens the scene is opened up and the subject is slightly distorted. It's a very cool look in it's own way. You can see the shadow created by the overhead translucent LitePanel. They are both very cool looks.
6. Here is the long lens, 200 mm at f 2.8. The long lens creates a nice bokeh in the background. It isolates the subject and compresses the scene. By keeping the light around toward the front I was able to get a nice profile shot of my granddaughter and a nice split light on my grandson. The light needed to be in the right place. The nice thing about a set-up like this is that you can move right into doing video. I set up my Kessler slider and framed a slider shot moving from behind a flower pot into the shot of them. It looked very cool. The light was the same with the exception that I was shooting at 400th of a second so I had to put on 3 stops of ND to get the exposure back down to 50th of a second for video. Keep those cameras rolling and keep on clickin'.
Thanks to our sponsors.

