

Blackmagic Design has officially released DaVinci Resolve 21 and DaVinci Resolve Studio 21 for macOS, Windows, Linux, and iOS. The good news for users with older Mac hardware is that Resolve 21 still works on the Intel Macs running macOS 14 (Sonoma) or later. And because iOS is supported, that means you can run Resolve 21 on an iPad, too. There are many new features, but I’m going to focus on the new Photo page.


While the addition of a Photo page might look like a shot at Adobe’s Lightroom, the truth is that you could already work with still photos in previous versions of Resolve. However, Resolve 21 now integrates a proper photography workflow that includes camera raw support for Canon, Nikon, Fujifilm, Sony, and iPhone (ProRAW) cameras. It also supports DNG raw files and, of course, BRAW still photos from Blackmagic’s own cameras, such as the Blackmagic Cinema Camera 6K FF. Tethered camera capture from Sony and Canon cameras is available (Studio version) and you can collaborate remotely using Blackmagic Cloud.
The Photo page enables production companies that produce both video and stills to stay inside of a common application for editing and color correction. One advantage to Resolve 21 is that the information for edits made to photos stays within the Resolve project file. There are no extra sidecar files to track or data embedded into the original photo file. The DaVinci Color Panels can also be used for photographs, although those corrections need to be made in the Color page and not on the Photo page itself.
Getting started
You can organize your photos for each production within a separate Resolve 21 project, just like you would with video productions. That makes archiving easy. You could also just set up a special photography-only project to handle multiple still photo shoots all within the same Resolve project.


Resolve is inherently a video-centric application. Your default project settings for color space and gamma are likely set as Rec. 709. If you are only working with still photos, I recommend that you change these settings to sRGB. This will assure that your stills are tagged as sRGB and not Rec. 709. Plus, your viewer will match the look of your exported stills. I suggest that you work with photos and video in separate Resolve projects for each and not mix-and-match your workflows within the same project.
Start in the Media page, import your stills, and organize them into bins in the Media Pool. For example, you might want separate bins for different shoot days, cards, or cameras. Resolve’s default for sequential DNG files turns these into a video stream. So make sure that the Media page’s Frame Display Mode is set to detect Individual frames upon import. Next, select one, several, or all photos in a bin and create a new Photo Album from the selection. Albums are the Photo page’s version of a timeline/edit sequence.
The Photo page layout
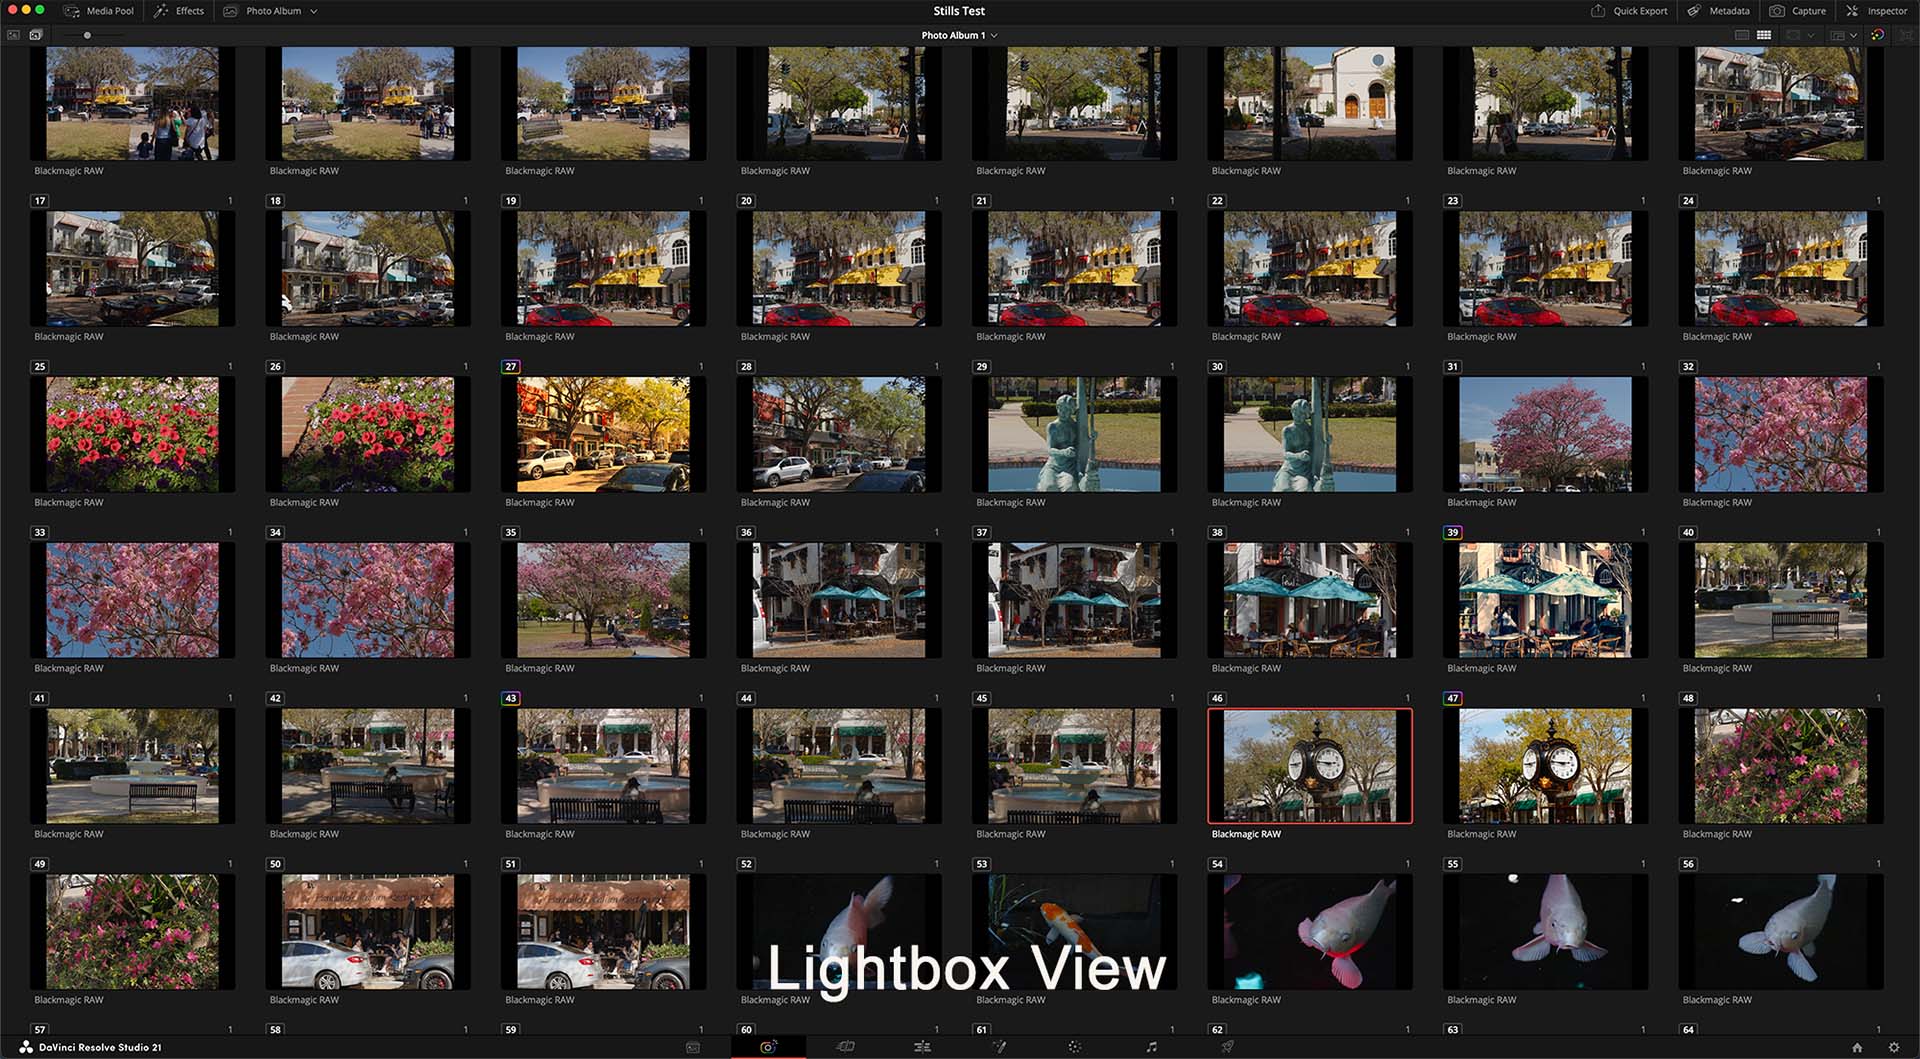

Now switch over to the Photo page. The selected bin from the Media Pool and the Effects library panes are arranged on the left. The selected Photo Album appears as a timeline/filmstrip across the bottom. The center viewer displays any selected photo from the Media Pool on the left or the Photo Album’s filmstrip across the bottom. You can also switch the viewer to Lightbox mode, which displays all images from the Photo Album in a grid. The various panes can be turned off to declutter the interface. For example, you might only want to see the Lightbox view full screen while rating your selects.
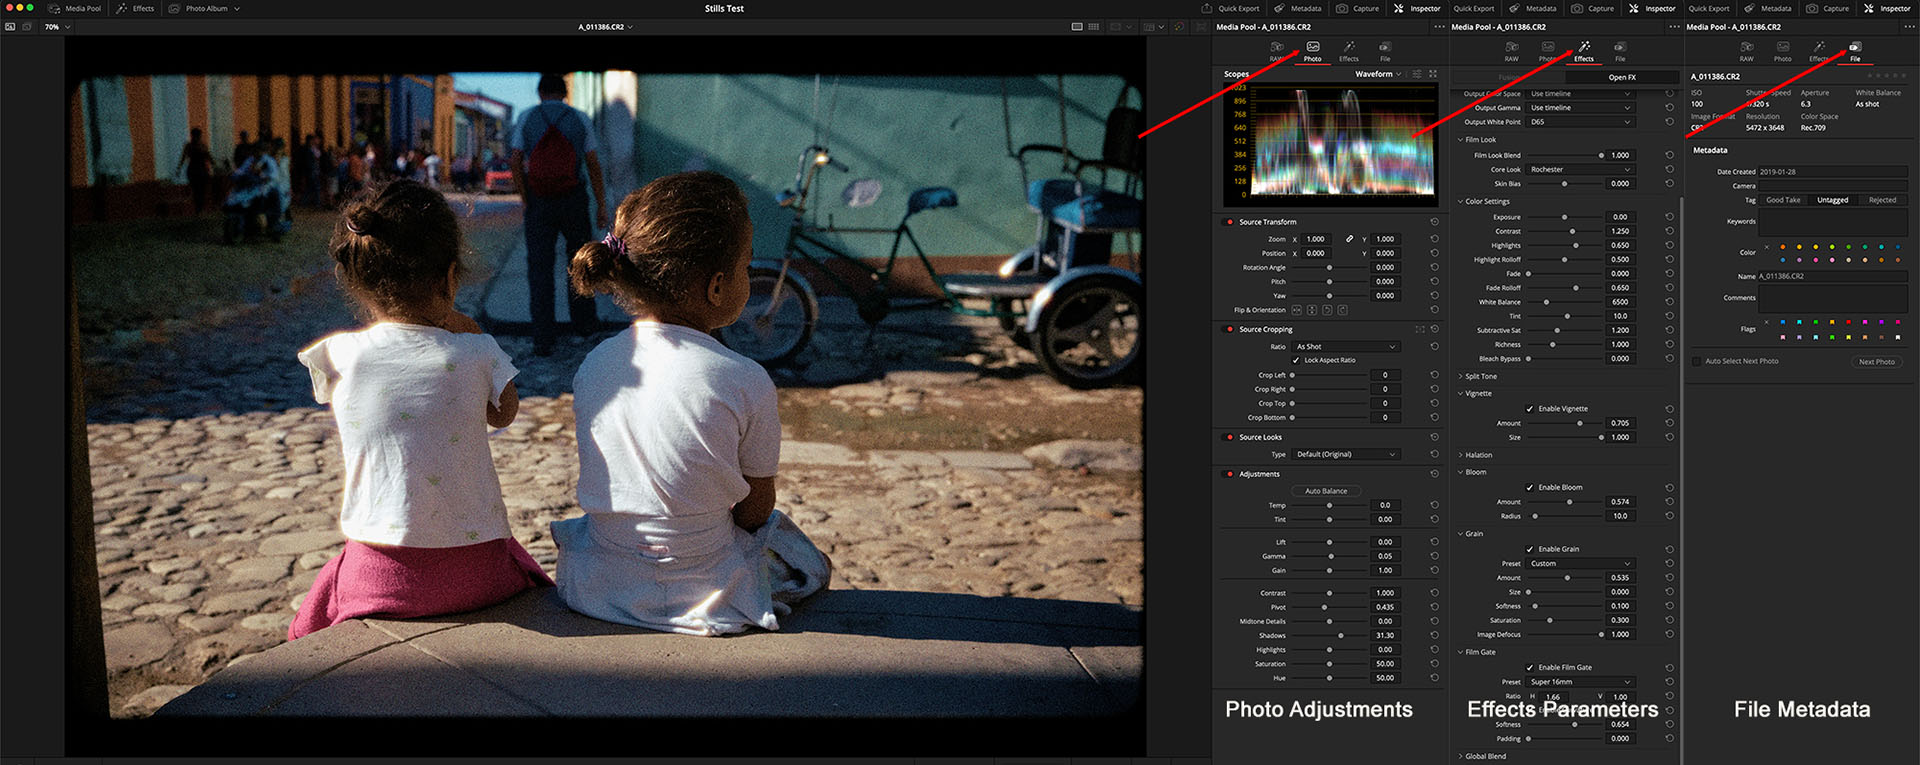

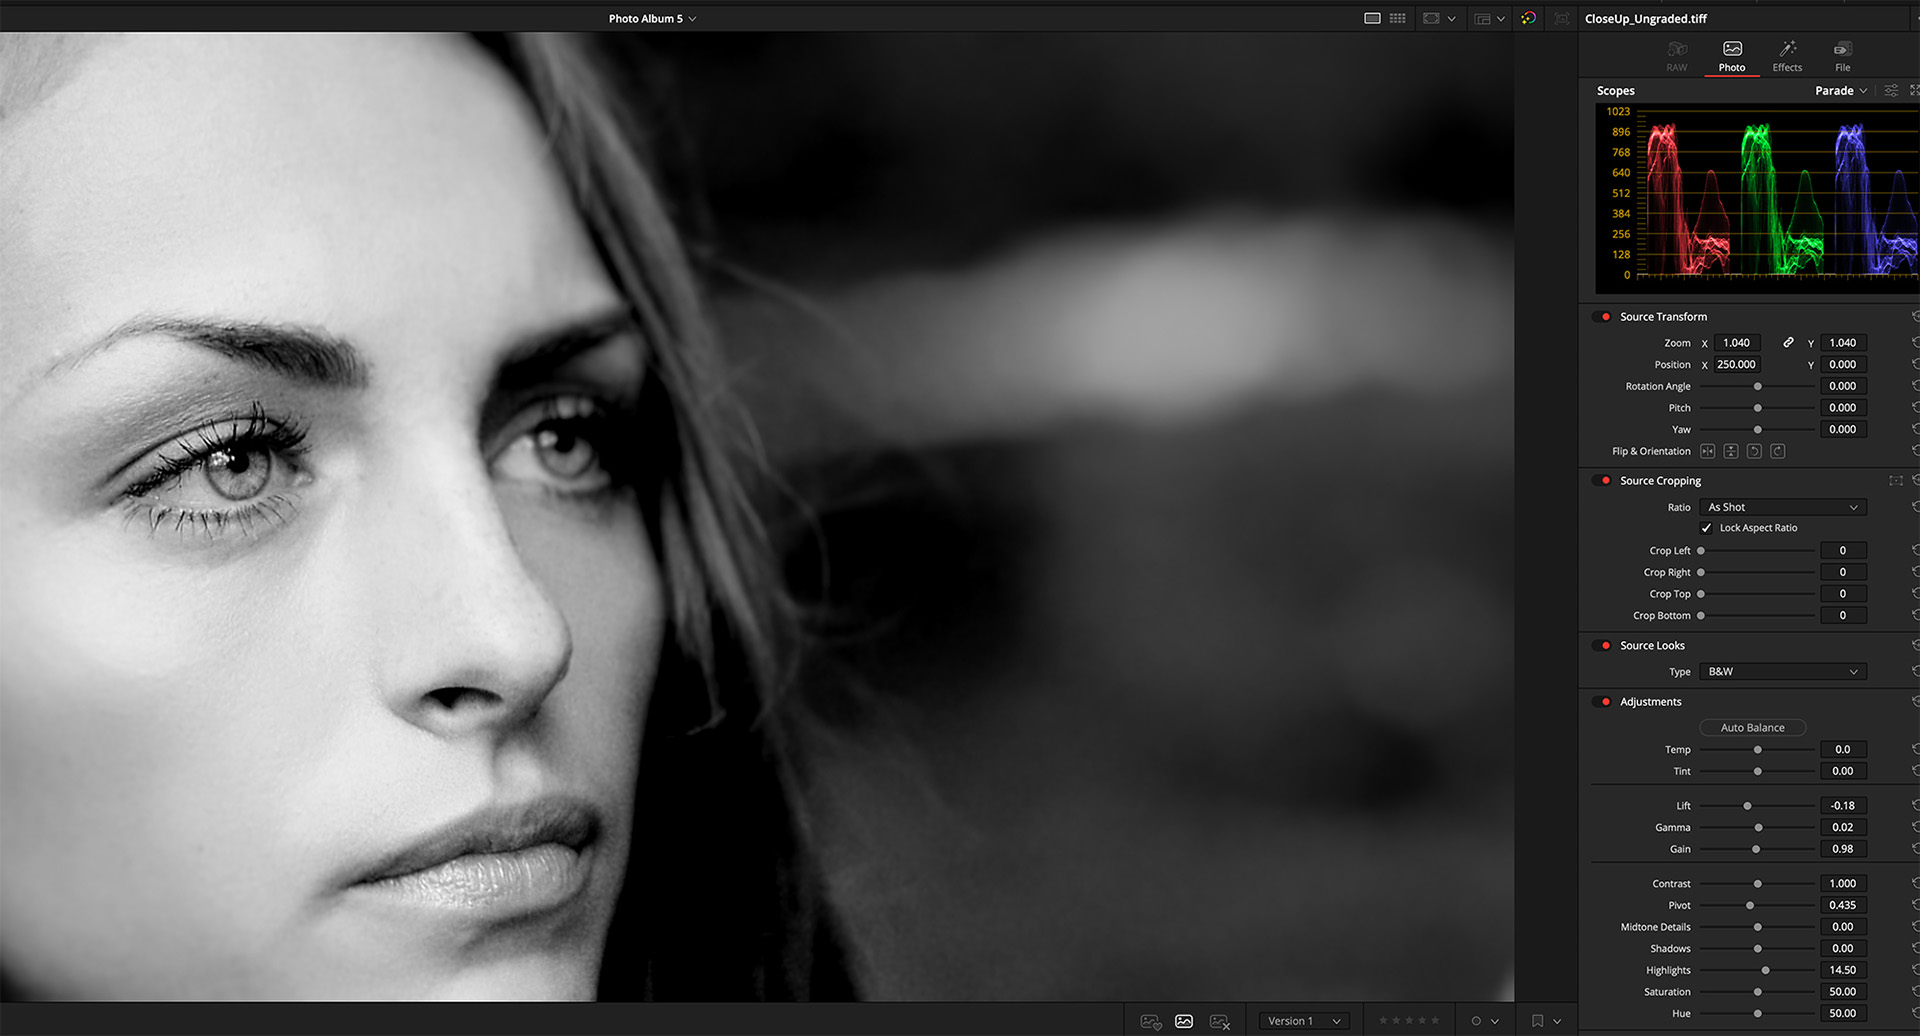
Image editing controls appear in the Inspector pane on the right. It’s divided into four tabs: Raw, Photo, Effects, and File. The Raw tab is where you adjust settings for any supported camera raw format. Photo is where you perform cropping, transforms, and additional color correction on the image. It also includes a selection of curated ‘looks’, such as B&W, Dramatic, etc, plus histograms and scopes. The Effects tab is where you control the parameters for any applied effects. Finally, the File section is for file metadata, adding comments, color-coding, and more.


Resolve 21 supports Resolve, Fusion, and third-party (OpenFX) effects in the Photo page. However, Studio-only effects aren’t available in the free version of Resolve. Hover over an effect’s name with your mouse and you’ll see a preview of that effect applied to the image in the viewer. It may take a moment for the image to update a preview with large images on older computers. To apply an effect, drag-and-drop it onto the image. Then switch to the Effects pane in the Inspector and adjust the controls.
Working with the Photo page
Unless you need or prefer advanced color correction with nodes or simply like using the Color page, then all standard image editing can be performed in the Photo page. First, create a pleasing grade for the image in the Raw tab of the Inspector pane. Then, move to the Photo tab and work through the vertical sections. Transform and crop, if needed. Next, select a preset Source Look (optional). Then tweak the look with the Adjustments sliders. Finally, add any effects.
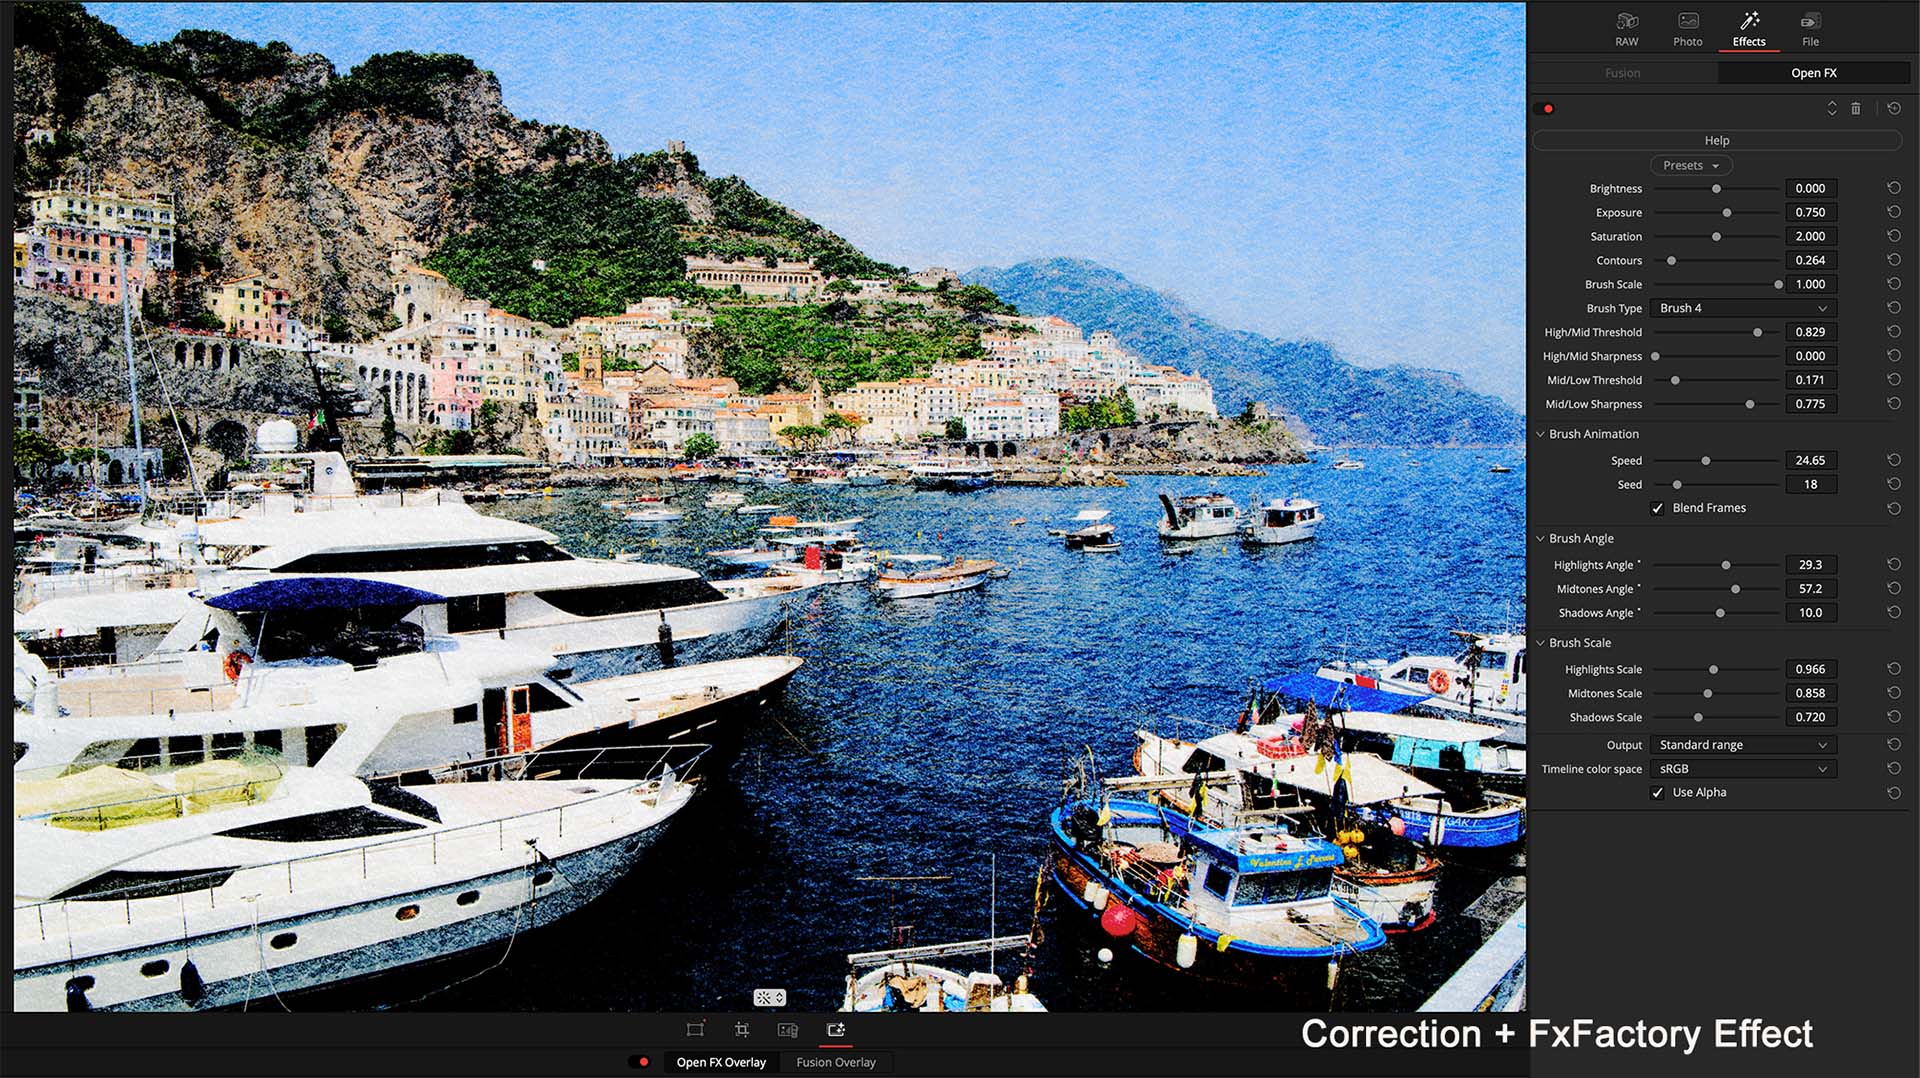

Curves, color wheels, secondary corrections, or any method of split toning or masking all require the Color page. Adjustments and effects added in the Photo page will show up as the first node, but those adjustments can’t be altered in the Color page. Conversely, if you apply a curve or a color wheel correction in the Color page and then return to the Photo page, you will see those corrections, but won’t be able to tweak them.
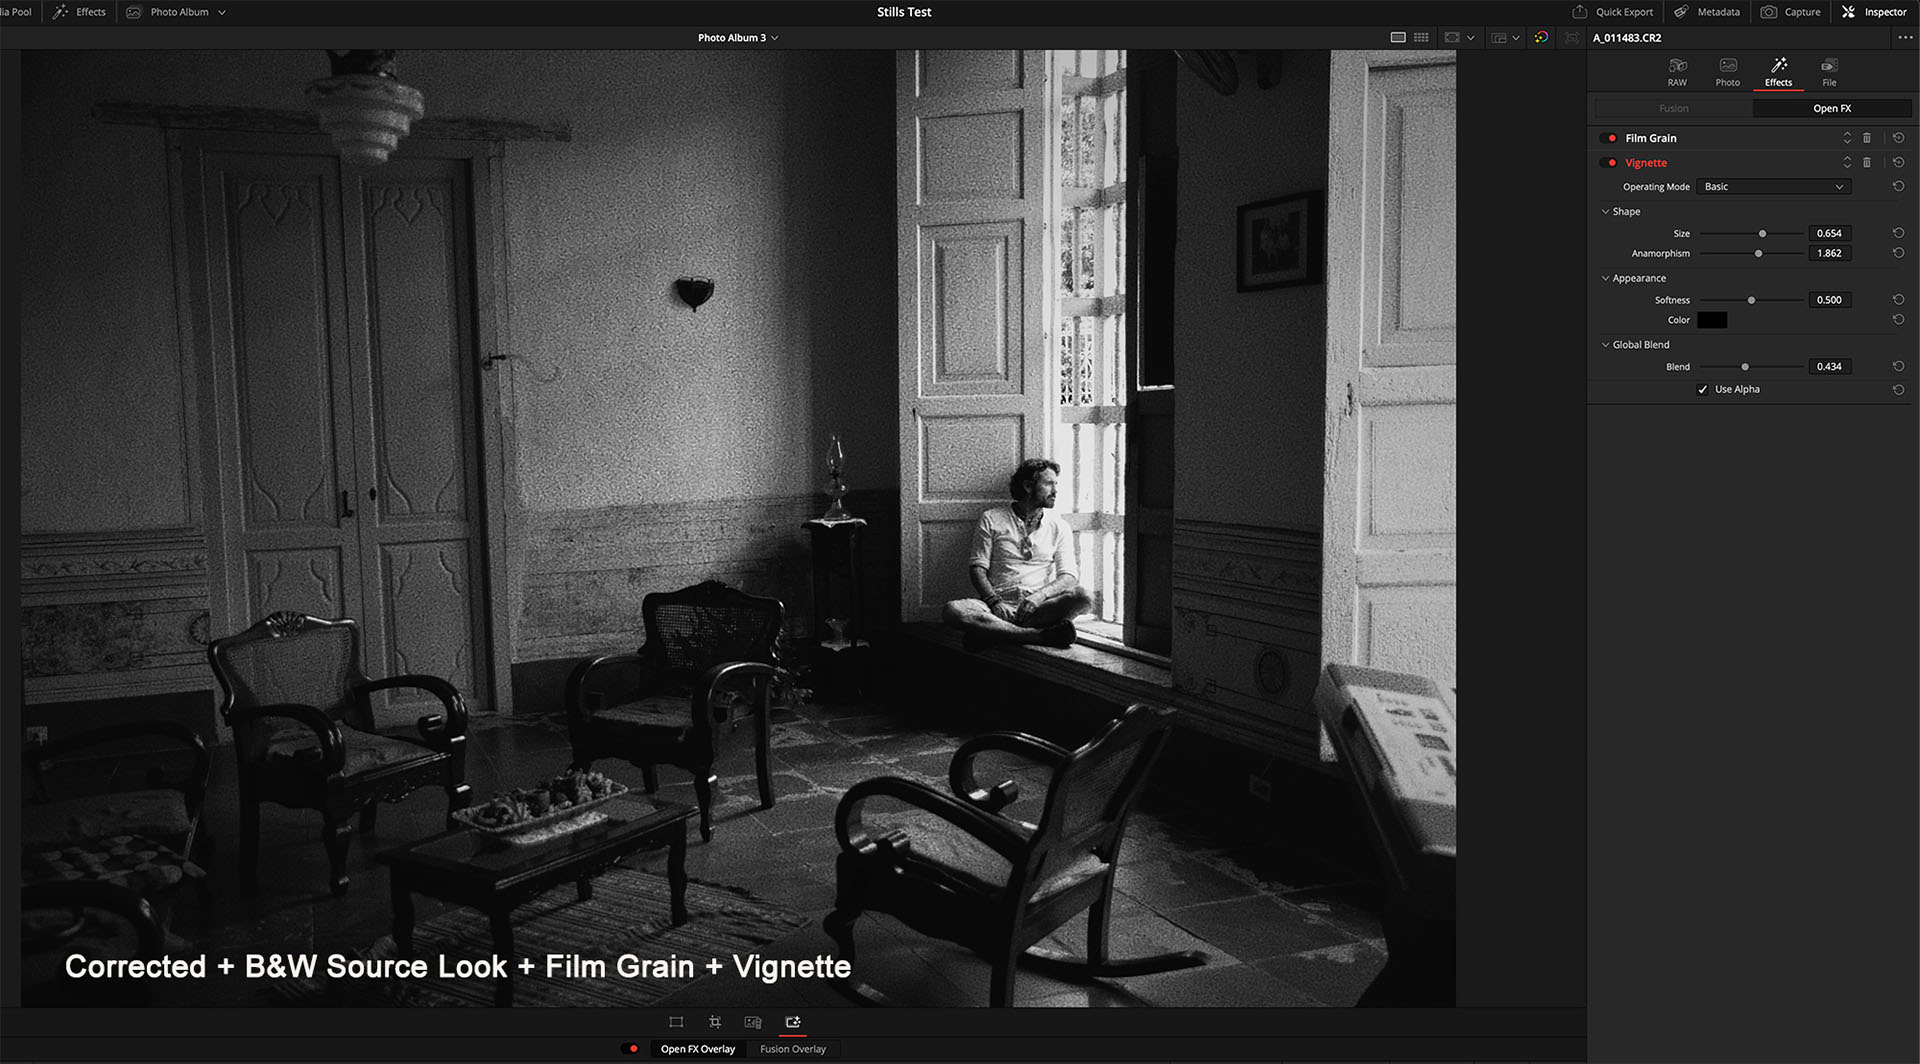

In my opinion, Blackmagic’s engineers ought to integrate some of the other grading tools, like the curves and color wheels, directly into the Photo page in order to keep page swapping to a minimum. That would be a more efficient workflow. On the other hand, thanks to built-in and third-party effects, you can create a wide range of stylized looks right within the Resolve 21 Photo page. Blackmagic has included a ton of useful effects, like the Film Look Creator, as well as its individual components, like grain, halation, vignette, and others. Effects added to photos will stack as ‘layers’ in the Inspector’s Effects pane. You can rearrange the processing order of these layers by moving them up or down in the stack.
The Photo Album/timeline
The Photo Album is effectively a timeline or edited sequence that’s displayed like a filmstrip. (In fact, the Photo Album also shows up as an edit sequence on the Edit page.) You can have multiple Photo Albums just like multiple video sequences. If you have more than one in your project, then it’s easy to switch between them using the pulldown selector at the top of the viewer. You can add flags, color coding, and star ratings to images and then filter the timeline view according to these ratings. Want to display only the images with a 5-star rating? No problem.
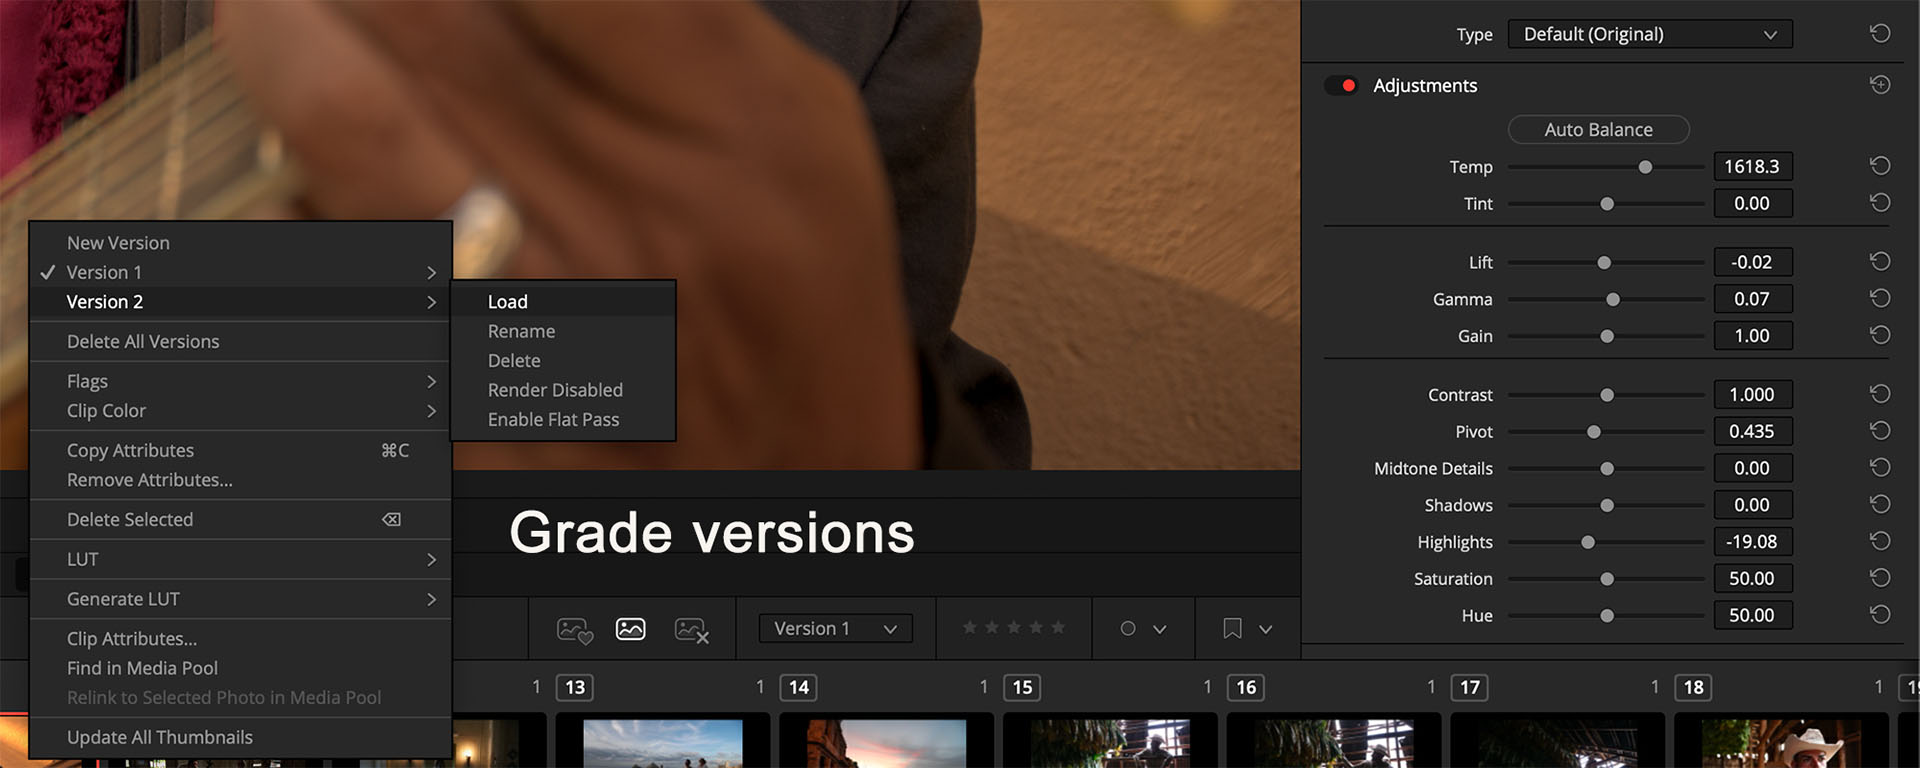

Stills in the Photo Album timeline can also have versions, just like nodes in the Color page. For example, shift the color temperature for an image to warm for version 1. Then create version 2 and make it cool. Right-click the image in the timeline to switch between versions.
Exporting your photos
Photos can be exported as JPEG, PNG, HEIC, or TIFF files by using either the Quick Export feature or the Deliver page. The free version of Resolve 21 is limited to an output of 3840 pixels wide (UHD). The Studio version has no such limitations. Select your image(s), open the Quick Export dialogue box, pick the format, and (optionally) enter a custom name. The second method is to use Resolve’s Deliver page. Export the entire Photo Album or just selected photos using a preset or custom settings.

You can add custom names upon export, but neither of these methods retains the original name of the source photograph. When I export video clips, the original clip name is preserved with an appended prefix or suffix number for the position of that clip in the timeline. This guarantees unique file names and a way to easily trace an exported clip back to the original camera file. The same isn’t true with photos. Consequently, it would be difficult to tie a handful of selects back to their original photos – especially when the photographer shot several hundred stills.
Final thoughts
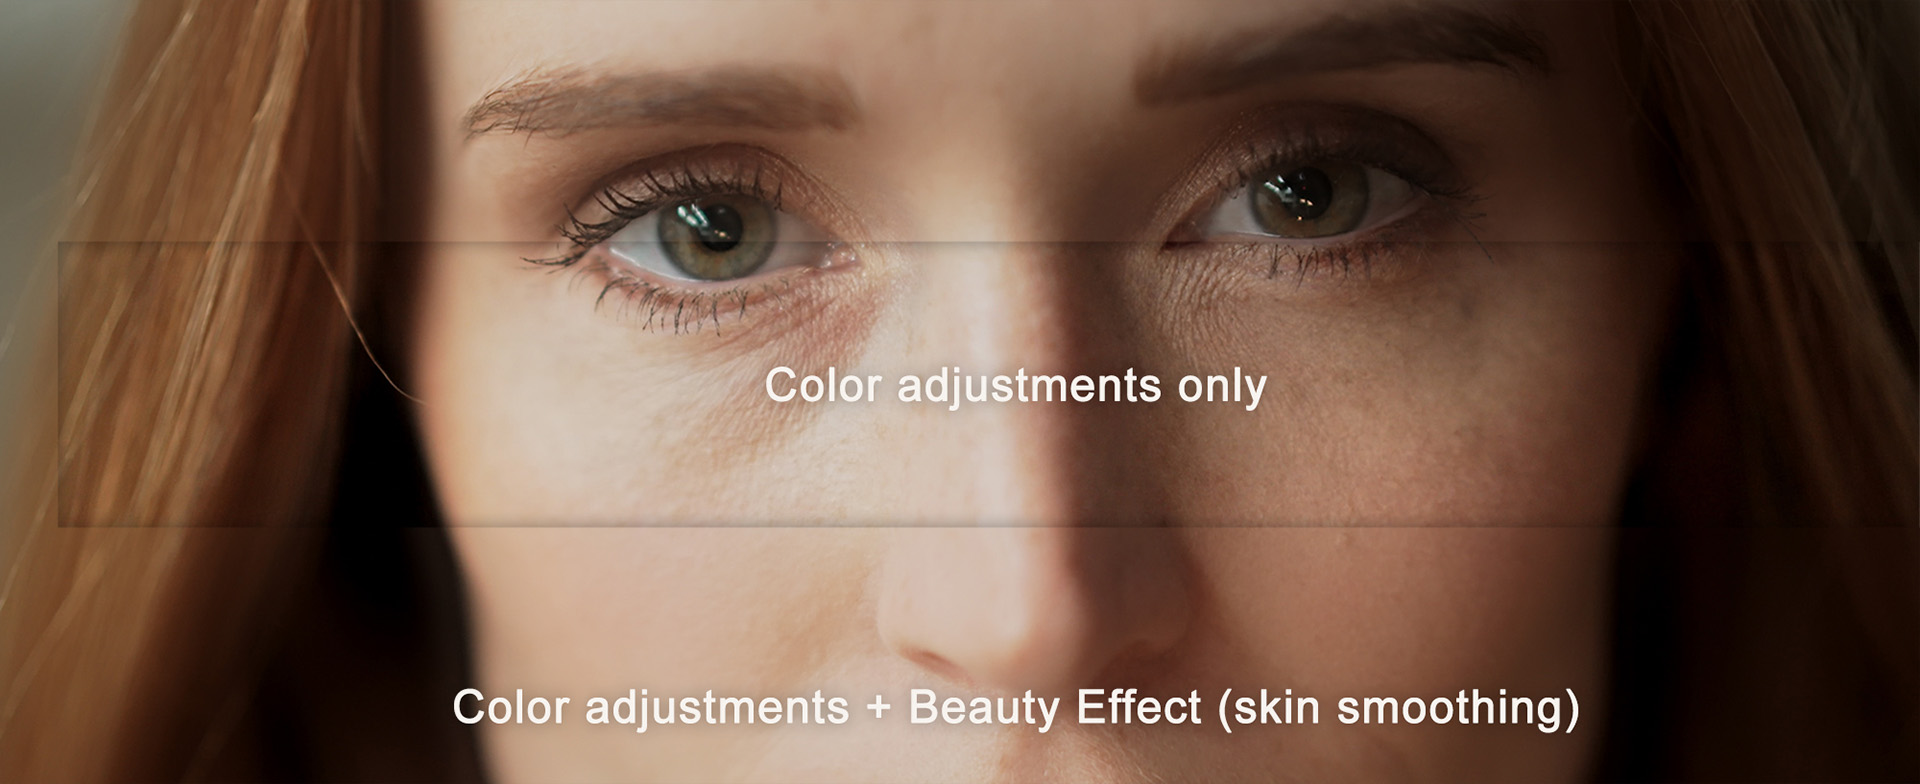

The Photo page in DaVinci Resolve 21 and DaVinci Resolve Studio 21 is a major development for Blackmagic Design. It’s a solid performer for editing still photography and provides a viable alternative to Adobe Lightroom, Photomator, Capture One, and others. There are some ‘1.0’ issues that I hope will get sorted out in future updates.
If you’re a professional photographer and locked into one of the established photography apps, then I doubt that Resolve 21 is going to change your workflow. But if you aren’t already committed to another solution, then Resolve 21 is definitely worth the look. Once you become familiar with Resolve’s color, effects, AI tools, and retouching capabilities, you’ll find a lot of creative power at your fingertips.
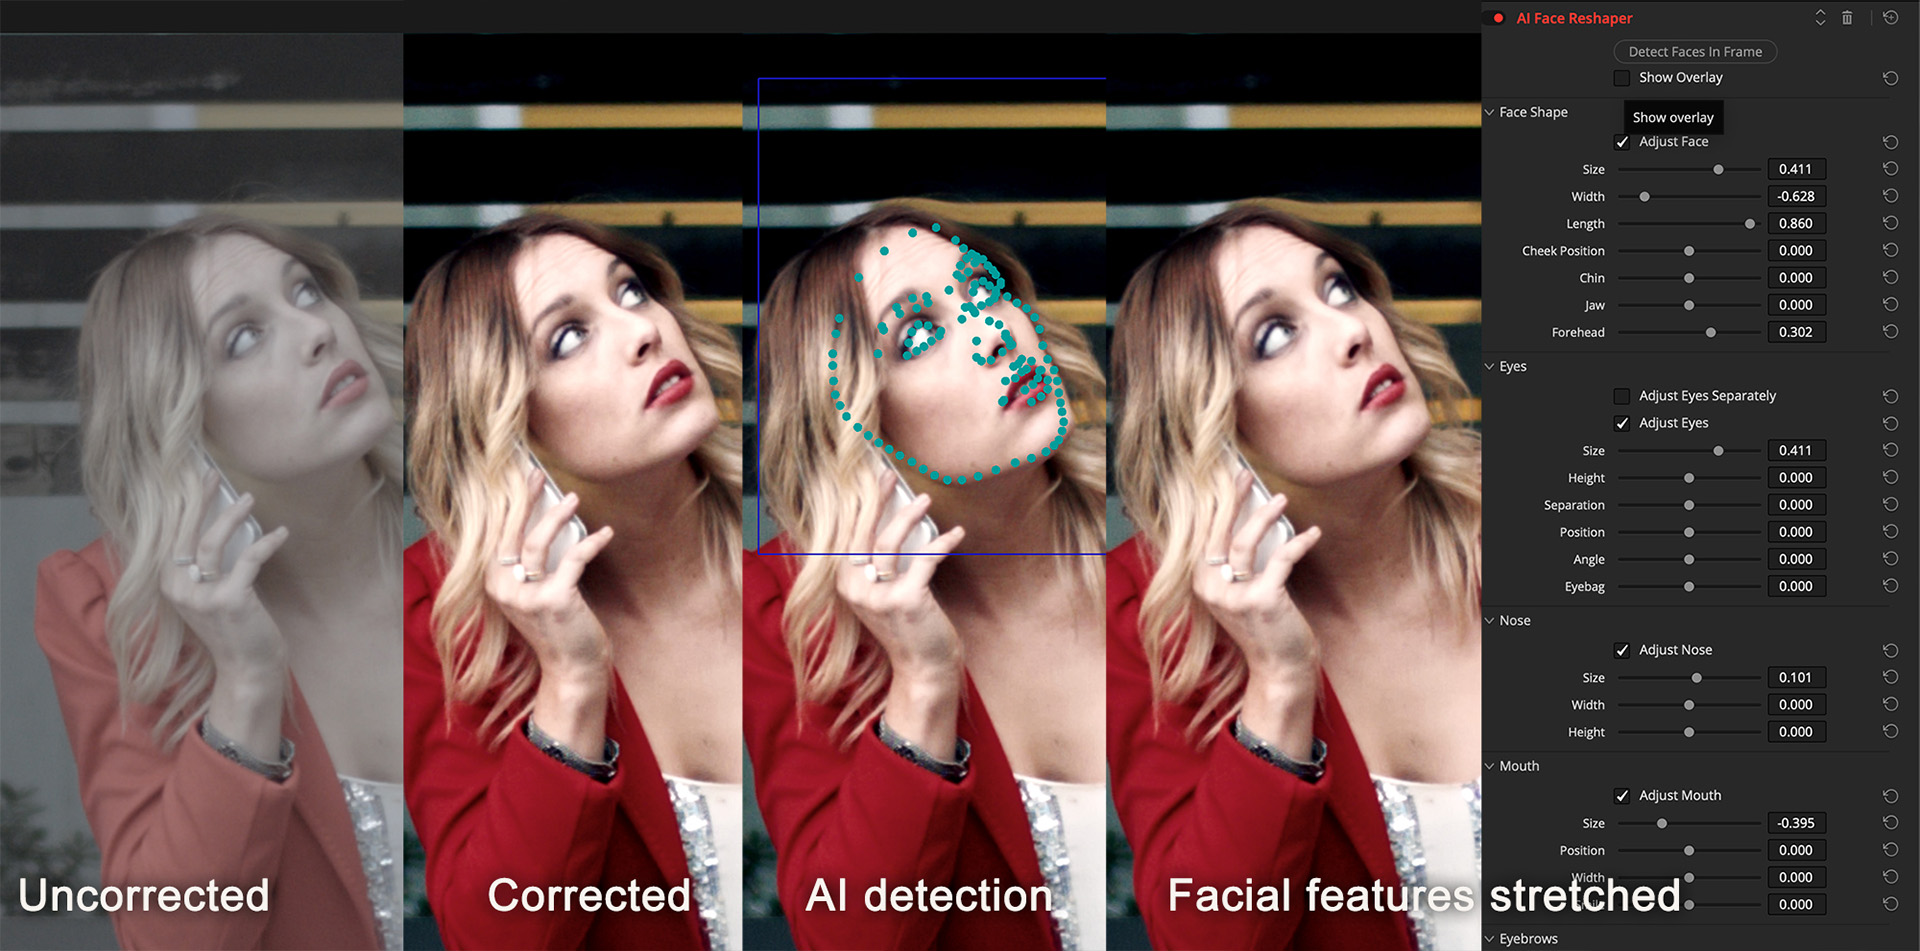

Many production companies today need to deliver finished stills to accompany their video shoots. These are typically used with various social media outlets, such as Instagram, that are increasingly a part of a client’s marketing plan. DaVinci Resolve 21 and DaVinci Resolve Studio 21 offer users a better way to get the job done – all within a single, comprehensive application.