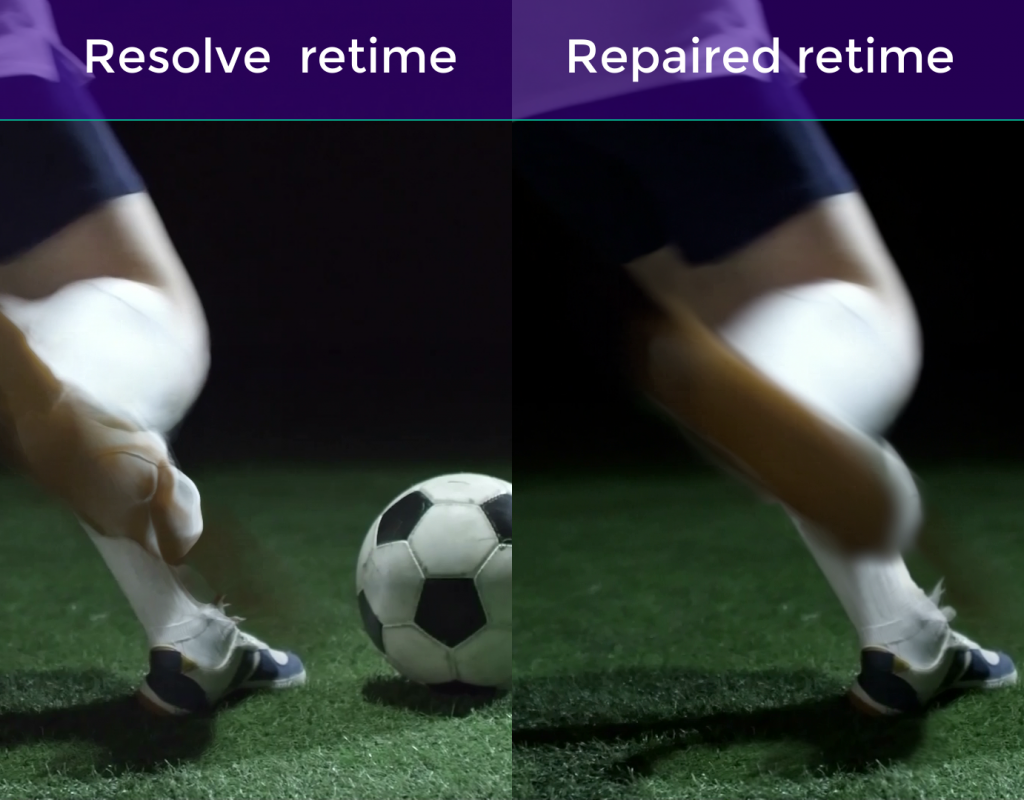
There are three main steps to the process: 1. Create a custom morph between source frames, 2. Paint out the artifacts using the resulting morph, and 3. Add additional motion blur to smooth everything out.
Creating a custom morph
Retime artifacts typically occur when there’s significant occlusion between frames. If someone moves their hand close to camera for example, there’s just not enough information between two frames for the optical flow algorithm to fill in the missing detail. Fortunately as human beings, we can often follow shape changes that the computer algorithms can’t. So we can guide a warp between two frames, essentially “art directing” how the pixels should move from one source frame to the next over the course of the retime.
To achieve this, a spline warper is a must. Don’t even think about doing it with a grid warp tool. If you own any flavor of Nuke, you’re in luck—there’s a spline warp tool built in. You can download a non-commercial version of Nuke that will render out up to 1080p for free from foundry.com. The catch of course is…it’s for non-commercial use. For work in other packages like Fusion or After Effects, you’re stuck with forking out the cash for RE:Vision FX’s RE:Flex. It ain’t cheap, but in my humble opinion a spline warper is such an indispensable tool that it’s worth it in the long run.
One last free(-ish) option: If you still have a 32 bit OS X operating system running, you can download a copy of the venerable Shake 4.1. At this point I think you could safely call it abandonware (after all, Apple completely abandoned it), though I’m not a lawyer, so don’t blame me when you get the legal summons. It had a smashing good spline warper in its day, so there’s that.
The idea is we morph from one source frame to the next. Then we can animate the morph across the retime period. For example if it’s a quarter speed retime, the original frames 1 and 2 would morph across frames 1 and 5 in the retimed version. We create shapes around the key elements that the optical flow tool is having problems with and make sure they correctly morph across the frame range.
The result is…an unusable piece of footage—by itself that is. There’s no way you could use your morph work as a final retimed frame because you’re stretching pixels in a way that distorts occluded areas badly. BUT, it does make a good source for painting out errors in the optical flow footage.
Painting the morph frames over the broken retime
With the morphed sequence created, we can then use it as a paint source to cover over the artifacts in the optical flow retime. The painting is a frame-by-frame operation and requires the use of cloning, smearing and blurring in addition to the morph source.
One step worth noting: the smear brush often works better than the blur brush in smoothing out motion detail. Try smearing harsh areas then applying a small amount of blur brush afterwards to smooth motion out.
A critical part of this process is to step back and forth between frames and see what jumps out at you. We’re aiming for a smooth transition of motion from frame to frame. Anything that appears as jarring movement from one frame to the next should be smoothed out with additional paint or blur.
Add mo’ motion blur
This is probably the most counter-intuitive step. At the end of the process we add an additional layer of motion blur. This is a classic visual effects trick: hide things in the blur. By applying an extra layer of motion blur, any inconsistencies in the paintwork get smoothed over. This requires a motion blur filter that can generate motion vectors to drive the blur, although you could theoretically “choreograph” a keyframed directional blur with a little bit of matte work.
Usually we’re trying to avoid additional blurring, but in this case the audience will forgive the effect, since we’ve come to understand that “moving things get blurred” in camera. Of course the reality is that if we’d really filmed a slow motion shot “in camera” there would be almost no motion blur due to the high frame rate and thus short shutter timings.
Watch the process
As always a picture tells a thousand words, so watch the short video below for a walkthrough of the process. Like all the content on moviola.com, it’s completely free.

