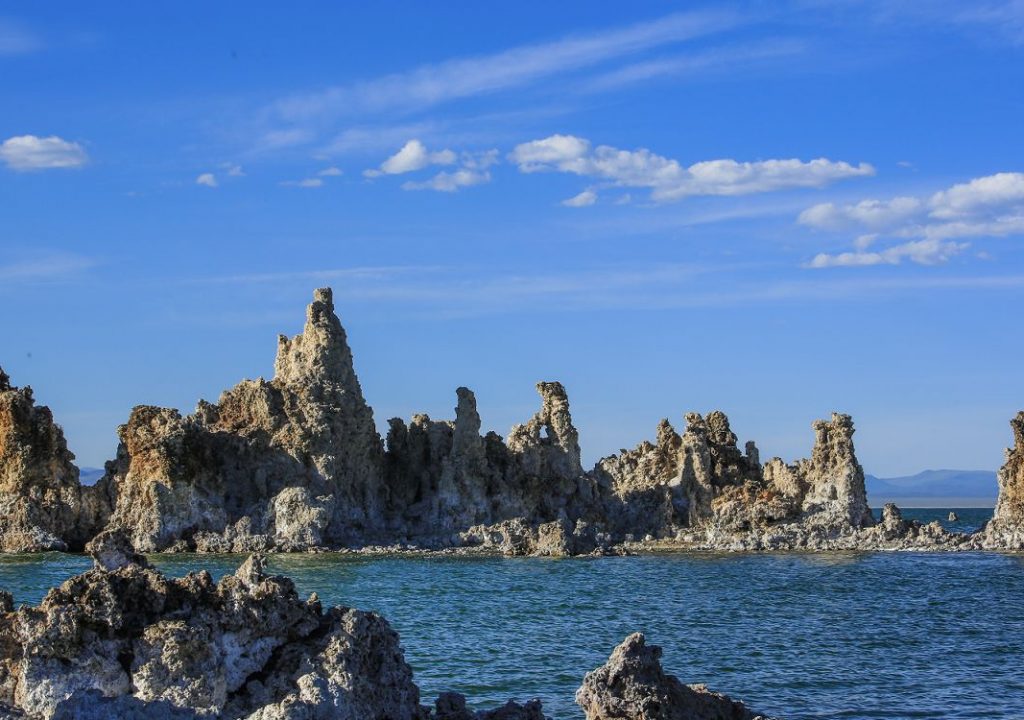
Today on The Slanted Lens, we are up at Mono Lake in northern California to teach you about shooting time-lapse photography at night. I want to get a great shot of the Milky Way as it moves across the night sky behind the tufas, which are the towers of calcium build up present all over the Mono Lake area.
First off, we need to know where the Milky Way is going to be in the sky and when it will rise above the horizon. I found a great article on Star Circle Academy to help get me started; read the article here: http://starcircleacademy.com/2012/06/milkyway/.
It is important to scout your location ahead of time. You cannot show up half an hour before it is going to start, throw down the camera and expect to get a good shot. Get out there early and check out the location. Here are a couple things to bring along to make this experience a little easier:
- A backpack – We had to walk quite a long way to get to the area where we wanted to shoot and a backpack makes it a lot easier to haul everything you need.
- Chair or foam pad – The time-lapse is going to take a while and you need something to sit or rest on.
- Headlamps and extra batteries – Even if you don’t arrive in the dark, you will probably be packing up in the dark.
- Dim flashlight – A small light like the kind found on keychains will give you enough light to move around while the time lapse going, but won’t be so much that it will affect your subject, in this case, the tufas.
#1 Here are the tufas in daylight.
#2 The reality is that all the stars we see in the sky are actually in the Milky Way, but I am looking for that cloudy area that comes together between the constellations of Scorpio and Cygnus. Once I figured out where to find that cloudy area, I used a program on my computer called Stellarium, and an iPhone app called StarTracker to help me track the movement of the constellations on the night we were shooting.
#3 Now that we have decided where to shoot, let's take a look at our camera settings. I am shooting with Canon Mark III cameras, with two different lenses, set on manual. The first is a Canon 16-35mm lens, which gives me a very wide angle and good view of the sky. The second lens is a Tamron 24-70mm and is a little tighter but still has a good frame. Both cameras are set to f2.8 on ISO 2000. I will do a 20 second exposure with a 25 second time lapse interval. My white balance is set to daylight, because stars are daylight.
#4 To fire the cameras, I am using a Nero Trigger and a Canon TC-80N3.
#5 To focus, I am going to set the camera on video, magnify 10x and focus until the dots are focused. For the format, I am shooting both JPG and RAW images. The reason for this is that it gives me complete control to edit the images in post. The cameras will be shooting for about three hours and will generate about 500 images, so it is not unreasonable to shoot in both formats. I am going to use a simply hiker's headlamp with three stops of ND to light the tufas. It will hardly look like the lamp is on, but I just want a kiss of light. Remember, this is a 20 second exposure at f2.8, it doesn't take a lot of light. The headlamp battery started to die near the end of the three hours. The next time I do this, I will bring a small LED like the Rosco LitePad lights.
#6 After you shoot your time lapse images, you will want to process them. Be sure to check out the next TSL lesson where I will walk you through batch editing your RAW images and converting them into a video.
#7 Here is our final shot after processing.
It was a great time to be out in that location, sitting under the stars with my sweetheart. I love photography and video – where else can you get these kinds of experiences? Get out there and see what you can do.
Thanks for watching! Keep those cameras rollin’ and keep on clickin’.
-Jay P Morgan

