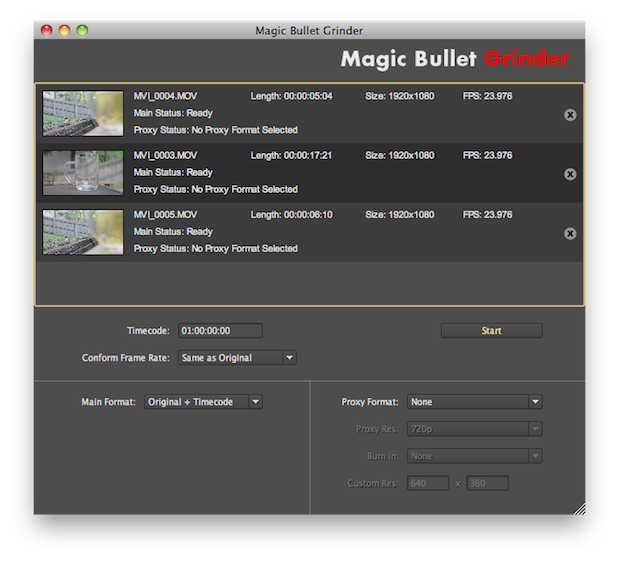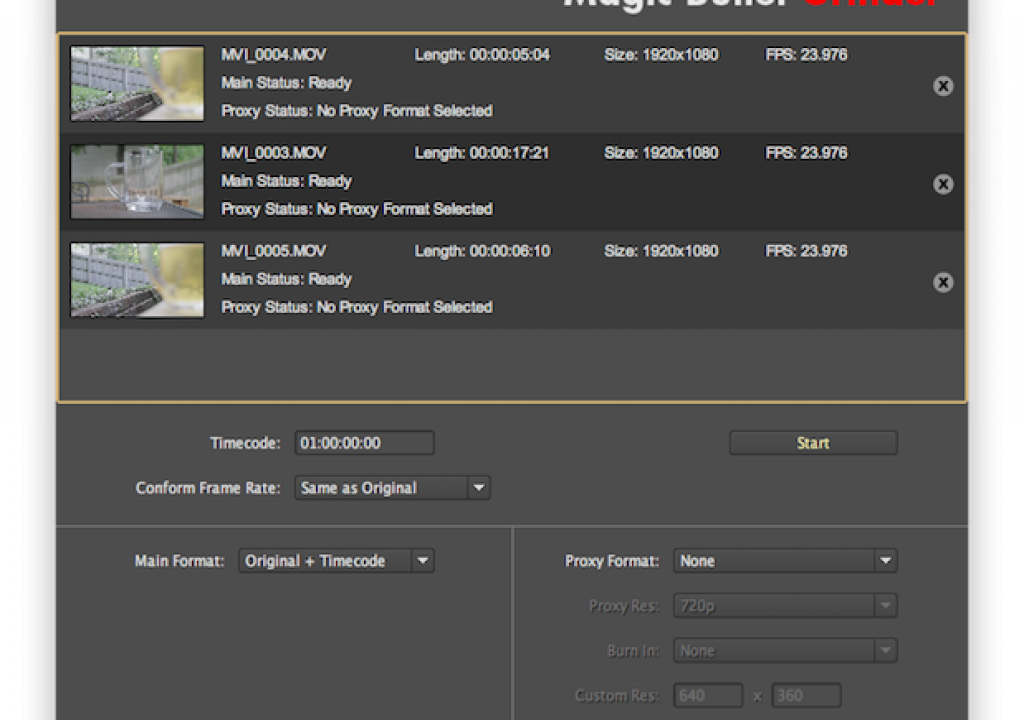
Red Giant Software has just dropped a new tool into the family of Magic Bullet products and it might be of great interest to the DSLR shooter. Magic Bullet Grinder is a simple application tasked with transcoding your Canon 5D/7D/1D files out of their H.264 native state and into something a bit more usable. It also can create lower resolution offline versions of the same clips for editorial should you be in an offline to online position. While simple, Magic Bullet Grinder works quite well and has a few tricks up its sleeve.
When I say it’s a simple application, it is. At its simplest, drag some clips into the Grinder window (or add clips via File > Add Clips…) to set a processing queue, choose a few resolution settings and you can be off and running in no time. But it’s some of Grinder’s tricks that might make it most useful to a particular workflow.
It’s great to see the option to simultaneously transcode offline clips for each full resolution clip you process. This can be a big time and headache saver for the big documentary project with hundreds of hours of footage where there’s no need to do the creative edit at full rez. Cutting on a laptop with a portable drive? Then the proxy clips would be great for your offline edit as well. With compressed HD codecs and cheap storage many editors have never cut at an offline resolution. It’s important to note that the old blocky and ugly (think Avid’s AVR 3 for those old enough to remember that one) low rez codecs are a thing of the past. ProRes (proxy) creates very nice looking, small HD clips that are a pleasure to offline with and Grinder includes that as an option:
The offline format options included in version 1.0 of Magic Bullet Grinder
You can also choose custom sizes and resolutions if you need to get smaller than 1920×1080. And there’s the ability to add several different burn-ins to the proxy footage so it’s a true offline to online tool.
You have several different options for the type of burn-in information that can be placed on a frame
While not customizable the BITC information is tasteful and easy to read
Another nice trick up Grinder’s sleeve is the ability to add timecode to your clips. When the Canon cameras shoot video files they are defaulted to a 00:00:00:00 timecode for each clip. With Grinder there’s a field for you to assign a new timecode to each clip. Adding new timecode doesn’t appear to increment with each clip but rather all clips in a particular batch will begin with that code. Being user assignable can help keep track of different cameras and/or different shoot days and allow the editor to identify certain information just by looking at the code. I remember the old days of shooting tape where a camera operator would often increment the hour with each new tape shot (and we often wished the cameras would let you go above the 23 hour to 99!) as the timecode off the tapes were a good identifier for what you were looking at. It would be nice if Grinder gave you the option of each clip getting unique ascending code based on what is assigned but the application appears to be mulit-threaded and process more than one clip at a time so that might not be possible.
One interesting thing that I did notice when adding new timecode is that while the timecode appears just fine in Final Cut Pro when you open the new clip in QuickTime Player 7 and check the timecode there the first frame appears correct but then the numbers don’t turn after that. It might have something to do with the way new timecode is being written into the file. Or it might be a bug.
You can see the assigned timecode in Final Cut Pro
When viewing that new timecode in QuickTime Player 7 the first frame is correct but it doesn’t display after that
And that same assigned timecode is a bit off when you look at the clips in Adobe Premiere Pro CS5:
The newly assigned timecode appears to be off in Premiere Pro CS5
I’m not sure why this happens in Premiere Pro but hopefully the Red Giant engineers will look into it as one option in Grinder is to leave the H.264 codec intact and just add timecode. I could see this being a useful option if you are working H.264 native in Premiere Pro CS5 and want the organizational option that assigning timecode could bring. But to be fair the Red Giant Software site does market this more as a tool for Final Cut Pro.
There’s also the ability to conform the frame rate of your clips to 23.976. While I didn’t test this feature it can be used to slow down your 59.94 footage (or 29.97, 30, whatever) without taking a trip through Cinema Tools.
Why buy Grinder when there’s free tools available?
One question that might be asked is why would I pay $49 for this tool that is geared to work with Canon DSLR footage when I could just run the clips through Compressor for free since it’s included with Final Cut Studio? Or better yet why not just download the free Canon EOS Log and Transfer plug-in for FCP and get yet another free transcoding option? Both are valid questions and both are valid workflow options but the Grinder answer for me would be for speed and simplicity. In my tests, Grinder was able to crank out ProRes clips on par with what Compressor could do, even as a multi-processor aware Quick Cluster. And the simplicity factor can’t be beat either as setup is very easy and very fast as I was able to setup a batch and get it running in Grinder much faster than in Compressor. And while you can run low resolution clips (and include a BITC as well) through Compressor to match your full resolution versions … again, Grinder is faster and easier. And at $49 it’s cheap so you can throw Grinder onto pretty much every Final Cut Studio install you have. And being simple you can have someone who isn’t familiar with FCP or Compressor throw on a batch without much training. They could easily be talked through the process via telephone.
Plus, the strongest feature of Magic Bullet Grinder can’t be overlooked: It’s ability to create full resolution HD clips and low rez offline clips at the same time. As I mentioned above, if you don’t work in an offline to online world then you might not see the value of this feature but if you do then Grinder’s ease and simplicity (not to mention speed) are a big selling point.
What’s missing?
There’s several things that seem to be missing from this first release of Grinder. It could be that it is just version 1 of the product but maybe Red Giant is keeping it targeted very narrowly at a specific market. A few things I would like to see is support for more Main Formats to transcode the clips to. In the beta version I was using there was the option to transcode to ProRes 4444 and ProRes Standard but no ProRes LT or HQ. And that still seems to be the case after downloading the 1.0 release. While the merits of HQ vs. Standard quality are debatable I’ve encountered some clients who want to work in ProRes HQ no matter what you try to tell them. And ProRes LT is a great option as far as quality vs. file size goes as well as great if your only delivery is for the web. There seems to be a mistake on the Features section of the Magic Bullet Grinder webpage as it mentions “Handles ProRes LT and PhotoJPEG format in 1080p to quarter resolution” but under the proxy format there is no option for ProRes LT.
One advantage that the Canon EOS Log and Transfer plug-in has over Grinder is that is can assign a name in the Reel column for imported footage. This would be a great addition to Grinder as well as that would allow duplicate frame detection to work. Showing dupe frames is a nice luxury to have. I don’t know if is a programming limitation of the way a tool like Grinder processes files but if that could be added then I hope it will come along in a future version.
It would also be really nice to see Avid DNxHD support. Even better if it could process into the Avid native MXF format with an ALE file. That would enable a great workflow allowing the editor to process the footage right into an Avid Media Files folder on their dedicated media drive. Of course we know that the new Avid Media Composer 5.0 release will support ProRes .mov files and while that is a great option to have it’s still going to be a better workflow if you can get DNxHD .mxf files into Avid’s media database.
I would also like to see the ability to point Grinder right to a back-up of a CF card with the DCIM folder structure intact. As it stands now you have to drag and drop the clips from the Finder or navigate into the DCIM folder and select the .mov files. While that isn’t hard to do just pointing to a directory that might be full of .movs, thumbnail files and what could be hundreds of stills could be a real timesaver when using Grinder in a heavy production environment.
Overall Magic Bullet Grinder is a great little tool. We’re only at version 1.0 so there’s a lot of room to grow. It can help make the life of the DSLR videographer a bit easier because you don’t have to think too hard about what you are doing. You use a simple interface to quickly perform a desired task. And best of all it’s affordable. There’s a demo of Magic Bullet Grinder available as well so you can try it out for yourself.

