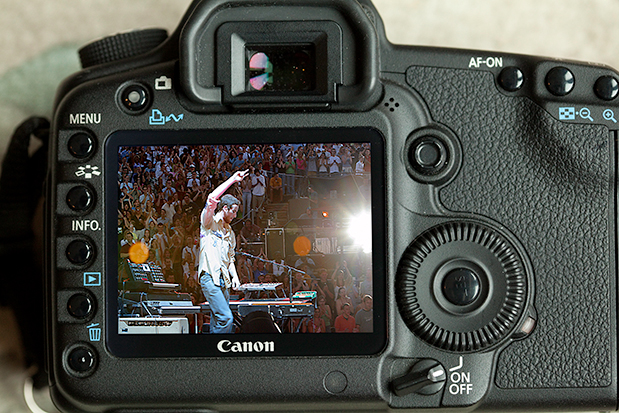
Challenging lighting mix on stage with Maroon 5 (here keyboardist Jesse Carmichael) at famous Red Rocks Ampitheater.
“Chimping” is good! WB can be judged fairly well on the camera LCD, especially with my method for cycling through in-camera settings to visually compare what they will give you. It’s a two-part method; the first part is camera-essential, the second is the secret approach of long time commercial pros. This simple technique will not just get you in the ballpark; I call it at least a double, often a home run.
Quoting Ross Lowell, lighting guru of generations of film makers and photographers, color balance matters are “the bane of beginners and the boon of the brave.” Unbalanced capture equals technical poverty. Lab reps I’ve talked to complain that they have to be miracle workers to pull in accurate color, because the majority of clients don’t pay any attention to this sleeper pitfall.
While I do find that the Auto WB setting is amazingly helpful, I want my images to be great, not just acceptable. Postproduction time should be for enhancing images, not correcting what should have been done right in the first place. Custom WB is always a good answer, if you have the time and one of the many excellent WB devices at hand. Yet even when I use my favorite Ed Pierce Digital Calibration Target or Colorright disc, I almost always want to tweak color tone a bit in post to mesh with my emotional vision for the face or scene.
Setting WB in controlled or studio situations is pretty easy, more challenging when angles of light and surfaces change, or when bright sun slips in and out of clouds or afternoon slides into evening. WB can be an ugly problem for the location and event photographer who must work quickly, sometimes in a matter of seconds, under wildly varying lighting indoor and out and back again, reflective wallpaper, dark halls, mismatched fluorescents.
Here’s how to do pretty darn good WB on the fly.
First thing is to set your camera to Live View Mode – for making stills, not just movies. And here I have to credit Shane Hurlbut for clarifying my thinking of how to tease the best out of the Canon 5D Mark II. When you are in Live View Mode, and you press the WB button on the top of the camera, you see the effect of your setting on the viewscreen. Best of all, when you turn the back camera control wheel to cycle through the settings, you can see the effect change live. This makes it super easy to compare settings and pick the closest one to your visual intent without doing a Custom WB protocol. Of course, I change back to Viewfinder Mode for focus and traditional still capture.
There’s More!
The second part needs a bit of explaining, so follow along with my train of thought to reap this big bonus. I’ve been using Kelvin as my preferred WB control for some years, and I was pleased to read that Hurbut agrees with me. The back story is that I queried the late Bruce Fraser about the role of Kelvin in achieving accurate WB. He replied that Temperature slider in Photoshop RAW converter or Lightroom actually approximates teal to orange, not just blue to yellow, and Tint is really more like chartreuse to purple. The blue-yellow relationship is the most critical, while Tint is often simply a matter of personal taste. Yellow is a two-edged sword. It’s how we see qualities of brightness, lightness and openness in an image, but when correcting an overly yellow color cast, you can easily lose depth, sparkle, clarity – as well as add significant noise and a dirty looking cast. I reasoned that by using a Kelvin WB setting for capture I might be able to alleviate the significant color swings that result from defaulting to Auto, and further, get closer to the gold standard (best value of yellows) of WB rather than the canned settings. I started experimenting and found that setting Kelvin right when entering a room works wonders for me. So how do you set Kelvin? Well you can guess from experience, and then make some test frames. But here’s the trick: if you enter Live View Mode, you can see the Kelvin temperature change on the fly, just like the canned settings. Move the back camera control wheel to the K symbol, then the screen prompts you to turn the front wheel to see the entire Kelvin range change before your eyes. No need for a color temperature meter or extra time and hands to test. As an additional tweak, you can certainly refine Tint by setting a few points of green or magenta on the Color Correction grid. It’s accessed in the menu under WB Stift/Bracket.
Of course this method, though a significant leg up, does have limitations, and will never replace careful Custom WB. But for me, when the Governor is moving to catch a limo to the next event and I still need one last shot, I know I’ll come home with the goods.
