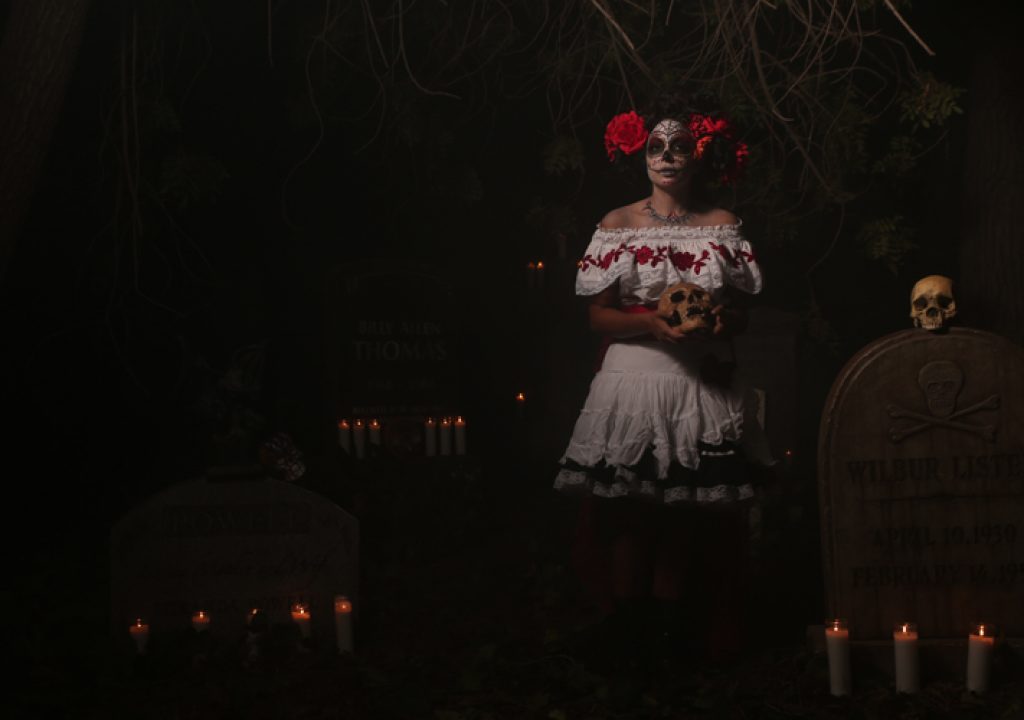
Today on the Slanted Lens we are going to break down a fantasy portrait we did of Nadia Dawn in her Day of the Dead make-up. We will look at the crew that was needed and the camera settings, use of smoke machines as well as the location. Then we will move on to the lighting breakdown. When doing heavy make up for a photo shoot like this we will need a professional make up artist. We also found a lighter dress for the talent to stand out against the background. We scheduled to shoot at a cemetery that canceled on us last minute, so we rented out a bunch of head stones and proceeded with production by shooting in our backyard. We used a Rosco 1900 smoker for background smoke and a Rosco 1700 smoker with a chill box for the foreground smoke that is laying on the ground. These two sources of smoke are hard to keep under control but we were able to light them efficiently and create a great fantasy portrait.
1. I set my ISO at 320 and shutter speed at 30 of a second. My aperture is 5.6. I chose this because I want a slow shutter and a wide open aperture to give the exposure to candles in the foreground. We were not using candles as a light source and we also wanted a shallow depth of field. For the key we used a Triton strobe by Photoflex and a small octodome. We put a small octodome grid on it to narrow the beam of light. We shot all night on one of the lithium batteries at different settings. We shot 650 images and the battery was still at half level.
2. Then I used an LED light behind the camera as a slight fill and a good way to see what we are doing on set in the dark. I do this often. I am also dragging my shutter so it gives me a slight fill.
3. Then I added a triton head from camera right with a blue gel as a rim on talent's hair. It picks up some of the smoke and will open up the front.
4. We then added a Dynalite head in the background with a full blue. It will backlight the smoke and rim the head stones.
5. Now on the camera left side we added a Dynalight head with a full blue. It's aimed at the trees and will create cool light streaks coming through the trees.
As we are ready to shoot we keep in mind that the smoke is very unpredictable. It's important to get a sense of how heavy you would like the smoke and then watch until it disperses and reaches the level you like. The brightness of the smoke will affect you exposure. The heavier the smoke is the brighter is your background. The less smoke there is the darker your background.
6. Here is our final image. Keep those cameras rolling and keep on clickn'.
Thanks to our sponsors.

