Here’s another week of some of the latest news on After Effects tutorials, plug-ins, scripts and more. Last week saw a little swarm of news on organization and workflow setups, wiggles & glitches, CUDA and Premiere Pro, and more.
In Creating a Glitch Effect in After Effects, VinhSon Nguyen shows how to make a ‘glitchy twitch’ effect within After Effects without 3rd-party plugins or scripts, like plug-ins by Satya Meka or Twitch by Andrew Kramer. For more on the specific effect made see posts tagged Chromatic Aberration at AE Portal archive. Here’s VinhSon Nguyen:

John B. Hartley posted an in-depth look at how to use the wiggle expression in After Effects using a slider control. See also The Wiggler tool and “After Effects Apprentice Free Video The Wiggle Expression” and “Deeper Modes of Expression Part 9: Wiggly World” by Trish and Chris Meyer, Automatic Animation from Motionworks, and iExpressions by Mathias Möhl and pt_AutoExpress by Paul Tuersley on AEscripts. Here’s John B. Hartley:

Stu Maschwitz shares how he tweaks the default installation of After Effects in Pimp Your After Effects. See also, Todd Kopriva on optimizing for performance: Adobe Premiere Pro and After Effects and project considerations were discussed by Mark Christiansen in How to Optimize Projects in After Effects CS5.
MotionRevolve covers how to organize your projects on your computer and within AE in Maintaining Good After Effects Project Organization and Workflow:
There’s also Automated Folder Structures for PC and Automated Folder Structures for OS X by Jake & Dan, which might be the right thing for some. In addition, Post Haste, a Mac application from Digital Rebellion, helps you keep things organized, especially in shared environments. Here’s the overview:
Brendan Bolles noted that the “color picker gets adjusted just like your display when you have a project working space. Depending on the space, the change might be such that you can’t find certain colors in the picker, but that’s because those colors are out of gamut for that space.” AE Help recommends that use a linearized working color space when you set up the project, instead of switching later.
Matt Jeppsen mentioned DSLR Video and Aliasing Artifacts a few years ago here at PVC, and Stu Maschwitz went in-depth in You Didn’t Believe Me and noted Moire and Aliasing no more?! A solution for the 5DmkII on lens filters by Philip Bloom. There is DSLR Moire Filter is a plug-in for Final Cut Pro by Jorgen Escher: on Chroma Blur:“This is NOT a blur filter. It will not soften your image. It transforms the colorspace to YCbCr and breaks it up into components, further only affecting the “CB and CR” channels.” See more from Philip Bloom on this, as well as First Look: VAF-5D2 Optical Anti-Aliasing Filter by Marco Solorio.
Of course, mileage varies wildly but check out [TUTORIAL] getting rid of Moire (After FX) by Lucas Pfaff, which discusses using the Median filter with some roto/mattes and color modes (instead of say Channel Blur or Remove Grain):
Chris and Trish Meyer posted a new movie on PVC, After Effects Apprentice Free Video: Understanding Axis Modes on Moving layers relative to the world, the current view, or themselves.
Todd Kopriva reminds us of tips on Saving and backing up projects, to “turn on Auto-Save or use Increment And Save. Both minimize lost work in case of problems.”
John B. Hartley posted a series of 3 tutorials on Kinetic Typography. For more, see the mini-roundup archive Kinetic typography as storytelling and especially the course Kinetic Typography Techniques for After Effects by Angie Taylor. Here’s John Hartley and Angie:


On AEtuts, Tudor “Ted” Jelescu explained how FreeForm Pro can be used to Create A Displacement Map Water Replacement. The tutorial has 3 sections: animated displacement map and water texture in FreeForm Pro, water replacement using The Aqua Pack for FreeForm Pro, and title creation using ShapeShifter AE and Magic Bullet Looks. Here’s the preview:

Also on AEtuts, Jorrit Schulte showed how to Coordinate A Procedural Candle Animation:

Jordan Shipman posted a Free Text Animation Preset for After Effects, along with a tutorial on this “Blinking Cursor Type On Effect.” Ayato posted something similar a few years ago using Red Giant Image Lounge. The built-in preset Typewriter doesn’t include a cursor but the preset Word Processor does. Rhys-works has an expressions tutorial that creates a typewriter style effect with a blinking cursor too; Voiduh did it by hand on YouTube. Here’s Jordan and Rhys:

Toby Pitman ignores the Caustics plug-in in this unusual method in Liquid Backgrounds With Shape Layers. Also, see Newton liquid tutorial by Tercel:
Jordan Shipman shows you how to composite in After Effects 3D Titles created in Cinema 4D into live action footage with 3D Camera Tracker from The Foundry:
AEscripts says that ‘Art of Flight’ Title Sequence Loves Plexus and hints at tracking points clouds. By the way, there’s a new version of Plexus available. Here’s the title:

Andrew Devis continued his series on AE Shapes with two tutorials: AE Basics 24: Shape Layers Part 8 – Round Corner & Stroke and AE Basics 25: Shape Layers Part 9 – Trim Paths. For more ideas see related resources at AE Portal archive, especially the mini-roundup Shape Layers in After Effects.
Honeyhouse Films explored several black and white tints in B/W Grading Tutorial for After Effects. For some other approaches, mostly in other apps, see the archived Grayscale Shootouts and After Effects CS5: Black & White Adjustment by Richard Harrington. For presets and tutorials on other looks, see How To Give Your Photos a Dark Processed Lomo Effect and Bleach bypass, cross-process, and other looks for After Effects. Here’s Honeyhouse Films:
Explosive TV Promo Graphics 2 at Motionworks is a walkthrough tutorial by Brett Morris discussing the After Effects workflow he used to create some Fast and Furious-style titles. Third party plug-ins used include Video Copilot Optical Flares and Red Giant Software Magic Bullet Mojo.
Laurie Knapp shared After Effects Tut: Apply Tracking Data to a Mask “Cheat”:
Fixel Detailizer is a new Pixel Bender plug-in on AE Scripts that decomposes the image into 5 different details scales to allow a complete control of the contrast level of each detail scale level. Here’s Lloyd Alvarez with a demo:


Creating snow in After Effects by Rich Young is a long list of resources for a popular effect. Here’s a sample from Church Media Design, which at 12:30:00 shows how to create looping snow inside AE with CC Particle World (they also have a few free looping backgrounds):

NLEs, Production Premium, and post production
Blackmagic Design Announced that DaVinci Resolve Lite now Includes Unlimited Color Correction Nodes. Stereoscopic 3D features, noise reduction, power mastering, remote grading and sharing projects with an external database server are features not included in this free version. For a discussion see Patrick Inhofer in DaVinci Resolve 8.1.1 Lite – NOT! (aspiring colorists: no excuses) and his various training resources.
Colorist and author Alexis Van Hurkman discussed the latest interoperability workflows for DaVinciResolve, which added round-trip support for Media Composer, Premiere Pro, and Final Cut Pro X at a recent Supermeet:

Jan Ozer discusses Choosing a Graphics Card for Premiere Pro CS5.5. See also Adobe’s Dennis Radeke recent look at results from Diving into NVIDIA GPU’s and what they mean for Premiere Pro. Neither author cover GeForce cards, oddly, though even the preference hack for unqualified cards (1GB+) helps weaker systems speed HD editing and rendering. For more on that see, Mercury, CUDA, and Premiere at AE Portal archive, especially the Studio 1 Productions list, Premiere Pro Benchmark for CS5, and the Adobe PP Hardware Forum.
Here’s Toff Kopriva from After Effects & Premiere Pro Performance Workshop, GPU: CUDA,

Vizworld noted NVIDIA Maximus Technology, which is now supported in CS5.5. For more info, see Todd Kopriva’s Adobe Premiere Pro CS5.5 (5.5.2) update: Maximus functionality and bug fixes/. Here’s a demo:

Todd Kopriva reminds us that Premiere Pro CS5.5 does import .vob files and links to File formats supported for import.
Little Frog in HiDef discusses Working with Adobe Premiere Pro CS 5.5 from the perspective of an Avid user. Track patching seams to be a sticking point for many (and perhaps needs to be rethought to cut out the extra clicking); here’s Andrew Devis on How to use Sync Lock & Target Tracks:
Jon Geddes posted a video on Changing a Button’s Clickable Area in Encore DVD. You’ll need to know this if you avoid the aliasing on live text buttons.
Richard Harrington explores the Media Browser in PP and talks about features that you might not know exist in Mastering the Media Browser in Adobe Premiere Pro:
Walter Biscardi shared a Fix to DNxHD Quicktime stuttering in Premiere Pro CS 5.5.2, if you have an AJA Kona card installed.
The base version of the CineForm 422 codec is free, though perhaps buggy on the Mac. This 10-bit intermediary codec comes with the free GoPro CineForm Studio app. One Subhadip Sen noted recently:
“The GoPro-Cineform codec is very impressive. At 100 Mbps it offers similar quality to the ProRes or DNxHD 185 Mbps modes. The best part is it is VFW so no gamma issues or any other troubles of any kind. However, Quicktime is also an option for Mac compatibility. 4:4:4 and 4K are still proprietary though. … Neither of these are finishing codecs though. They are best suited to being intermediate proxies. For finishing, there’s no better option than X264 in its various forms. High-CRF X264 10-bit Lossless is pretty incredible as a finishing codec. You can finish at 4K at 400 Mbps, i.e. 50 MB/s. (2K at under 100 Mbps) The quality is superior to ProRes 4444 which is much higher bitrate. You have the option to choose between speed and compression. At Ultrafast and interframe the performance is quite incredible -faster than ProRes/DNxHD/Cineform and it is still more efficient! Of course, if you can compromise with some losses – as you do with DN/PR/CF anyway – you can drop CRF right down to 10. That gives you ProRes 185 Mbps quality at 50 Mbps.”
Heres’ GoPro Cineform Studio – Overview for DSLR-Users by Lucas Pfaff, who says the app is a viable alternative to 5DtoRGB or Red Giant Grinder, and shows the codec in AEM and After Effects:
Miscellaneous
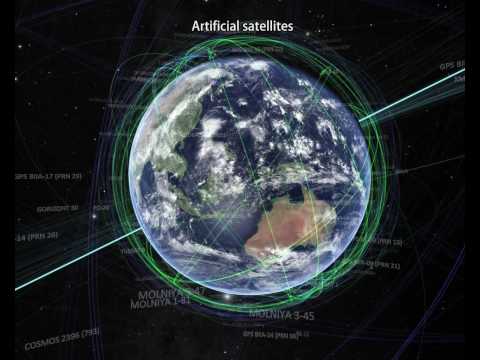
The Known Universe “takes viewers from the Himalayas through our atmosphere and the inky black of space to the afterglow of the Big Bang. Every star, planet, and quasar seen in the film is possible because of the world’s most complete four-dimensional map of the universe, the Digital Universe Atlas that is maintained and updated by astrophysicists at the American Museum of Natural History.”