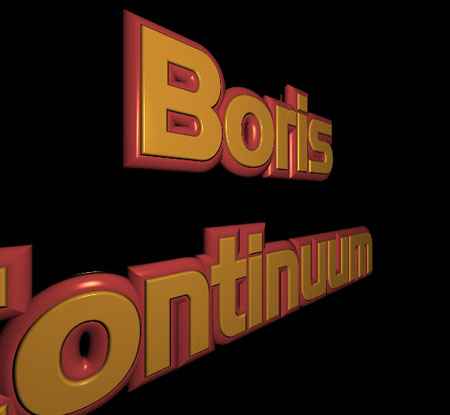
3D Objects is a new feature of Boris Continuum Complete 6. It’s built around the concept of using vector text or splines to generate real 3D objects right in an Adobe After Effects composition by the means of extrusion or creating thickness for an otherwise flat layer or shape. Such extrusion would typically require a shape of its own – unless you really want it to be straight with sharp angles. Let’s see how to control such profile shape or contour with something as simple as AE masks.
We’ll start off by creating a new comp and adding a 2D solid of the same size as our comp. Then, drill down in the Effects menu under BCC 3D Objects for the BCC Extruded Text filter, which is essentially a generator in disguise of an AE filter. As soon as the filter is dropped on the solid, a Text Entry window will pop up, offering us a place to type in our desired text. This is a standard Boris text tool, common to all Boris FX text applications.
Among the controls you will find in this window are the same typographical niceties as in After Effects’ own text tool – kerning, leading, tracking, etc. – but now they will apply to extruded text in 3D space.
Hit the Apply button to go back to After Effects. This is the only modal custom user interface we’ll ever have to use to control any 3D property of our objects. The rest can be done with AE’s native user interface.
To make the text look a little more interesting right off the bat, let’s apply one of the many extrusion styles installed with Boris Continuum Complete.
The Extrusion Style preset popup offers a variety of pre-saved styles consisting of textures, bumps, reflections, and bevels. The best way to browse so many styles is to use the up and down button. Let’s choose the Pink-Gold Chisel style.
I’m after an even more dramatic 3D look. To see my extrusion better I’m using an AE camera to view this 3D text from a different angle. All I had to do is add a Camera track and turn on the Use Comp Camera checkbox in the BCC Extruded Text filter.
Now we are beginning to see the light reflected off the rounded surfaces and edges of the shape. But how do I gain control over the chiseled extrusion side? Nothing can be simpler if you are already familiar with After Effects’ pen tool. While the Yellow Solid track is still selected, grab the pen tool and draw a simple open path anywhere in the comp window. Start your first point somewhere at the top and click-drag a few Bezier points.
A new Mask 1 track is now added to your solid layer. We are going to work with the parameters under the EXTRUSION group. Make sure it is expanded. Choose Host Path under the Side Style popup and open the Side Host Path popup box. Observe that Mask 1 is now a choice in that popup. In fact, if you have multiple masks, they will all become available here.
You can even adjust your custom mask after it has been applied to the extrusion – and with a live update, too. Now that you are happy with the contour of your extrusion, you can save it as a special file for future use. In fact, this is how all pre-saved contours were made. Now you can generate your own library of custom contours right in After Effects – without needing to switch to Illustrator – and apply these contours in future projects. Pretty cool!
Where else can we use AE masks? The same trick can be applied to custom bevels – front and back – and even to the text path. But this could be a topic for another tutorial…
