Suppose you wanted a perfectly useful workhorse of a video application to slip in completely under the radar and be as underutilized as possible. What would you do to kill its chances of being discovered? For starters, you would introduce an early version – the debut perhaps – that wasn’t quite ready and was therefore unreliable, in terms of features and stability, in order to scare off the early adapters. You could then, if you were clever, make sure that any succeeding versions were not directly integrated with any popular applications sitting right next to it in the installation. You could make it look like it was designed primarily to create Flash videos. Finally, if you made it so fully featured that it was, in fact, challenging to easily understand – bingo, that tool would be almost forgotten!
Adobe Media Encoder made an inauspicious debut with Adobe Production Premium CS4, only to be radically improved in terms of reliability, for CS5 and then radically improved again, including support for GPU acceleration and 64 bit memory handling, with its CS5.5 update.
Encoding applications are, by and large, not cheap, let alone included as free add-ons. When such a valuable app is made a freebie, as with Apple’s late Compressor, users are encouraged to keep expectations low when it comes to fundamental reliability and versatility.
Adobe Media Encoder is not perfect, but it is certainly rather too useful to be ignored for all of the After Effects artists and Premiere Pro editors out there who can find it sitting right there next to their bread and butter applications. And what exactly can it do? Here are some basic capabilities of AME that you may consider valuable:
- Background processing
- Watch Folder support
- Multi-pass encoding
- Multi-device & multi-format support
Let’s take a look, and see if we can lift the veil a little.
Background processing, including Watch Folder
You may already be aware that you can render AE comps and Pr timelines directly in AME – no transcoding. But I already have the Render Queue, you may be thinking, so how does that help me? (You’re also thinking, boy, I really can’t stand it when writers tell me what I’m thinking).
The first script featured in my Script of the Week series (returning soon, by the way) was BG Renderer, which does one thing only – send the Render Queue to the Terminal for background processing, so you can continue working while your AE comp is rendered.
AME will do this for you, and you get to monitor the actual output in its GUI. The catch is that it doesn’t pay any attention to items in the Render Queue – AME requires its own output settings. Because AME has an unfamiliar UI, particularly for After Effects people, these settings sometimes trips people up. The simplest way to get started is to drag a project directly into the AME queue. Dynamic Link fires up and gives you an opportunity to import any comp or timeline. Once you do so, it’s listed in the AME queue.
If it’s your first time using the app, you may find, disconcertingly, that it defaults to creating an F4V file. If you change this to QuickTime in Format column, you may be further disconcerted to find that all of the presets are for SD formats only. Do not despair.
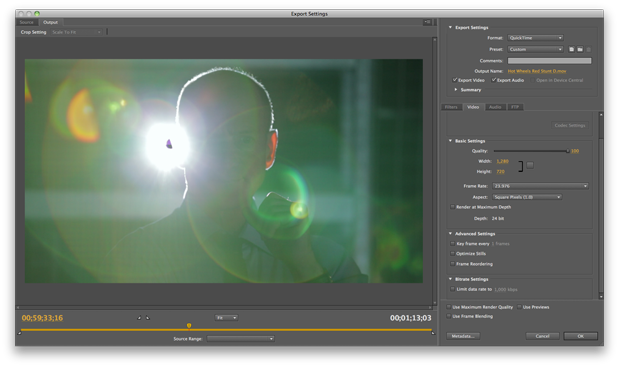
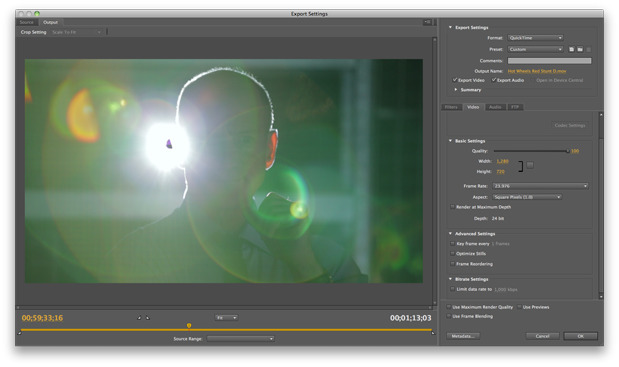
With the preferred format selected, click on Preset and the Export Settings open. On the left is a preview of a source rendered frame; switch to the Output tab and this becomes a preview as the frame will appear with compression, which you can zoom into, up to 800%, and scrub. Cool.
On the right, go to the Video tab and adjust Video Codec to your preferred output format. This, in turn, populates the Basic Settings section; depending on whether the chosen codec applies to a fixed or variable size, quality and framerate, you can adjust those in this section.
If you’re creating output with compression that you want to fine tune, go to Advanced Settings and Bitrate Settings to optimize those. Which settings to use? A thorough response could be covered in a whole separate article; please post specific questions and requests in the Comments below. Note the Audio tab settings as well, and note that Filters and FTP are probably not that important unless you are specifically batch processing for web display.
AME overlaps with the Watch Folder command. The benefit is that, in addition to providing background processing, AME is a standalone app that can be left running for this purpose. The catch is that items that appear in the Watch Folder queue also ask for a Format and Preset in AME, despite that you might expect to set these in AE or Pr.
Peek inside an After Effects or Premiere Pro project to select the renderable items in Adobe Media Encoder.
Multi-pass encoding
Adobe Media Encoder is also effective for, well, encoding. Although its many options to provide efficient handling of Flash video will only be of use to a minority of readers, its ability to render-multi-pass H.264 and other long-GOP formats is worth talking about, because those are typically ruined by the one-frame-at-a-time rendering approach.
The standard way to render video is to first create a frame in memory, then write it to disk, and then move on to the next frame. Formats like H.264 succeed only by compressing footage so aggressively by creating a group of pictures, or GOP structure. An excellent description of this process and how it works can be found on Wikipedia and in descriptions of formats such as HDV and XDCAM.
AME is not only able to buffer sequences of video for the purpose of creating these files, it can even do so on two passes for maximum quality with an aggressively small footprint. There is simply no way to match this with frame-by-frame renders, as they are fundamentally limited to creating and writing one frame at a time.
Queue items and track the current render.
Multi-device and multi-format support
Finally, check it out: AME extends upon the already wide range of formats supported by Adobe apps generally, and by doing so eliminates the need for more expensive alternatives. The many flavors of QuickTime are of course available, along with H.264, MPEG2 and MPEG4, MXF and P2. There are a number of audio-only output formats. And as you might hope (or even expect), the handling of Flash FLV and F4V video formats is excellent, with high quality results at aggressively small data rates and support for cue points (useful for anyone working on interactive Flash video).
What would make AME even better? It could be easier to tap into optimum output settings. The app is fully capable of creating high quality, lean H.264 media, for example, but the process of doing so is much more likely to yield straightforward good results in a tool like Handbrake. It would be really cool if settings created in the Render Queue could somehow be preserved, or if, like the Render Queue, it could at least default to the same frame size and pixel aspect as the source. To succeed with AME is to create good presets of your own, as in most encoding applications.
And to close on that note, the presets are sometimes made available online, including this starter set from Kevin Towes at Adobe. If you find other good ones, by all means, share them here.

